Updated on March 28, 2019: We have updated the post with the official version of TWRP Recovery for both the Galaxy S8 and S8+. Download and install now.
Samsung has launched its brand-new flagships S8 and S8 plus which are currently in market trend. The smartphones have been launched also in India and started shipping only a few days ago. It was one of the most awaited smartphones which have so many rumors already. But, the fact is that now Galaxy S8 and Galaxy S8+ can also be rooted and are also equipped with TWRP recovery. The credit for making this thing possible goes to Jesec from XDA.

Samsung was forced to launch their flagship devices with a Qualcomm chip in the US because of some copyright infringement issues. But for the rest of the world, a Samsung flagship is only launched with Exynos beast. Another point is that the Exynos variants of Samsung Galaxy S8 and S8 are more popular and have better developer support also. Here are some of Exynos variants listed of Samsung Galaxy S8 and Galaxy S8+.
Page Contents
Samsung Galaxy S8
- SM-G950F
- SM-G950X
- SM-G950N
- SM-G950FD
Samsung Galaxy S8+
- SM-G955F
- SM-G955N
- SM-G955X
- SM-G955FD
Note:
You must know that Rooting an android device can void the warranty. You must know the risks and vulnerabilities before proceeding and try at your own risk. We are providing the procedure in detail and in simple language. Rooting and installing custom recovery are risky processes and you can also get your phone bricked or stuck in bootloop. We will not take any responsibility for that.
Requirements:
- Galaxy S8 or S8+ powered by Exynos.
- Your device must have enough battery with a minimum of 50%.
- You must have installed Samsung USB drivers on your PC.
- Your smartphone must have unlocked OEM and USB debugging.
- Download the latest version of Odin software.
- Backup all your phone’s data before proceeding further.
TWRP Recovery For Samsung Galaxy S8
TWRP Recovery For Samsung Galaxy S8+
Steps to Root Samsung Galaxy S8/S8+ and Install TWRP recovery:

- First of all, download the TWRP recovery from the link for your Galaxy S8 or S8+ according to your device.
- Now open the ODIN Zip file and extract the folder.
- Start the ODIN application by clicking on Odin3.exe file. https://www.getdroidtips.com/wp-content/uploads/2017/04/Android-Odin-Software-Rooting-and-Updating.png
- Switch off your Galaxy S8 or S8+ device.
- Once switched off, press and hold Bixby and Volume button together and then press the Power button.
- The phone will boot into the download mode.
- Once you are in the Download mode simply connect your phone to PC with USB cable.
- If you have appropriate drivers installed on the phone your device will be detected and you will see ADDED!! In the ODIN application Log box.
- The ID:COM option in ODIN will also be highlighted blue in color.
- You will now need to click on the AP tab in the ODIN application and select TWRP recovery.tar file that you can download above.
- Now click on the Options tab on the ODIN app and uncheck the Auto Reboot
- Once you are done that, simply click on the Start button and wait for the TWRP installation process to finish.
- If your device is completely flashed with the TWRP recovery then you will see the ID: Com port light up with Green color and with Pass Message.
- Now you can disconnect the USB cable. Once you are done with TWRP installation you can root your Galaxy S8 by flashing the latest Magisk via the recovery. Hence you will need to boot into recovery mode. For doing that you will need to press Volume Down + Power+ Bixby buttons at same time and immediately swap to Volume up as soon as the screen goes black/blank while already holding the Home and Power keys. You will boot into the recovery mode by pressing these 3 keys.
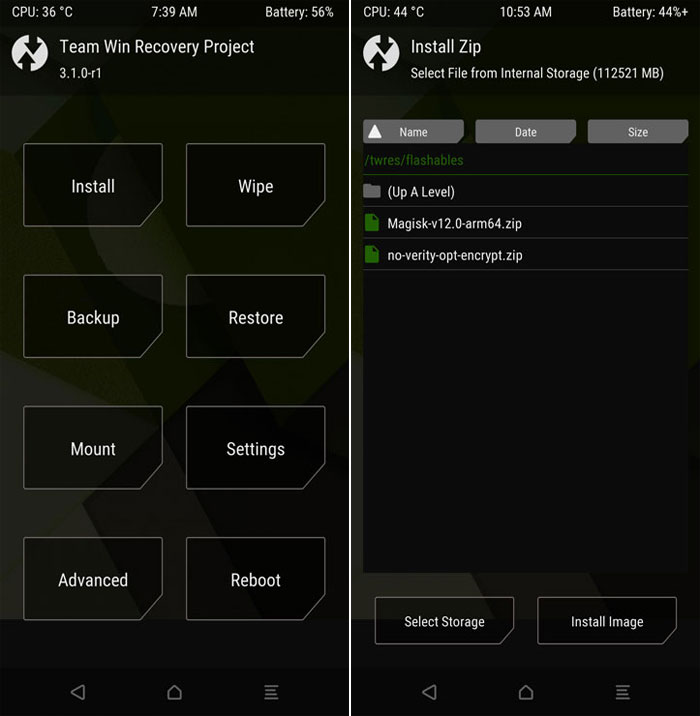
- Now tap the Install button in TWRP and move to the folder /twrs/flashables/ and select no-verify-opt-encrypt.zip. Now swipe the confirmation slider when you will be prompted. (You can see the Red text error in TWRP by saying unable to mount storage. You can solve it by going TWRP main menu and Wipe> Format Data. Now reboot to recovery and then install no-verify-opt-encrypt.zip).
- Now you have to Go back to the main Menu in TWRP and select Reboot> Recovery.
- Again, reboot to recovery and select Install button and navigate to the folder /twrs/flashables/.
- Once you are done with that step select Magisk-v12.0-arm64.zip that you have downloaded from above link and the swipe right to flash it.
- The Magisk will be installed on your device successfully and your device will be rooted when you will boot it up.
- Once you are done with the Flashing select the Reboot system.

Voila!! Your new S8 or S8+ is not rooted. You can verify the root privilege by opening the Magisk. In case if you have the problem with your freshly installed TWRP and the recovery does not read your internal storage then it can be because of an encrypted data partition. To disable this encryption, you can flash the no-verify-opt-encrypt.zip in the folder /twrs/flashables. Once you are done, you will need to go to Wipe> Advanced Wipe option and select wipe the data partition.
