In this tutorial, we will show you how to install any font on your Samsung Galaxy device. Generally, if you prefer theming your devices or adding custom fonts to them, it’s not that easy. Most OEMs don’t have or support themes. The only way around, in that case, is to root your device and use the Substratum Theme engine. But not everyone prefers to root their device just for the sake of using themes.
They then have to remain satisfied with whatever one or two themes their OEM has provided. But with Samsung, things are different, and in a good way. Be it the Touchwiz or the OneUI, Samsung devices have always offered a plethora of customizations to their users. All the devices from the South Korean conglomerate offer tons of AOD, fonts, icons, themes, and Lock screen customization. You don’t have to exert much effort in this regard.
Just head over to the Samsung store and try out the desired customizations. However, as far as fonts are concerned there isn’t much to talk about. This is because the store only offers a few fonts and some of them fail to live up to the expectation. Therefore, today we will show you how to install any font on Samsung Galaxy devices. The best part is that you can easily download and install any font you like online. Check out how to do it.

Page Contents
How to Install any Font on any Samsung Galaxy Device
This guide will be broken into two different sections. The first one deals with Samsung devices running Android 8.0/8.1 Oreo. The second section outlines the steps to install any font on Samsung Galaxy devices running Android Pie or OneUI. Follow the instructions based on your device’s OS version only. Furthermore, download your preferred font style from the internet and keep it ready for the next section.
You could download any font of your liking, as long as it retains the Truetype font format (.ttf) extension. If you are having trouble finding the desired font, you could check out Google Fonts, BeFonts, and Fonts (dot com). They have a huge collection of fonts, search and download your favorite one and then follow the below instructions.
Install Fonts on Galaxy Devices (Android 8 Oreo)
- Download and install the themeGalaxy app on your device. Make sure you have the desired font ready as well, in the .ttf extension.
[googleplay url=”https://play.google.com/store/apps/details?id=project.vivid.themesamgalaxy”] - Furthermore, also download and install the GX Fonts app.
[googleplay url=”https://play.google.com/store/apps/details?id=project.vivid.gxfonts”] - Head over to the menu and go to the Extra section.
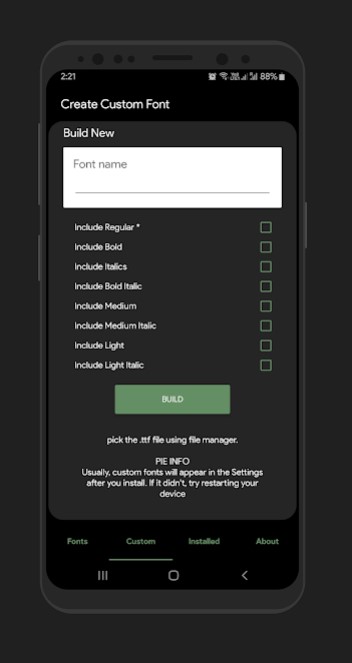
- Within that, you should see the Build Custom font from .ttf option.

- Tap on that option and give it any name of your choice. Just make sure that the naming scheme doesn’t have any space in between.
- Now check to mark the option that says Pick .ttf file manually. Then navigate to and select the downloaded font .ttf file.
- Now hit the Build button situated at the bottom. You might have to Allow Unknown sources as well. Refer to our detailed guide to know how this could be done.
- Once that is done, reboot your device.
- Then head over to Settings > Display > Font and screen zoom and select the Font style option.
- Now select the font that you had earlier named. In some rare cases, your font might not show up. If that happens, you should again reboot your device.
That is it. These were the steps to install any font on your Samsung Galaxy devices running Android Oreo (8.0/8.1). Now let’s check out the steps to do so for Galaxy devices running Android Pie 9.0 or OneUI.
Install Fonts on Galaxy Devices (Android 9 Pie/OneUI)
For this section, there are a few requirements that need to be met before you proceed with the instructions.
Pre-Requisites
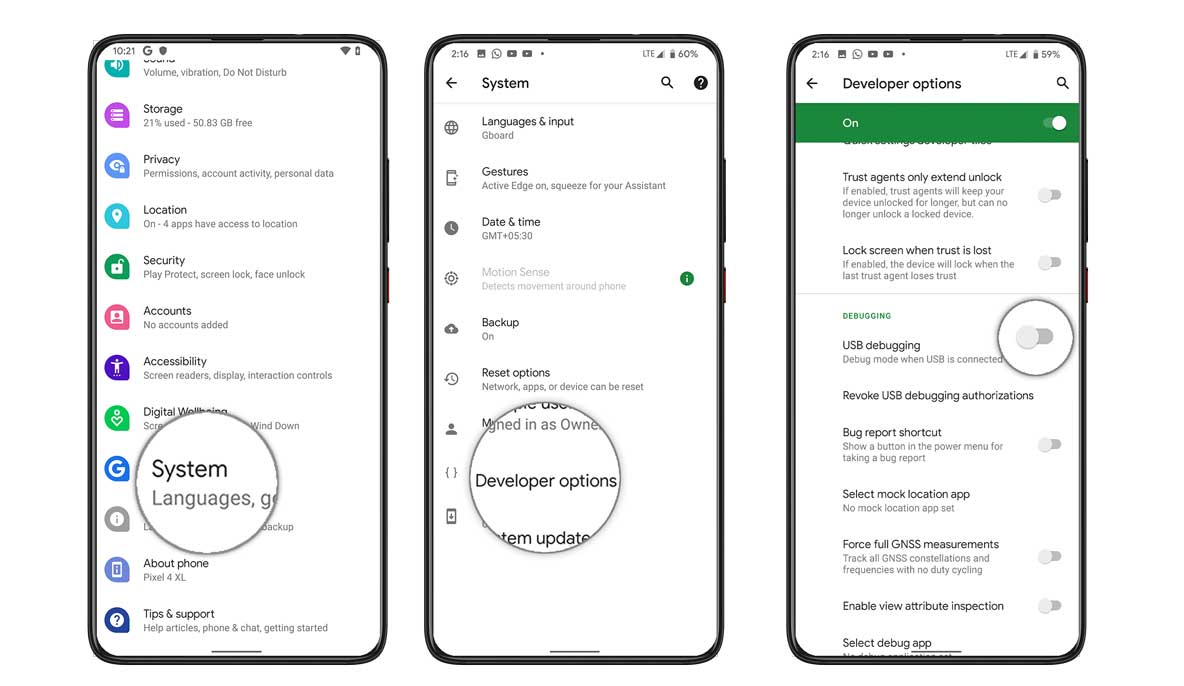
- To begin with, you will have to enable SUB Debugging on your device. To do so, head over to Settings > About Phone > Tap on Build Number 7 times > Then go back to Settings > System > Advanced > Developer Options > Enable the USB Debugging toggle.

- Next up, you will also have to install the Android SDK Platform Tools on your PC. Download and install it from the linked post.
- Also, make sure that you have the desired fonts, in the Truetype font format (.ttf) ready.
- Download the Wings Fonts APK and Wings font theme installer and send it to your device. Thanks to the Wing’s Telegram group for these files.
Now proceed with the below instructions to install fonts on Samsung Galaxy Devices (Android 9 Pie/OneUI).
Instructions Steps
- Download and install the Wing’s Font APK app on your device. You might have to enable Unknown sources as well. Refer to our guide to know how this could be done.
- Next, transfer the Wings Font Theme Installer to the platform-tools folder where the fastboot binaries are present.
- With USB Debugging enabled, connect your device to the PC via USB cable.
- Now launch the Wings Fonts Theme Installer on your PC and hit the Install Theme option.
- Doing so will install the theme inside the Galaxy Theme Store.
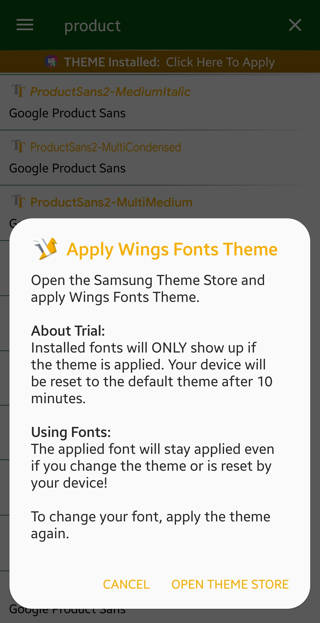
- Head over to the Galaxy Theme store and use the Try it Now option to apply the Wings theme.

- Once that is done, launch the Wings Fonts manager app.
- Now download and install your preferred font from there or choose your own.
- At this point, it will generate an APK, install this app right away if it doesn’t do so right away.
- As soon as that is done, reboot your device. Then go to Settings, search for your fonts, and select the Fonts and Styles option.
- Finally, apply the font that you have downloaded. That is it.
Install Fonts on Galaxy Devices (Android 10+/OneUI 2.0+)
A big thanks to SatySatsZB for developing the FlipFont app that supports .TTF file extension on any Samsung Galaxy device (Android 10 or higher). Make sure to download fonts from the web in .TTF extension format only. You can also use stock fonts that can be found in the app itself like Samsung Sans or more than 1800 stock Flip Fonts.
Download Links:
- Google Sans Font TTF (cufonfonts)
- Roboto Font
- Google Product Sans Font
- Google Fonts (official website – unlimited free fonts)
- Fonts.com website
- BeFonts website
Steps to Install Any Fonts on Samsung Galaxy Devices
- Download and Install FlipFont APK using this direct XDA link.
- Now, make sure to download any of your desired fonts via the links provided above on the device.
- Extract the font zip file into a folder to get the .ttf extension file.
- Next, copy & paste the regular or medium/bold font in the .ttf format into the internal storage of the device. [The location should be monofonts/ttf]
- If the .ttf folder isn’t available, create it manually inside the monofonts folder and then copy/paste the font .ttf file. [Important]
- Launch the FlipFont app on the Samsung Galaxy handset. [App name should be like #mono_]
- Make sure that you’ve signed into the Samsung account for backing up settings.
- Next, tap on Install > Install Samsung Sans Font > Tap on Select.
- Select Samsung Sans Font > Tap on Backup ‘Settings’ to the Samsung Cloud.
- Now, go to the device Settings menu > Accounts and Backup > Backup and Restore > Backup data > Checkmark ‘Settings’ only.
- Tap on ‘Select TTF file’ from the custom TTF option.
- Tap on ‘Load TTF’ > Tap on the ‘Install Custom Font’ option.
- Wait for a while until the Samsung Sans font gets uninstalled and reinstalled again.
- Make sure to restore backed up ‘Settings’ from the Samsung Cloud again. [Checkmark ‘Settings’ only]
- It should completely install the custom font on your Samsung Galaxy handset.
So with this, we conclude the guide on how to install fonts on Samsung Galaxy Devices. We have segregated the instructions into different sections, for Android Oreo and Pie. Refer to the one that corresponds to your OS version. Likewise, we also have many more tips and tricks lined up. Check out our iPhone Tips and Tricks, PC tips and tricks, and Android Tips and Trick section too.

Hello