In this tutorial, we will show you how to set up voicemail on Android. Without a shadow of a doubt, this is among the most useful call functionality. Using this feature you could drop in your voice message to the indented recipient if he or she didn’t pick up your call. You could either select these messages from the present ones or create your own personalized ones as well.
The ultimate aims stand simple- to make the recipient aware of your intention to call. This way they will be able to make a decision whether they need to revert at the earliest or not. As far as the compatibility of this feature is concerned, near about all the carrier services and mobile devices support this feature. So without further ado, here’s the comprehensive guide to set up voicemail on Android.

How to Set up Voicemail on Android
Before we begin with the instructions, there’s an important point that we would like to discuss. For this guide, we are using the default Google Phone app. Different OEMs might have their own phone application but even then the steps should be identical. So with that said, let’s get on with the guide.
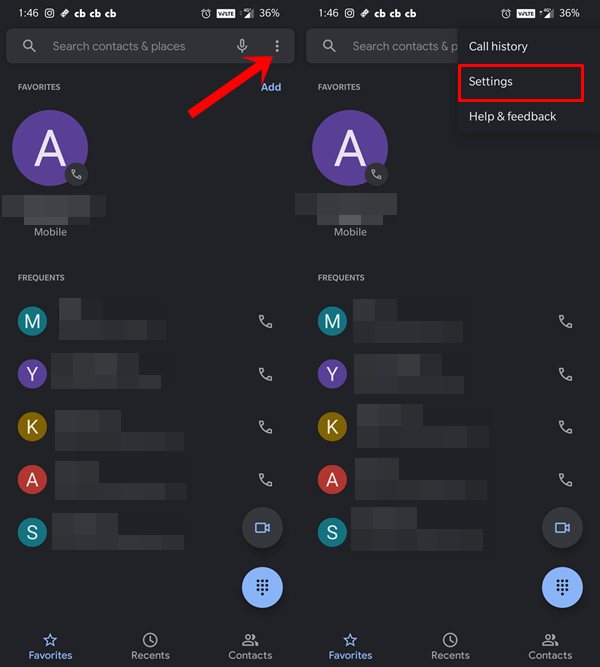
- Launch the phone app on your device.
- Tap on the overflow icon situated at the top-right and select Settings from the menu.
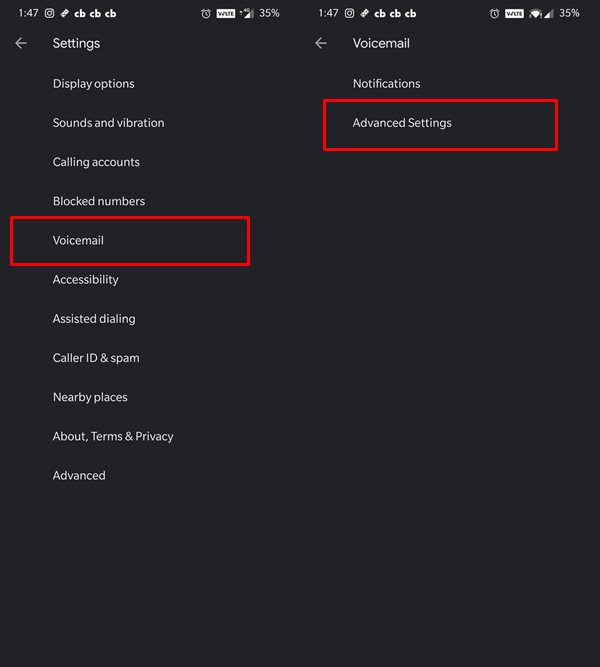
- Head over to the Voicemail option and select Advanced Settings.
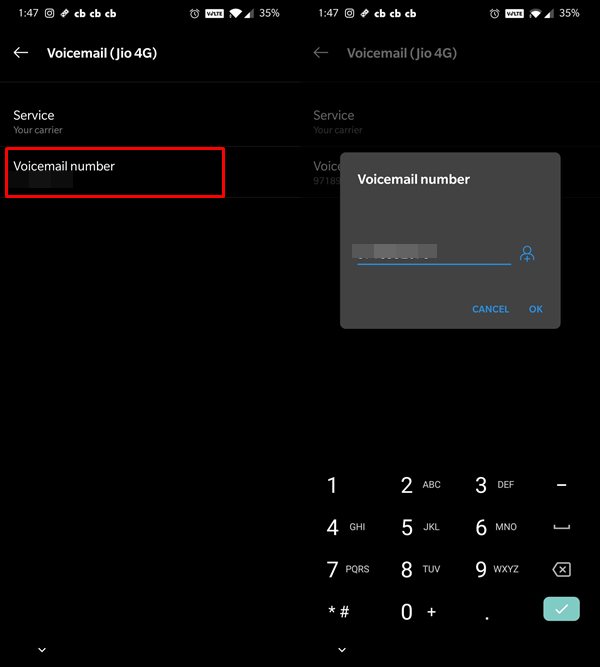
- Now select the carrier of your choice (for dual SIM) under the Service section. If you only have a single sim, then it would automatically set to that carrier itself.
- The next step to set up voicemail on Android requires you to input your phone number under the Voicemail number section. So type in your number and click on OK. The single sim users might already have their number entered.
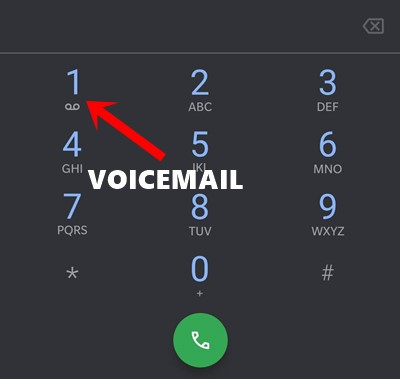
- Once that is done, open the keypad and long-press 1 (there will be a voicemail icon right beneath that number as well). It should take you to the voicemail section of your service provider.
- Then it will then give you a PIN or Password that you need to enter by bringing up the keypad.
- After this, the voice command will prompt you to record your message or you could also select from some preset ones. If you wish to take up the former route, then speak up the desired message right after the prompt.
- Then there might be a few other settings that you might need to set up. This varies according to the service providers.
That’s it. With this, you have successfully set up voicemail on Android. As already mentioned, the steps might be slightly different for various phone apps, but should still be along similar lines. With that said, if you have any queries, do let us know in the comments section. Rounding off, here are some iPhone Tips and Tricks, PC tips and tricks, and Android Tips and Trick that you should check out as well.
