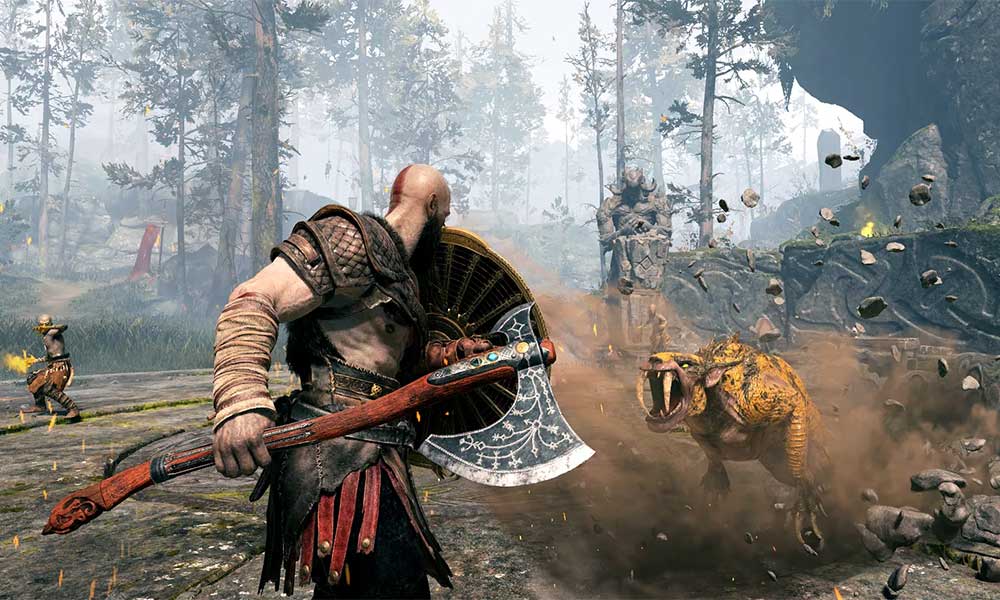
God of War is a stunning action-adventure video game that has been quite popular and ruling the gaming industry since the 2015 PlayStation release. Now, Santa Monica Studio and PlayStation PC LLC have launched the PC version in January 2022 which has received overwhelmingly positive reviews on Steam. However, some players are reporting that the game doesn’t run on DX12. So, we’ve covered the guide to turn DirectX 12 or DX12 on God of War PC.
If we take a quick look at the system requirements of the God of War title then you should have known that it requires DirectX 11 (DX11) at least to run properly on Windows. Whereas Microsoft has already released the latest DirectX 12 (DX12) version for the Windows 11/10/8.1 editions officially that can be availed by updating the Windows system to its latest build. Microsoft mostly offers frequent software updates every month or so which are necessary.
Also Read
Page Contents
How to Turn DirectX 12 or DX12 on God of War PC?
Luckily, there are a couple of possible workarounds mentioned below that should gonna come in handy for you. Make sure to follow all the methods one by one until the problem gets fixed. Now, without further ado, let’s jump into it.
1. Update Windows
First of all, you should check for the available latest Windows updates on the PC and install them by following the steps below. An outdated Windows system may cause several issues with the performance or program running which can be related to the outdated DirectX version. Yes! Microsoft now includes the latest DirectX version to be installed with the cumulative system updates. So, your PC needs to be up to date always.
- Press Windows + I keys to open Windows Settings.
- Now, click on Update & Security > From the Windows Update section, click on Check for updates.
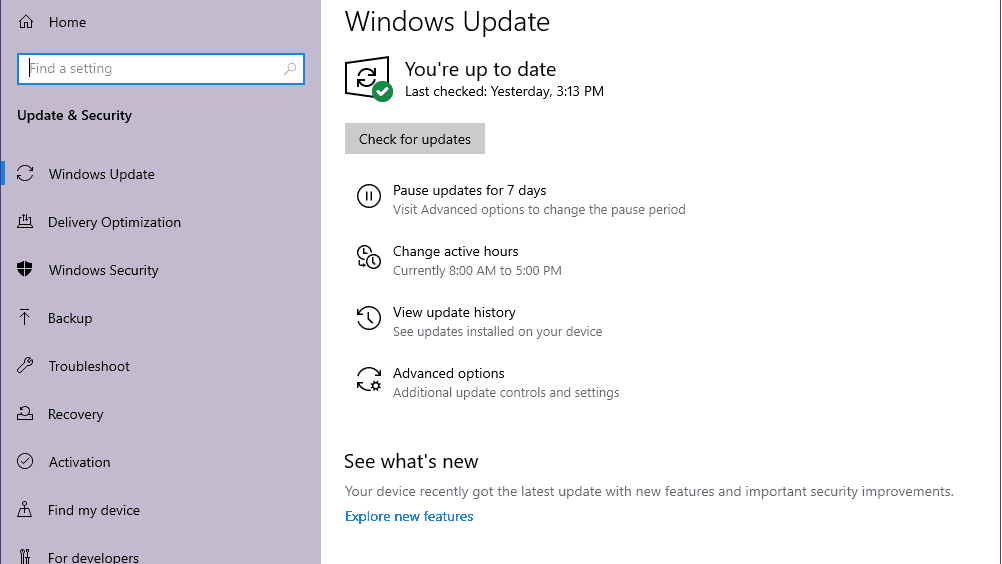
- If there is an update available, you can click on Download and Install.
- Wait for the process to complete the installation.
- Once done, make sure to reboot your computer to apply changes.
2. Check for Optional Updates
The chances are high that your Windows system is running on the latest version as well as the build. But the Microsoft team has released a few driver updates silently inside the Optional Updates section. You should also check for the same and do accordingly. To do so:
- Press Windows + I keys to open up the Windows Settings menu.
- Click on Windows Update from the left pane > Click on Advanced Options.
- Now, scroll down a bit and find the Additional options section.
- Click on Optional updates > If there is an update available, make sure to select the update.
- Click on Download & install > Reopen the system once the update is installed.
3. Run DirectX Diagnostic Tool
Another thing you can do is to check whether the installed DirectX version on your system is running the latest DirectX 12 or not. Sometimes you might not even know which DirectX version is actually installed on your PC. So, you can follow the steps below to find out the DirectX version and DirectX Feature Levels too. To do that:
- Press Windows + R keys to open the Run dialog box.
- Now, type dxdiag and hit Enter to open DirectX Diagnostic Tool.
- Here you can go to the System tab and check the DirectX version.
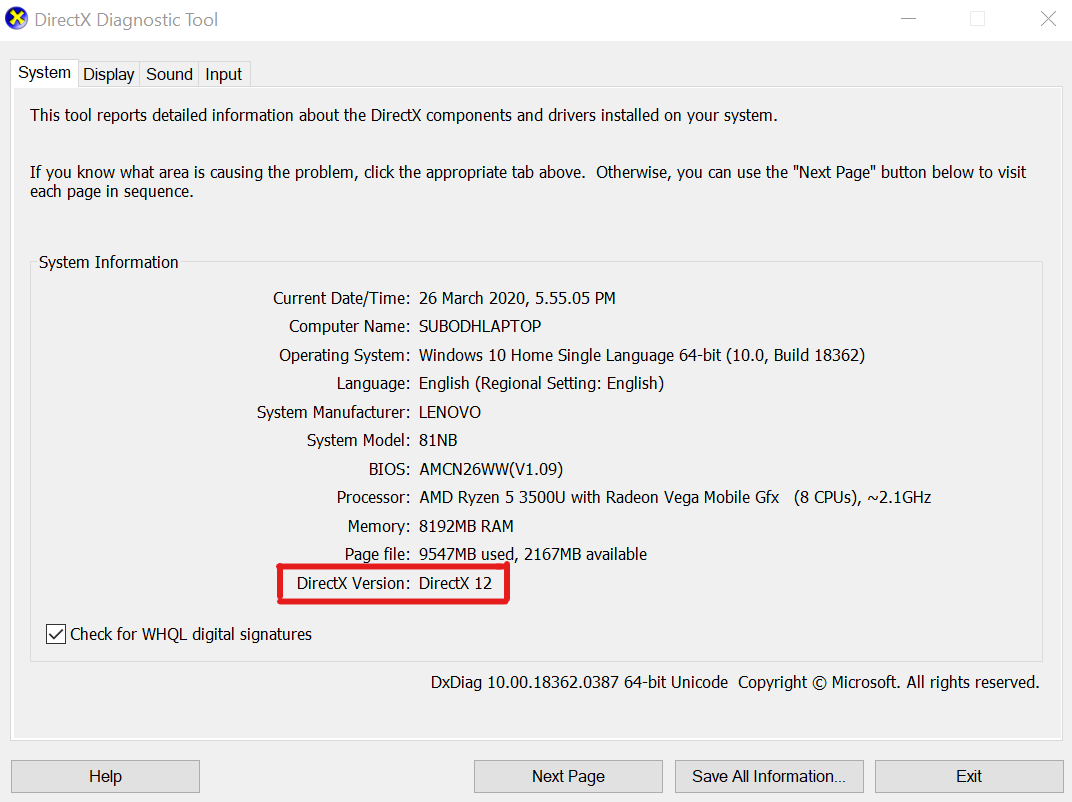
- Once you checked the currently running DirectX version on the PC, click on the Display tab.
- Make sure to check DirectX 3D Feature Levels and other DirectX Features.
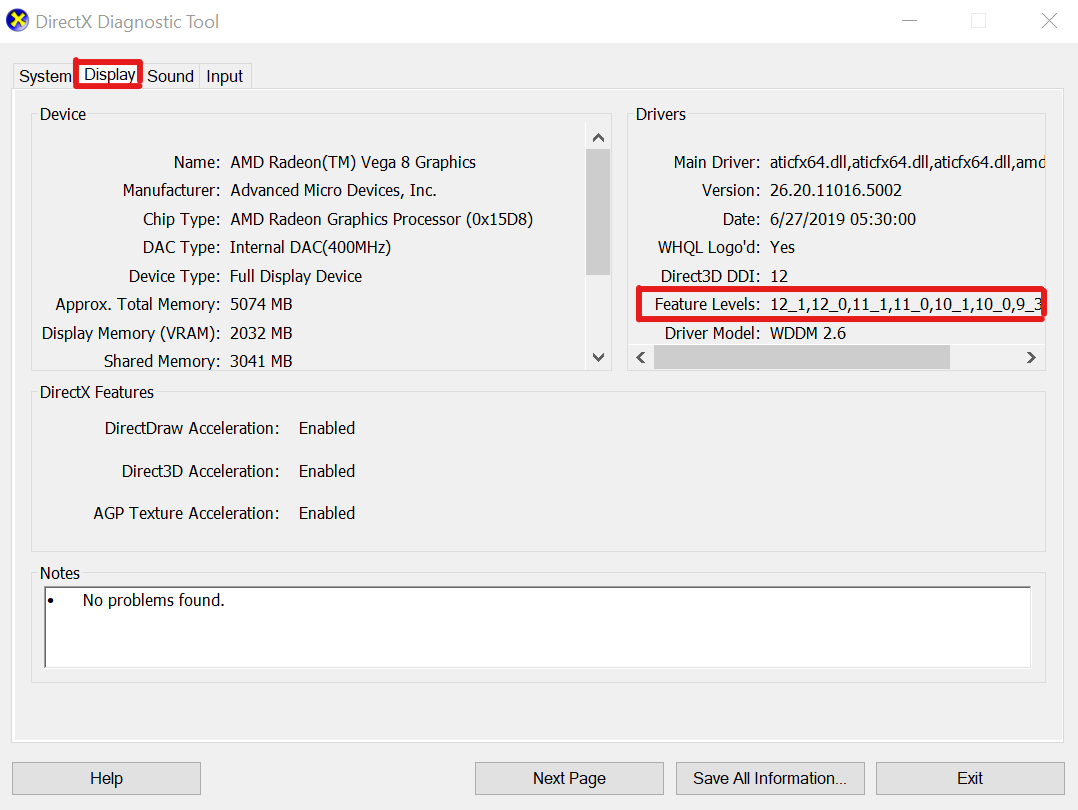
- If your PC system is running an outdated DirectX version or Feature Levels then make sure to visit the DirectX End-User Runtime Web Installer link and download it.
- Once downloaded, just run the installer, and install the latest DirectX version. That may help to resolve the issue.
4. Update Graphics Drivers
You should always update the graphics driver on the PC to avoid multiple issues related to the graphics-intensive games or other programs whatsoever. An outdated GPU driver can trigger game crashes, issues with the DirectX version, other visual glitches, and more. You can follow the steps below to do so:
- Right-click on the Start Menu to open up the Quick Access Menu.
- Click on Device Manager from the list.
- Now, double-click on the Display adapters category to expand the list.
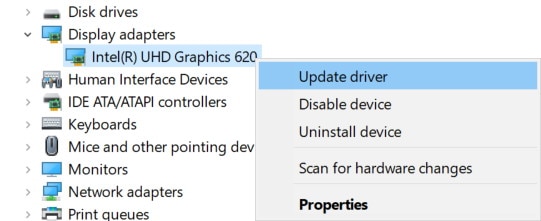
- Right-click on the dedicated graphics card which is active.
- Select Update driver > Choose Search automatically for drivers.
- If an update is available, it’ll automatically download and install the latest version.
- Once done, make sure to reboot your computer to change the effects.
Otherwise, you can manually download and install the latest version of the graphics driver respective to your graphics card model. You can do so by directly visiting the official GPU card manufacturer’s website. For your ease, we’ve provided the respective links for the Nvidia, AMD, and Intel graphics users.
5. Use Command Line Arguments
It’s highly recommended to use command line arguments on the game launcher to check whether the game is running on the DirectX 12 version or not. Plenty of players have found this trick helpful so you should also try it out.
For Steam:
- Launch the Steam client > Click on Library.
- Right-click on God of War from the left pane.
- Select Properties > Click on the General tab.
- Click on SET LAUNCH OPTIONS… > Make sure to type -dx12.
- Now, go back to the library section, and run the game.
For Epic Games Launcher:
- Open the Epic Games Launcher > Click on Settings.
- Now, click on the God of War game from the list to select it.
- Make sure to tick mark the Additional Command-Line Arguments checkbox to enable it.
- Then type -dx12 and run the game to check for the DirectX issue.
6. Add DirectPlay in Legacy Components
If none of the methods worked for you then make sure to add the DirectPlay option in the Legacy Components section under Windows Features. Some of the affected God of War PC players have found this method useful enough. To do so:
- Press the Windows key to open the Start menu > Search for Windows Features.
- You’ll have to click on Turn Windows features on or off from the search result.
- Now, click on the ‘legacy components’ checkbox to enable it first.
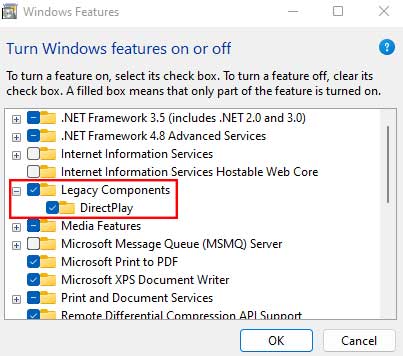
- Then make sure to click on the + icon next to it > Here you’ll have to enable the ‘Directplay’ checkbox.
- Once done, click on OK to save changes.
- Finally, reboot the PC to apply changes immediately. This should fix the DirectX 12 not running issue in most scenarios.
That’s it, guys. We assume this guide was helpful to you. For further queries, you can comment below.
