Data loss is one of the most common and timeless issues that various gadget users must have faced sometimes. For users, who are going through the same problems despite using cloud storage or hard drive, Windows 10 have one ultimate solution named- Windows Storage Spaces. Storage Spaces is a technology in Windows and Windows server that helps the user protect all their PC data from Drive failure.
We have prepared a comprehensive guide below for those who are unfamiliar with the Windows 10 Storage Spaces feature. After reading this article till the end, you will be able to understand multiple Storage Spaces concepts and how to use them for Data Backups in Windows 10.
Also Read
Page Contents
What is Storage Spaces on Windows 10?
Windows 10, the latest Windows version has been continually improving for the best user experience every day. Similarly, for data protection and backups, it offers a Storage Spaces feature that helps the user protect their data from Drive failure and other data loss.
The Storage Spaces is very much alike to RAID; the only distinction is that it is implemented in software. It can group two or more hard drives together in a virtual storage pool and later use that capacity from the pool to create virtual drives. After you generate Storage spaces, it makes extra copies of your data so that if anytime your Drive fails, you would still have every data copy available for use.
Create Storage Space in Windows 10- Explained:
Before you create Storage Spaces in Windows 10, make sure you have extra Drives (more than the one where Windows is already installed). The Drives can be either internal, external, or even solid-state Drives. Other drive formats you can include like SAS, USB, ATA, SATA, or similarly. (except micro SD cards).
For creating Storage Space in Windows 10,
- Firstly, connect the Storage Drives with your PC.
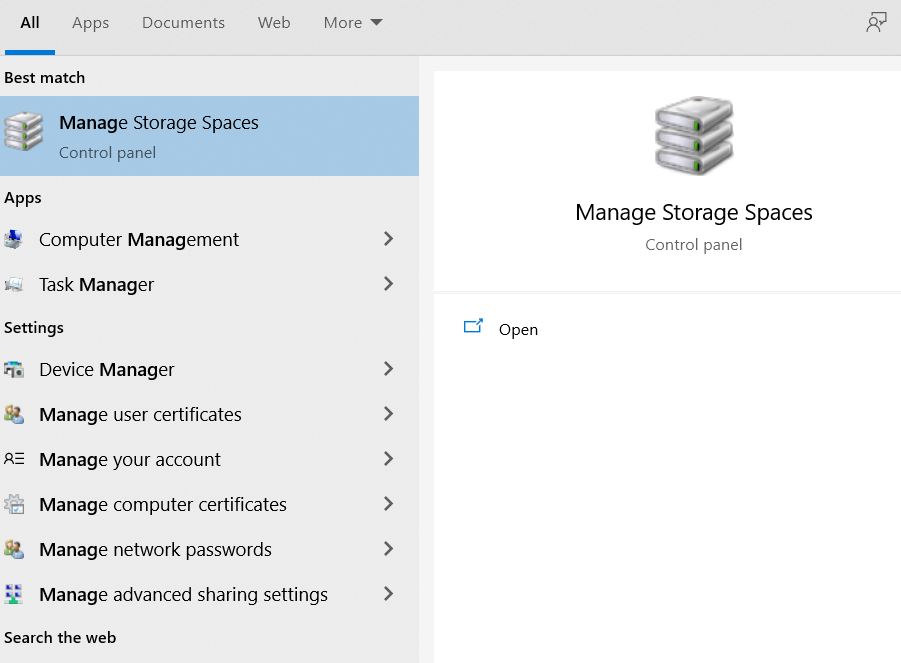
- Now go to the Windows search bar, type Manage Storage Spaces and select the relevant search result.
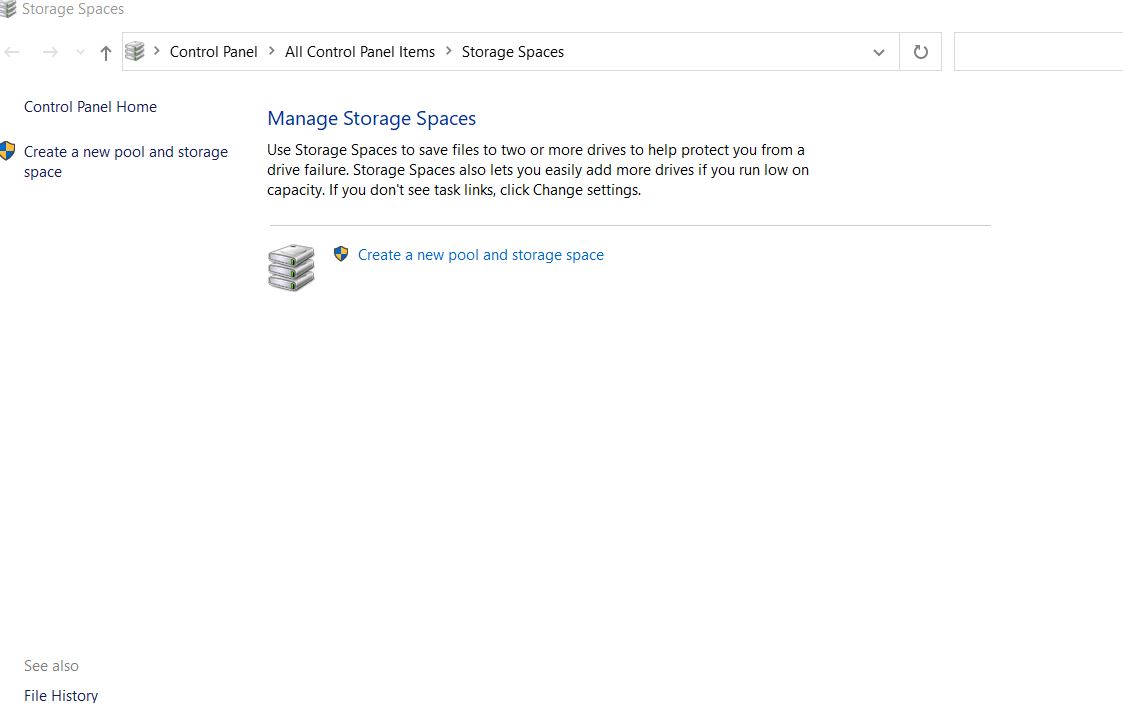
- On the next window, click on the Create a new pool and storage space option.
- On the next prompt, tick the checkboxes to select the Drives you want and then click on the Create pool tab.
- Now name all the Drives uniquely and assign each of them with a letter from the drop-down below.
- After that, select the Resiliency type from the three option at the drop down ahead: Simple, Mirror, or Parity. (Make sure you choose one thoughtfully, as once you select Resiliency type and file system, you cannot change them any way further.)
Simple spaces: These are ideal for temporary data and are not ideal for providing protection against Drive failure. It requires a minimum of two Drives and is for increasing the performance.
Mirror spaces: Mirror is classified into two versions, two-way mirror spaces, and three-way mirror spaces. The two-way spaces create two data copies and thus require a minimum of two Drives to function. Whereas the three-way spaces create three-data copies and therefore requires a minimum of five Drives to function. (It can handle two Drive failures) It can hold multiple data copies with a wide range of data with increased performance. Moreover, it is ideal for providing protection against data failure.
Parity spaces: These spaces are more advanced; with increased storage efficiency and performance. Unlike both the other versions, parity creates multiple data copies and provide data protection as well. However, for protection against a single drive failure, it requires three or more Drives, and for protection against two drive failures, it requires seven or more Drives.
IMPORTANT NOTE: Pool name or space can be changed anytime easily. Also, you can upgrade the storage space and add more Drives anytime required. Only make sure your Drive has to be around 5 GB in order to be available in Storage Spaces.
- Now finally click on the Create Storage Space tab. Once done, you have successfully created a Storage space in Windows 10. Further below, we will learn the process for adding a Drive to the Storage Space.
- Before moving further, remember that whenever you add a new Drive to the storage spaces pool, you require to optimize the Drive usage to move some of the data to the new Drive. Doing this will help you in getting maximum usage of the overall capacity of the pool. Also, if in case you add a drive before upgrading a pool, you would require to optimize the Drive usage manually.
Add a Drive to Storage Spaces in Windows 10- Explained
For adding a Drive to Storage Spaces, follow the procedure explained below:
- Now go to the Windows search bar, type Manage Storage Spaces and select the relevant search result.
- On the next window, click on the Change Settings tab.
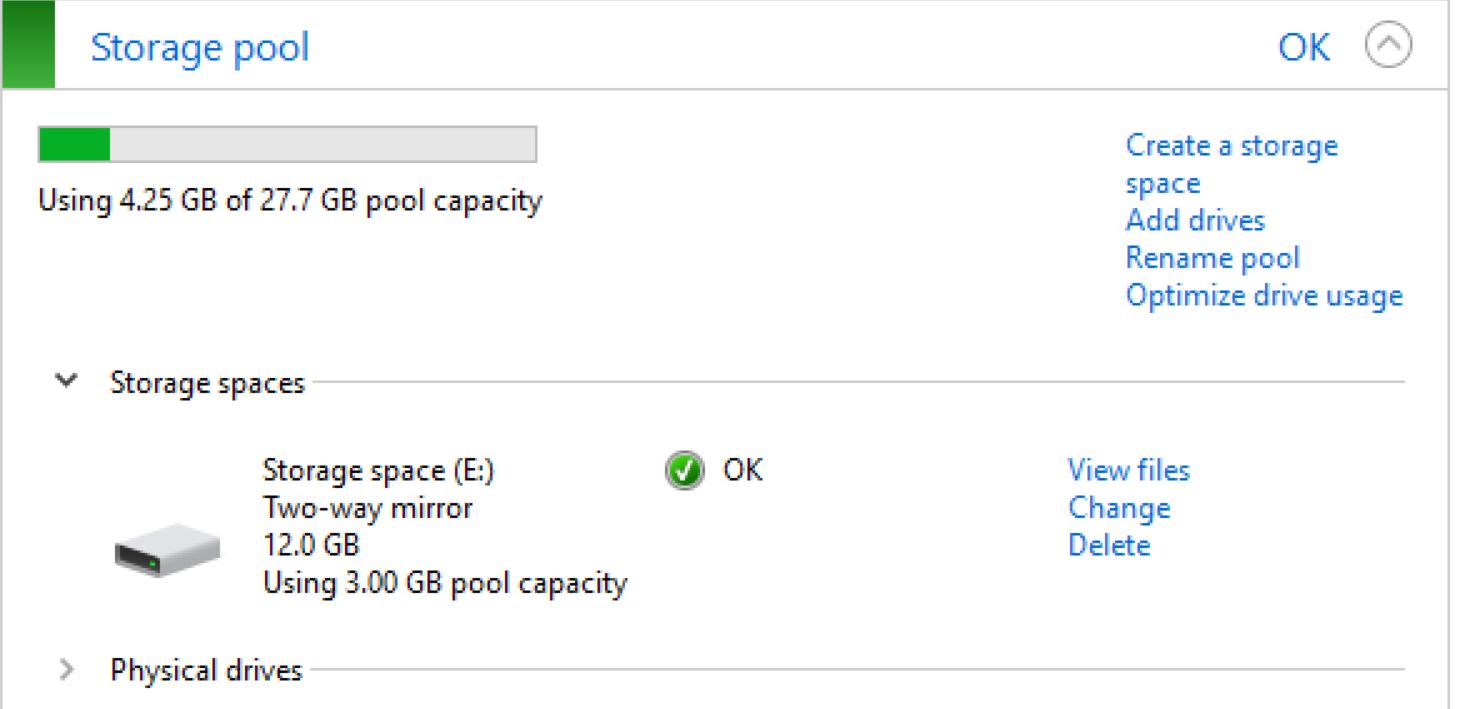
- Now click on the Add Drives option from the right-pane menu of your current storage pool. After that, you need to back up and select your Drive; else, it will get erased, and you will lose the data.
- Click the tick box located before the option Optimize Drive Usage to spread existing data across all Drives. This will let some of the data move to the new Drive.
- Lastly, click on the Add Drives tab below, and it will move your data across Drives, giving you more ample space.
Disconnect a Drive from a Storage Space- Explained:
Removing a Drive out casually might cause you data loss and other system issues; thus, it is always recommended to disconnect the Drive step by step. For doing so, follow the steps given below:
- Firstly, go to Storage Spaces and expand the option of Physical Drives.
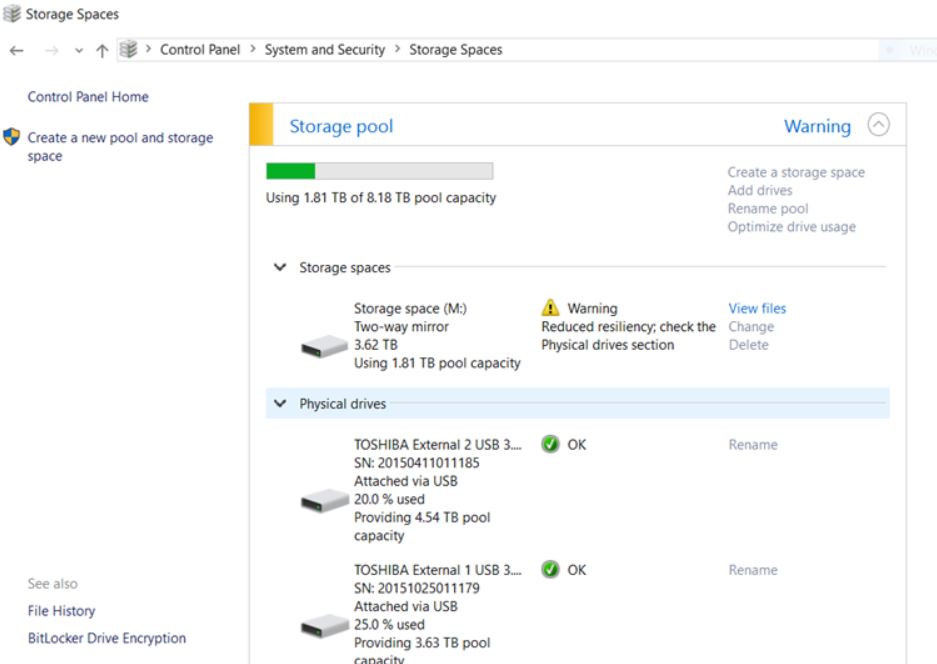
- Here you can select the option Prepare for removal.
- Now locate the Drive you want to remove and then click on the option Remove.
- Finally, select the Remove Drive tab in order to complete the process.
Disconnecting the Drive will keep you away from accessing it in the File Explorer. Though for accessing it in the File Explorer section:
- Right-click on the Start menu and select Disk Management.
- Here locate the Drive named as Unallocated, right-click on it, select the option New Simple Volume and follow the on-screen instructions for reformatting the Drive in the Disk Management utility.
Delete a Storage Space or Storage pool on Windows 10- Explained:
In case you want to delete a Storage Space or Storage pool in Windows 10, follow the steps given below:
IMPORTANT NOTE: Deleting a space will also permanently remove all the data it contains; hence it is advisable to make a backup before doing so.
- Navigate to the Storage Space window, locate the space you want to delete and then select Delete.
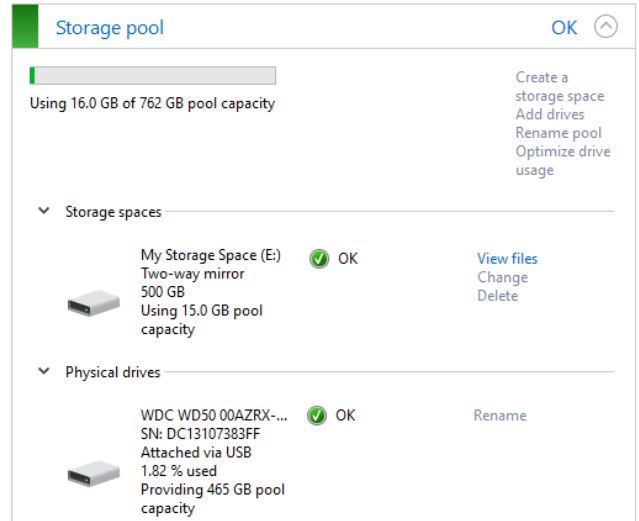
- Now select the Delete storage space tab.
- Similarly, for deleting a Storage pool, navigate to the Storage Space window, locate the pool you want to delete and then select the option Delete pool.
IMPORTANT NOTE: For removing a Storage pool, it is essential to delete the Storage spaces within first else you might not be able to remove the pool.
Creating or using Storage Spaces on Windows 10 for Data Backup is relatively easy and straightforward if you do that using the correct procedure. Whenever you run out of capacity, just add more drives into the storage pool, and you are good to go with a vast space for data backup.
In the guide above, we have tried to incorporate the simplest of the procedure so that you can work around it without much confusion. We hope you will find the above information helpful and relevant. If you have any queries or feedback, please write down the comment in the below comment box.
