Did it ever happen with you, your smartphone alarm clock did not wake you up in time.? I’m sure a lot of us will agree to this often the alarm doesn’t ring at all. Even if it does, somehow we miss out. When it happens, we keep wondering why the heck the alarm didn’t go off..? Well, in this guide, I will put an end to all these doubts. Today I will tell you what troubleshooting you need to do if the Alarm clock doesn’t work on your Android devices.
I have put up the possible reasons that usually causes the alarm to not sound on your smartphone. Also, there are some silly mistakes that users do which results in no alarm. Often some users are not that tech-savvy to tweak a few things to make the alarm work properly. Nevertheless, whichever of these categories you fit into, you can make use of this troubleshooting guide. So, let’s get going and fix this issue.
Related | How to Get Web Console Log for Chrome on Android
Page Contents
How to Fix If Alarm is Not Working on Android Devices
The fixes are pretty simple to carry out. Here we go.
Check for Alarm Volume
This is one of the most common mistakes that smartphone users do. They set the device in silence and then wonder why Alarm is not sounding. So, you have to manually check and set what amount of alarm volume can be better for you so that you actually hear it. To tweak that,
- go to Settings > Sounds and Vibration [It may be only Sounds in some devices]
- Under that, you will see volume controllers for Ringtone, Media files, and Alarm.
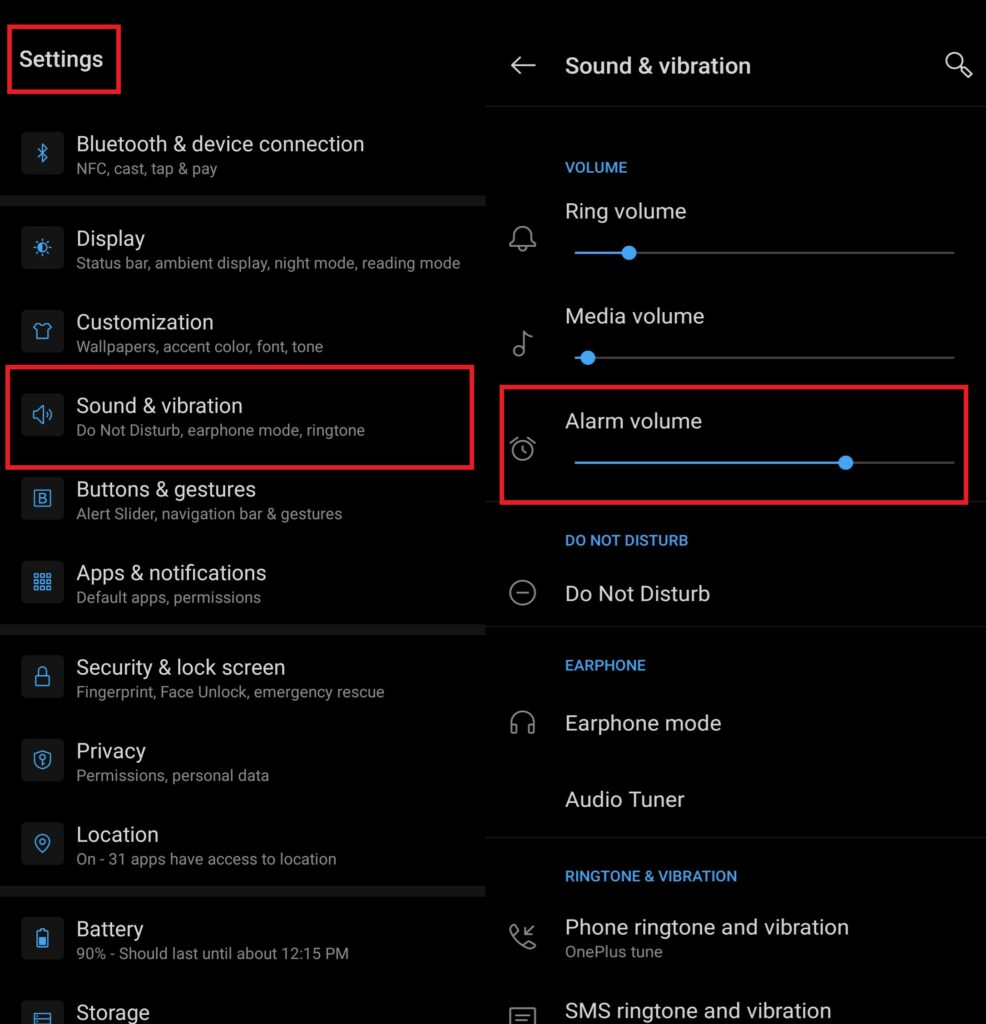
- Set the Alarm volume as per your sonic comfort. But make sure you hear it when it goes off else you will keep sleeping.
Guide | A Complete Guide on Securely Encrypting an Android Smartphone/Tab
Note
Uninstall Updates of the Clock App on your Android Devices
The stock clock app cannot be deleted from Android devices. However, you can uninstall all system updates for the app and take it back to its factory build. This means it will be the same neat app when you first unboxed your device and started using it. So, if there are any bugs in the previously installed version, those will be removed.
Some phones may not allow uninstalling updates to their stock applications. On my Oneplus 6T, there is no such option for the stock clock app. However, devices differ and if you have the option, here is how you can check for it and also uninstall the updates.
- Go to Settings > Apps & Notifications
- Scroll down to Clock App in the list of installed system/custom apps
- Tap on it to open.
- On the top-right corner, there should be a three-dot button. Tap on it.
- You should see the option, Uninstall Updates. Tap on it and confirm to continue the uninstallation.
Tweak the DND Exception
Often Do Not Disturb or DND can disable the alarm clock app if it’s active. So, you have to customize and add the alarm to the exception. This means even if the DND is active, the alarm will sound loud and clear. This is how you do it
- Go to Settings
- Scroll up to Sound and Vibration. Tap to open it
- Tap on Do Not Disturb
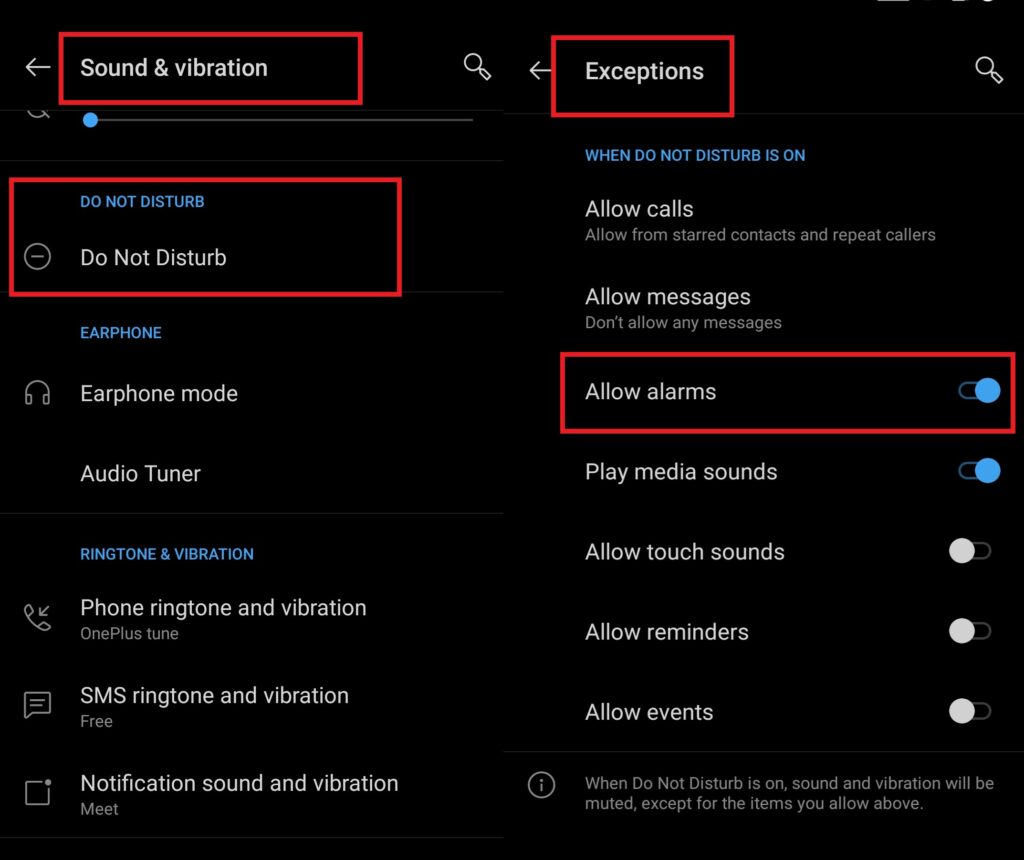
- Then go to Exceptions
- Under that check that Allow Alarms toggle is enabled.
Clear Cache of the Clock App
Often due to frequent use, the memory accumulates too much of clutter caused by temporary files. So, that may cause the clock app to not work. Hence, users do not get to listen to the alarm sound on their Android devices. So, the wise move here is to clear the cache of the clock app.
- Go to Settings > Apps & Notifications
- Tap See All Apps
- In the app list, select Clock
- Tap to open it > select Storage & Cache
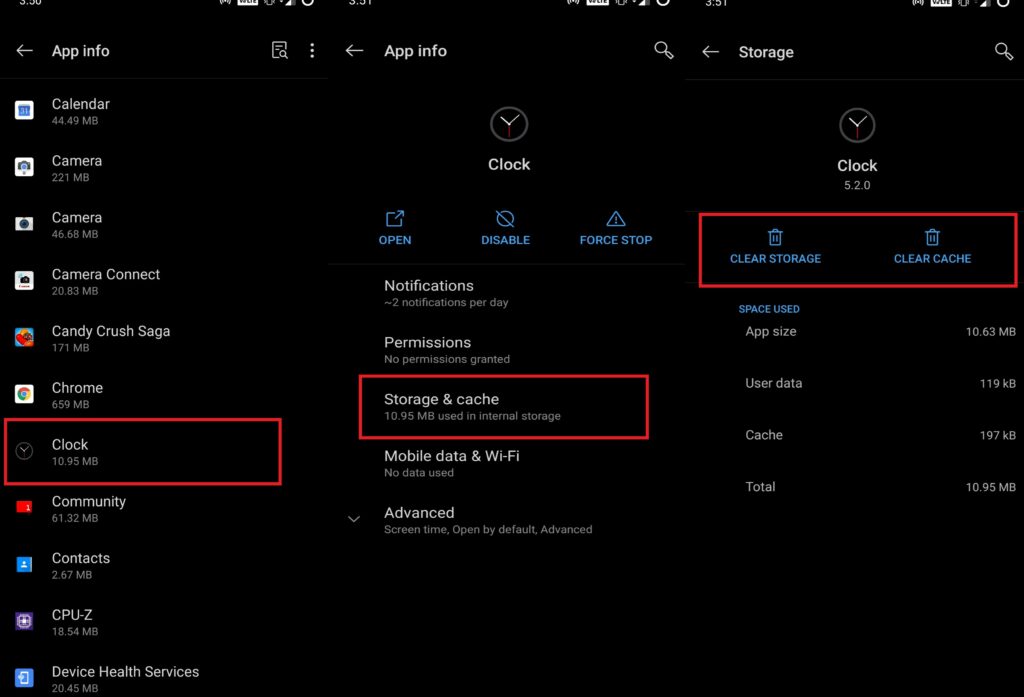
- Next, tap on Clear Cache
Rest App preferences
Keep this one as a last resort if everything that I discussed above doesn’t do anything for you. It will reset the settings you have customized on all of your apps. However, you won’t be robbed of your app data. It will remain intact.
- Go to Settings > System
- Then go to Reset Options
- Tap on Reset App preferences
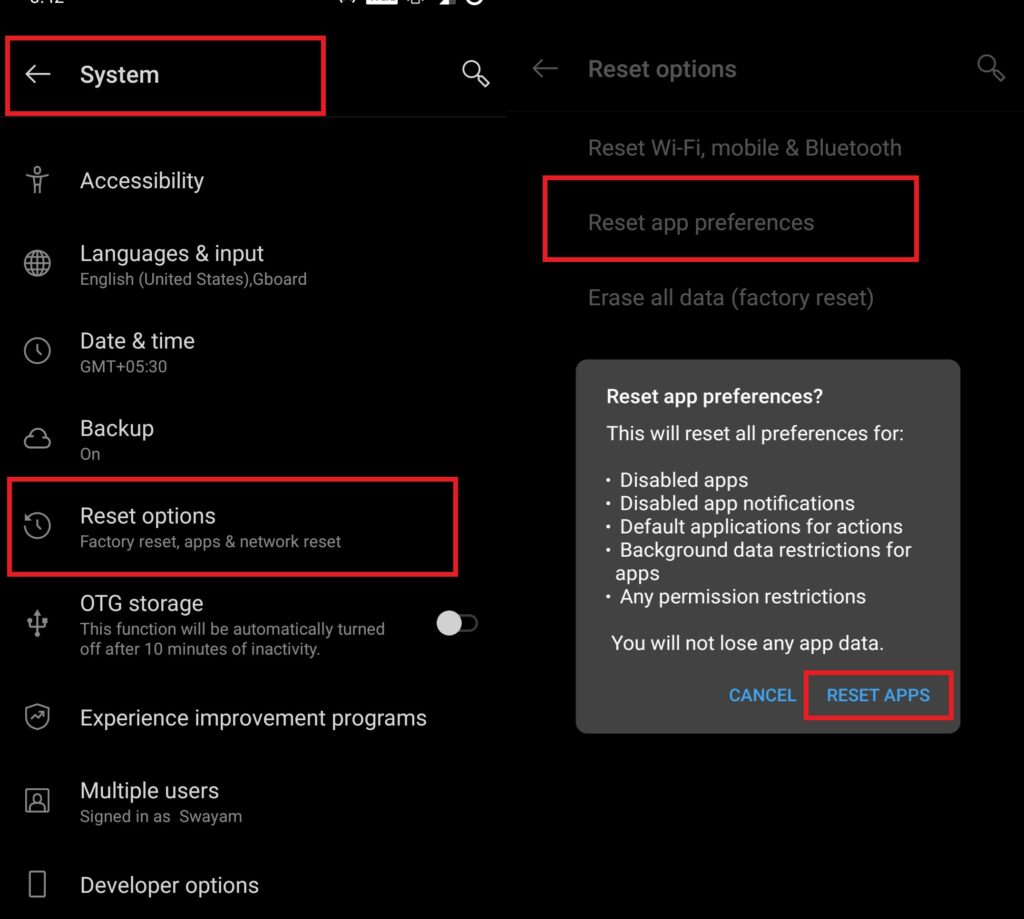
- Confirm and tap Reset Apps.
So, these were some of the effective solutions to fix alarm clocks not working on Android devices. Try these out and let me know what exactly worked for you in finding the issue. Stay tuned with GetDroidTips for more such informative guides.
Read Next,
