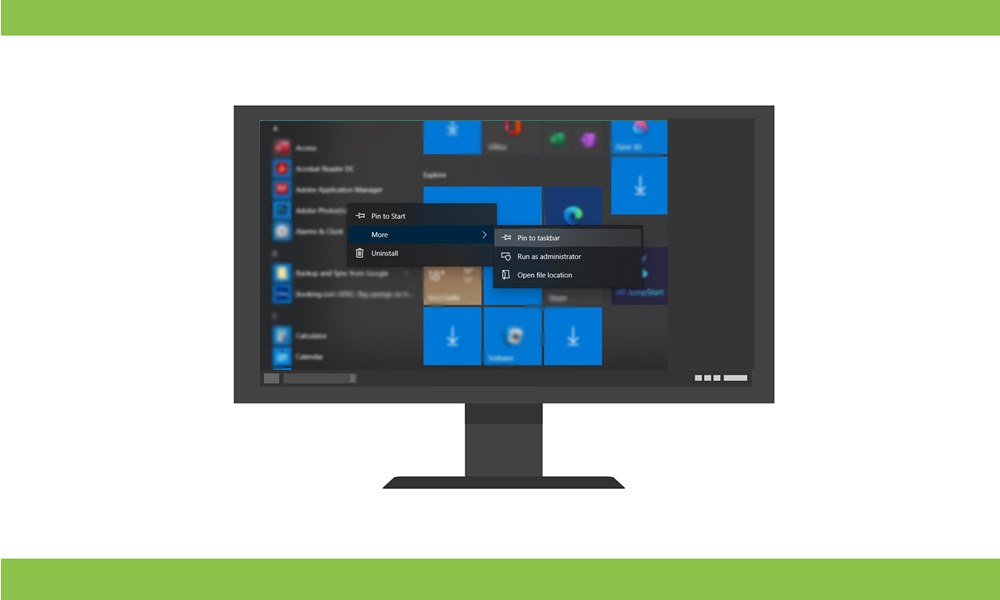
In this tutorial, we will show you the steps to disable the context menus in the Start Menu in Windows 10. The Context Menu appears on your PC when you perform a right mouse click. This isn’t a static menu but rather will show you different options depending on the file or location where you perform a right-click. Do so on a file and you will be able to access its Properties, Delete it, Rename it or perform a Cut, Copy or Paste operation. Along the same lines, you could also perform this right-click on the Start menu apps and icons.
This will then bring up the options to Pin the app to the Start menu or Taskbar, Access the App Settings’ page, Uninstall it, or even share it with others. However, some prefer a clutter-free UI and wish to get rid of this menu. Likewise, some website administrators favor hiding these options from the users. If you also echo their thought process, then you come to the right place. Given here are the required steps to disable the context menus in the Start Menu in Windows 10. Follow along.
Also Read
Page Contents
How to Disable Context Menus in the Start Menu in Windows 10
There are two different methods of carrying out the aforementioned task. The first one requires the use of the Local Group Policy Editor. However, this feature isn’t available on the Windows 10 Home edition. So if you are running this version of Windows, then you should check out the second method that makes use of the Registry Editor. With that said, let’s get on with the guide.
Method 1: Via Local Group Policy Editor
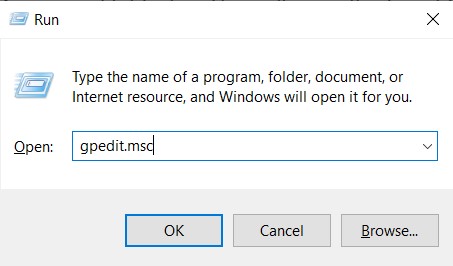
- Use the Windows+R shortcut key combinations to launch the Run dialog box.
- Then type in gpedit.msc and hit Enter. This will open the Local Group Policy Editor.
- Now from the left menu bar, navigate to the following location:
Computer Configuration\ Administrative Templates\ Start Menu and Taskbar\
- Here, we are taking the policy for the Computer Configuration, you could do the same for the User Configuration as well.
- Anyways, once you have reached the Start Menu and Taskbar, scroll to the Disable context menus in the Start Menu and double-click to open it.
- Now change the option from Not Configured to Enabled from the top left of your screen.
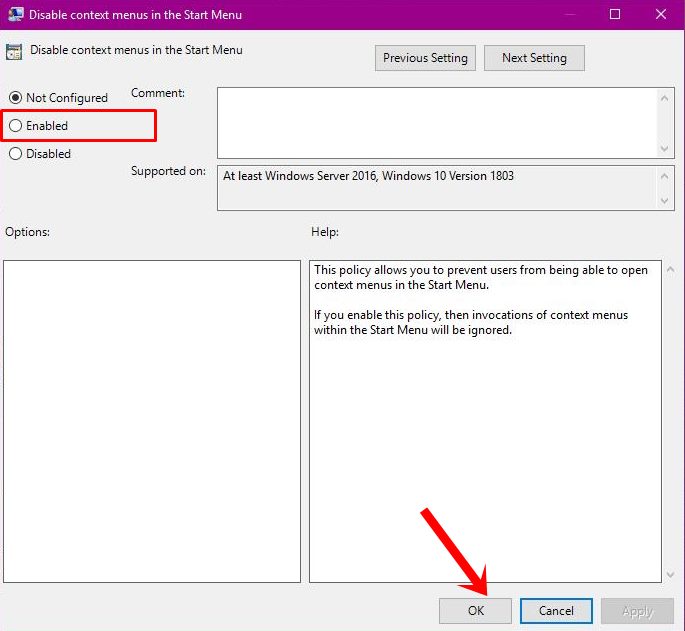
- Finally, click Apply followed by OK and the process stands complete.
So this was the first method to disable the context menus in the Start Menu in Windows 10. Let’s now turn our attention towards the next one.
Method 2: Using Registry Editor
The Local Group Policy Editor automatically creates and updates the required key to carry out the said task. However, since this functionality is absent from the Windows 10 Home Edition, you will have to take the manual route of creating these DWord keys. This, in turn, could be done via the Registry Editor. So here are the required steps to disable the context menus in the Start Menu in Windows 10 using the Registry Editor.
- Launch the Run Dialog box using the Windows+R shortcut key combinations.
- Then type in regedit in the box and hit Enter. This will take you to the Registry Editor.

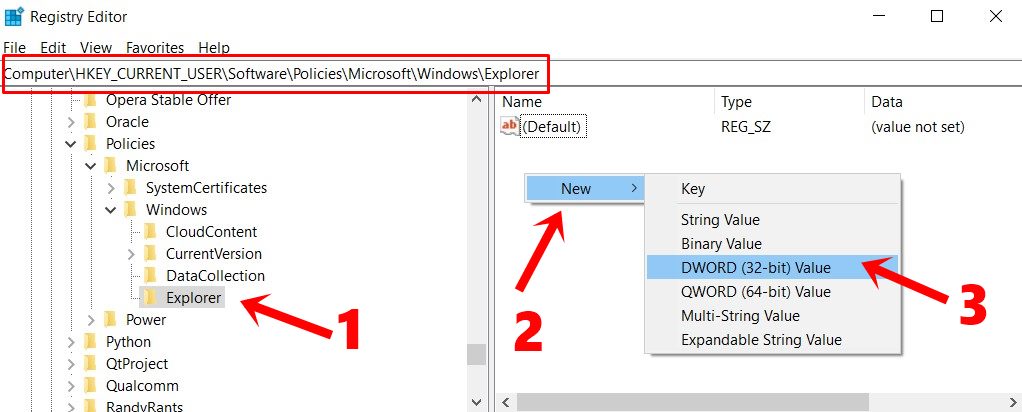
- Head over to the Editor’s address bar and paste the below-given location:
HKEY_CURRENT_USER\Software\Policies\Microsoft\Windows\Explorer
- Within the Explorer directory, right-click on an empty area and select New > DWORD (32-bit) Value.
- Type in DisableContextMenusInStart in the Value Name. Likewise, enter 1 in the Value Data field.
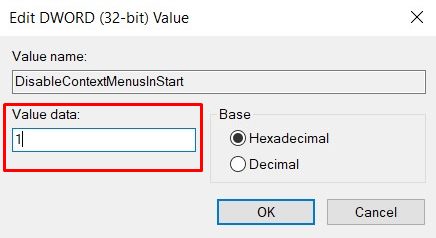
- Finally, click OK to save these changes. Now restart the PC for the changes to take place.
That’s it. These were the two different methods to disable the context menus in the Start Menu in Windows 10. If you have any queries concerning the aforementioned steps, do let us know in the comments section. Rounding off, here are some equally useful iPhone Tips and Tricks, PC tips and tricks, and Android Tips and Tricks that you should check out as well.
