If you check up on the services running in your Windows system’s background, you will notice that the search services consume a bulk of the memory. This, in turn, can reduce the performance of the system significantly. Windows search services exist to allow better indexing which in turn will result in faster search results. But in the quest of achieving faster search results, the search services of Windows 10 are taking a toll on devices with limited resources.
If your device is low in memory, you definitely don’t want a background service to take a chunk of it. For a system that has an ample amount of RAM, this is no issue at all. But for those with low RAM configurations, disabling search indexing and caching functionality could be a better idea. So here in this article, we will show you how you can disable windows search services. Without any further ado, let’s get into it.

Page Contents
How to disable Windows search in Windows 10?
There are two ways to go about disabling Windows search service. You can either disable it temporarily such that it starts again after the system reboots. Or you can disable it permanently, which will disable the service completely in your system.
How to disable Windows search temporarily?
To disable Windows search temporarily, you will have to use the Windows command prompt.
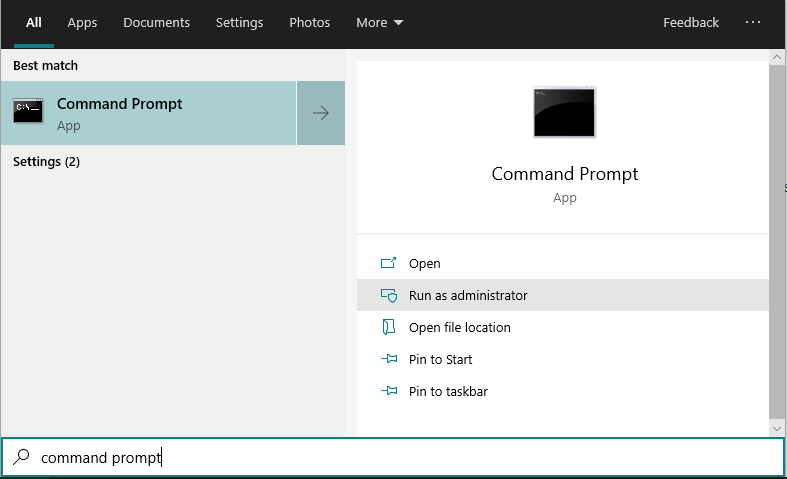
- Click on the search bar and search for “command prompt.”
- When it shows up in the results, choose the option “Run as administrator.”

- Then the command prompt window will appear. Enter the following command in that window and press the Enter Key.
net.exe stop “Windows search”
Now your Windows search service is disabled temporarily. If you restart your computer now, the service will start again automatically.
How to disable Windows search permanently?
If you don’t want Windows search ever starting again in your system, follow the guide mentioned below.
- Press Windows Key + R and the Run dialog box will show up.
- Enter “services.msc” in the Run dialog box and press the Enter key.
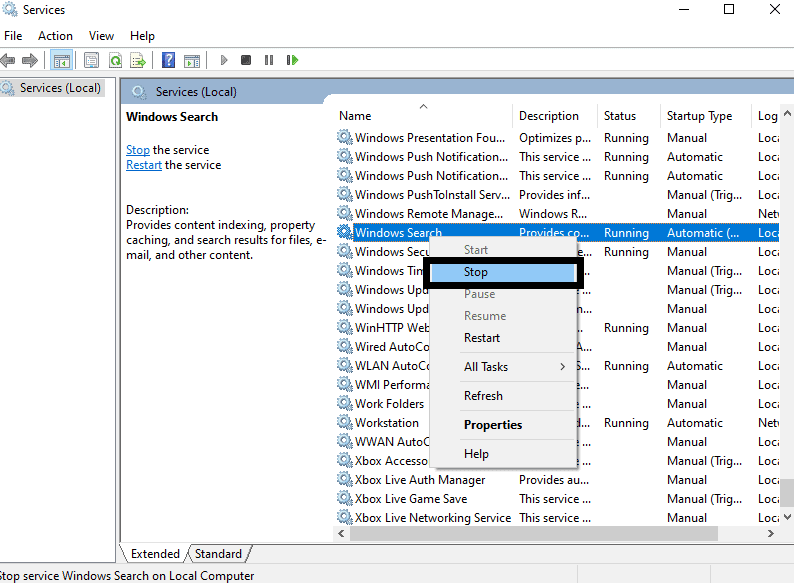
- Then the services window will appear. Here, look for the service “Windows search.”
- Once you find it, right-click on it and choose “Stop.”

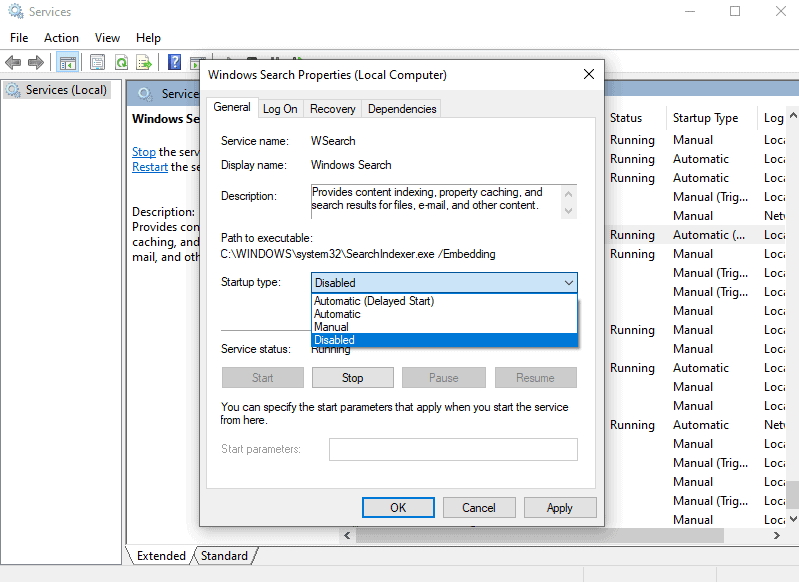
- Now, right-click on the service again and choose “Properties.”
- In the general tab, you will see the option “Startup type.” There will be a drop-down menu next to it. Click on that menu and choose “Disabled.”

- Click on Apply and then click on Ok.
This will permanently disable search services in your Windows system. If you wish to start it again in the future, then open up the services window and undo everything that you did to disable the search service in the first place. This time, instead of keeping the startup type as “Disabled,” change it to automatic and click on the start button below it.
So that is how you can disable Search services in a Windows 10 system. If you have any questions or queries about this article, then comment down below, and we will get back to you. Also, be sure to check out our other articles on iPhone tips and tricks, Android tips and tricks, PC tips and tricks, and much more for more useful information.
