Windows Defender is the inbuilt anti-virus mechanism that Microsoft packs on all Windows PC. It is free of cost and is quite efficient as well. On Windows OS, you can only use one anti-malware at one time. So, if you are using some third-party anti-virus, then you need to disable the Windows Defender on your PC. I will explain the same in this guide.
Besides, disabling the default anti-malware will help your PC consume fewer resources. It has also been observed that when running multiple security programs, other apps will not run properly. Usually, when you install a third-party app, the real-time protection component of Defender gets disabled.
Also Read

Disable Windows Defender on Windows 11/10
I have put up the steps to disable Microsoft Windows Defender on your PC. Check it out.
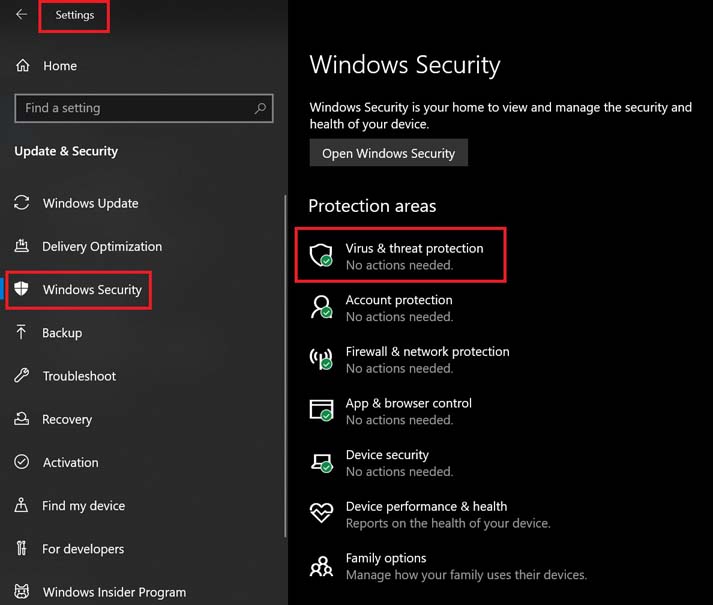
- Press Windows + I key together
- The click on Update & Security
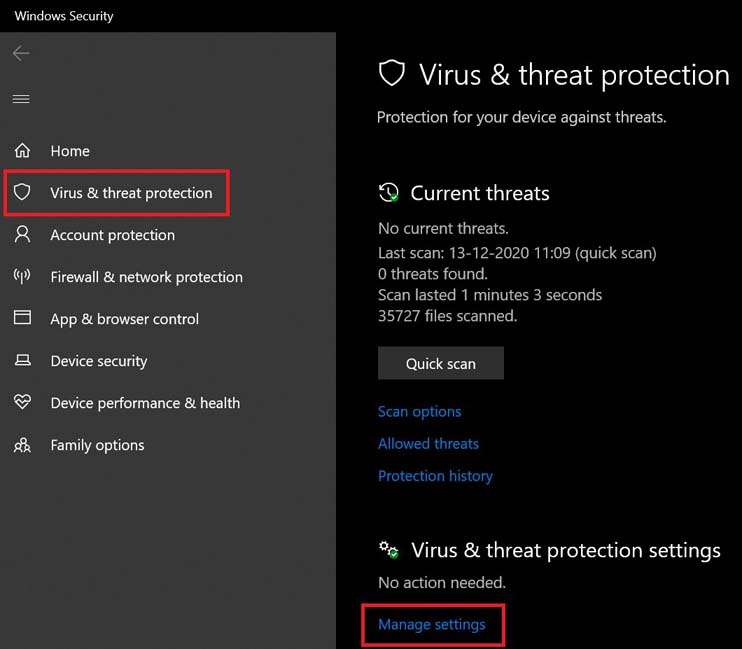
- Now, click on Virus and Threat Protection

- On the next screen look for the option Manage Settings. Click on it

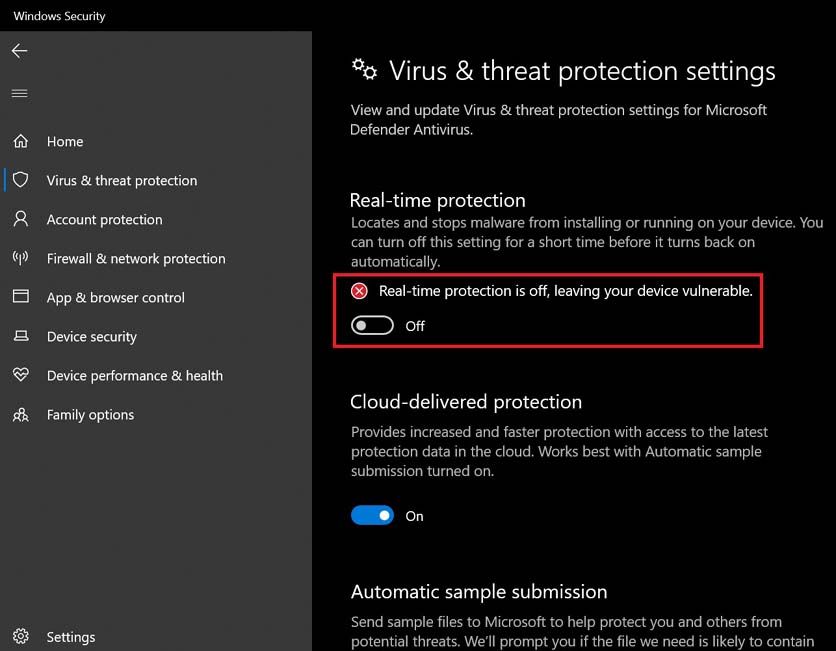
- There will be the option for Real-time protection. Click the toggle to disable it.

Here is a twist I must let you know. Only carry out the steps above if you have a third-party anti-virus running actively on your PC. If you only have the Windows defender installed on your PC, then the above steps to disable Windows Defender won’t do anything.
As soon as you restart your PC, Defender will restart and engage the Real-time protection component of Windows Defender. But if you have another anti-virus already active, then it will take over the real-time protection and replace the Defender when you turn off the latter.
I even suggest the same. It’s highly important that if you have an active internet connection on your PC, it is highly vulnerable to all kinds of malware out there. So, make sure either the Windows Defender or any third-party is protecting the PC.
Disable Defender on Windows 7/8
The previous section describes disabling the Windows Defender on Windows 10. Now, let’s see how to do the same on Windows 7 and 8.
- Search for Windows Defender using the search box and open it
- Click Tool > then navigate to Options
- On the left-hand side, click on the Administrator tab
- Uncheck the checkbox beside Use this Program
- To confirm the changes click on Save
- Then click Close on the confirmation dialog box that pops-up
So, these are the methods you must follow to disable the Windows Defender on your Windows PC. I hope this guide was informative.
Read Next,
- Windows Defender: Resolve High HDD and CPU Usage During Scans
- How to Fix if Windows Defender Won’t Update
- Windows Defender Not Turning On: How to Fix
