Windows Defender is an inbuilt app you get with Windows 10 PC. It comes from Microsoft and is actually reliable. It can run timely scans and remove malware if found on your PC. Now, it may happen that sometimes while scanning for viruses the Defender may get stuck. This means it will take more time than usual to scan a particular file or folder.
The virus scanning is carried out by the MsMpEng.exe. It is the primary component of Windows Defender. When scanning it gets stuck, which may consume 100 percent of the hard disk drive and CPU. It means the PC will freeze and the user will experience a lag in the PC. This is an undesirable situation that we do not need. So, in this guide, I have explained some methods to resolve this problem.
Also Read

Page Contents
Windows Defender: Resolve High HDD and CPU Usage During Scans
Let us begin with the troubleshooting.
Are You Using Any other Anti-Virus Program Other than Windows Defender.?
Make sure that when Defender is running as the primary anti-virus program on your PC, no other similar app/service should run. Otherwise, it will create conflict. The same will happen if you are trying to implement some online internet-based virus scanning service.
When two similar services will carry out the same job, then it will lead to conflict and Windows Defender will consume the HDD and CPU more than it should. So, make sure to uninstall or not use such extra malware scanners if you already have the Windows defender protecting your PC.
Lower the Set Affinity of the Defender Component
This means you have to reduce the scanning speed of the Windows Defender. The application will run slower and thus it will use less HDD and CPU of the system.
- On the Type Here to Search box, type Task Manager
- Click Open
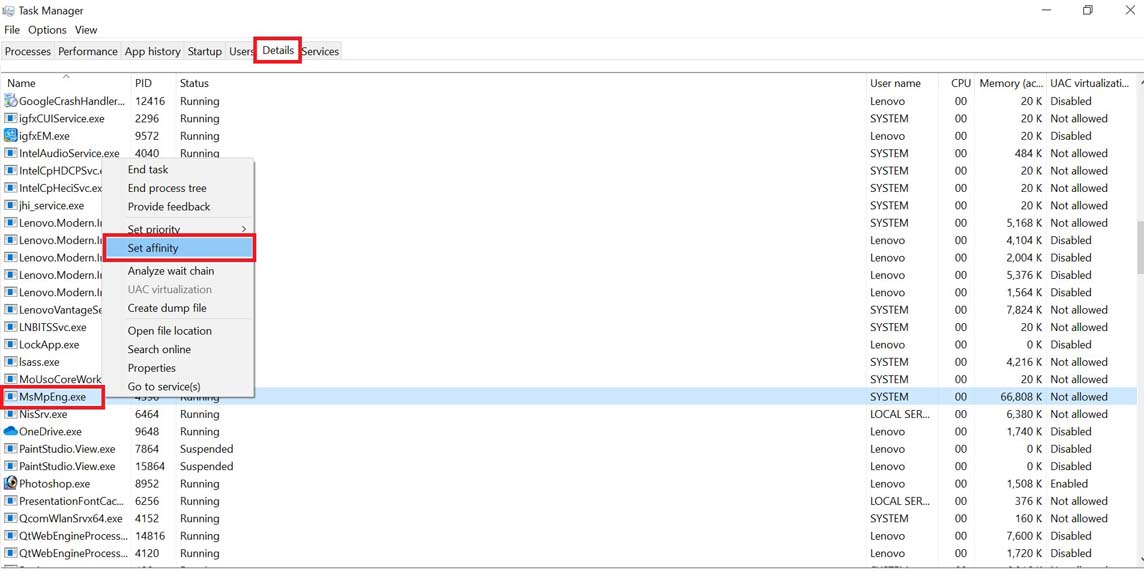
- In the Task Manager screen click on the Details tab
- Scroll down to Msmpeng.exe > right-click on it
- Select Set Affinity

- Define the limit of the CPU you wish the Windows Defender component to use
Exclude the Folder that is Causing the Defender to Consume 100% of HDD and CPU
If you know that a particular folder is safe and doesn’t consist of any malware, then you can exclude it from scanning.
- Open Windows Defender
- Go to Settings
- Click Add an Exclusion
- Select Exclude a Folder
- Mention the complete path of the folder and it’s in which drive. That’s it.
Turn off Windows Defender on Your PC
Now, this last option is something you should not require to do if any of the above three methods would work. If you turn off Windows Defender, it will make your PC vulnerable to hackers, malware, and viruses. By turning off I do not mean that you disable the Defender forever. You can disable it, turn off your PC and then restart it.
- Click on the quick access up arrow mark on the system tray at the bottom right corner
- Then click on the Windows Security icon
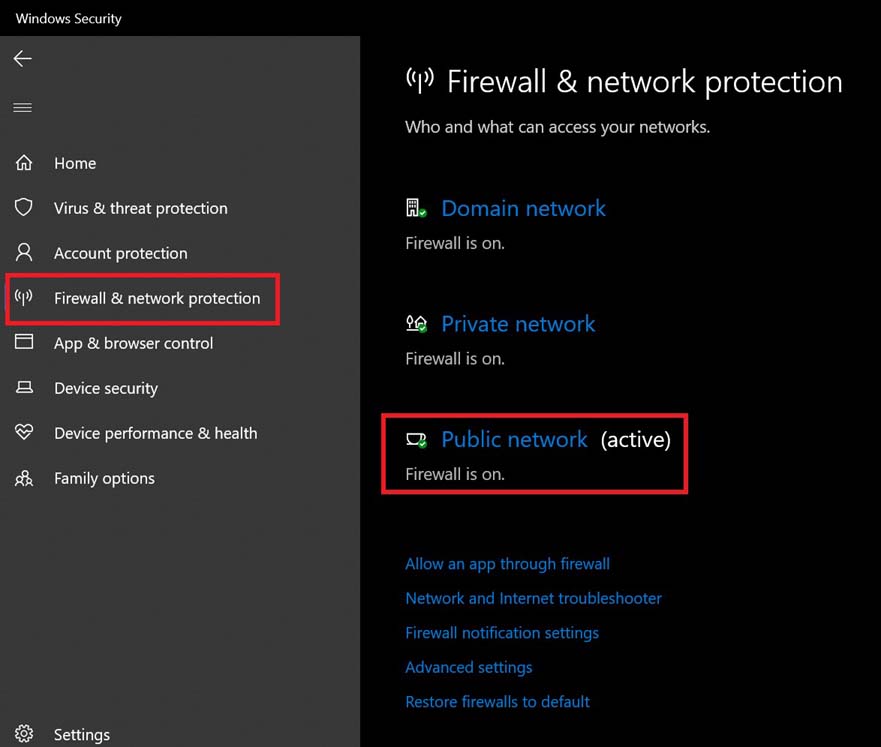
- Now on the left-hand panel click on the option Firewall and Network protection
- You will see three options domain, private and public network

- Click on Public network
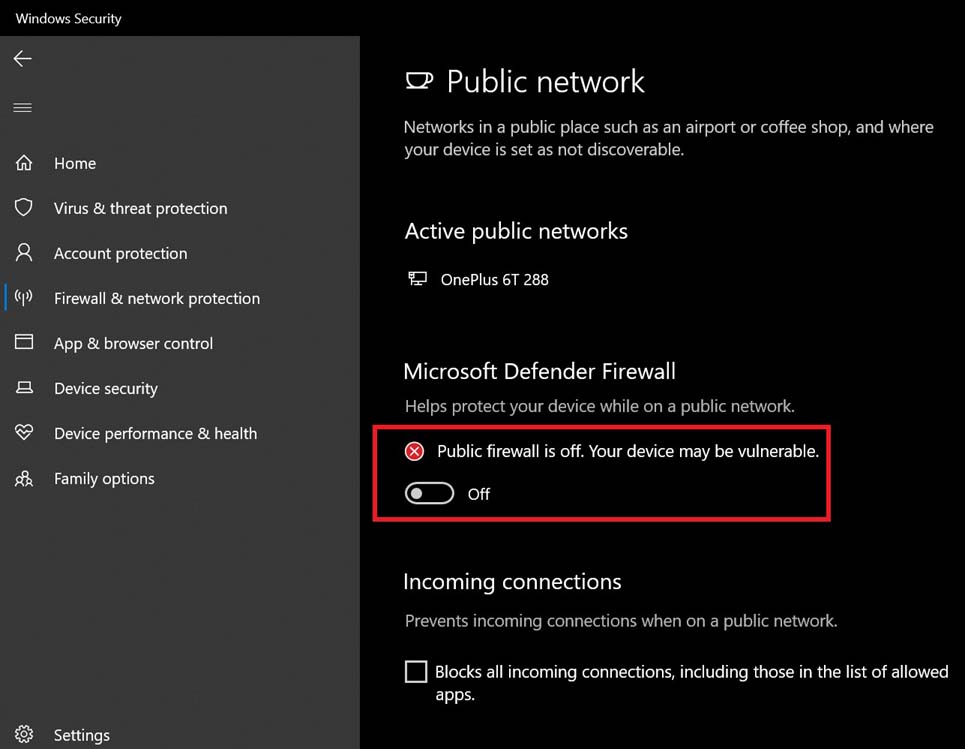
- Under that, there will be an option Microsoft Defender Firewall
- Click the toggle beside it to disable it

- As you can see a message mentions that the PC is now vulnerable as Defender has been turned off
You can immediately restart the PC and then enable the Defender program once again. The steps will just the same as above.
So, if you are facing lag in Windows Defender scan on your PC, and a lot of hard disk drive and CPU is being utilized, then follow this guide to fix that up.
Next Guides,
- How Much Will it Cost in India for Nvidia GeForce RTX 3070/3080/3090
- Fix: Adobe Problem Reading Document Error Code 109
- Attempted Write to read-Only Memory in Windows 10
