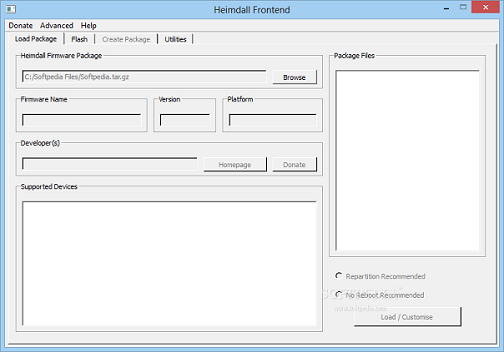
In order to flash Samsung Stock Firmware on Samsung Galaxy Devices, most of the users and developers prefer Odin Flash Tool. It’s worth mentioning that the Odin tool has been developed by Samsung but it works only on the Windows platform. Odin isn’t compatible with the MAC and Linux platforms. Whereas the Heimdall Flash Tool is compatible with all the platforms and versions. That’s a huge benefit for all those users who have Mac or Linux systems. Here in this guide, we’ll share with you links to Download the Heimdall Flash tool to flash Firmware on Samsung Galaxy devices easily with all steps.
But before going to the topic, a special thanks and credits to the glassechidna.com.au developers team for developing such a great tool for all platforms. Now, you may ask what is Heimdall and how it works…… Let’s take a look at the description and compatibility features of Heimdall.
Page Contents
What is Heimdall?
Heimdall is available for your Windows, MAC, and Linux platforms. This is a cross-platform open-source program that is used to flash firmware files for Samsung Galaxy smartphones. If you’re the Odin flash tool user, you can download this tool for your computer platform and you will feel the difference. If you’re a developer then Heimdall will help you to go with the Android rooting programming concept easily.

How Does It Work?
When you execute the application after connecting your Samsung device via a USB cable, Heimdall interacts with software running in the devices. This mainly communicates with the Samsung protocol. The low-level USB in Heimdall is managed by the popular open-source USB library, libusbx.
Why Heimdall Is Better Than Odin?
Apart from being slow and basically unreliable, the ODIN Flash Tool only runs on Windows systems. Additionally, Odin is a sort of ‘leaked software’ that is not officially supported by Samsung and is freely available online. However, the ODIN tool is well understood by the community at large that can be a reason for Odin’s popularity.
Whereas there is another main reason that the Odin flash tool is not compatible with MAC and Linux platforms. But Heimdall is compatible with all platforms. Another advantage of the Heimdall tool is that the Odin tool has leaked software that is not supported by some of the Samsung devices sometimes. This may occur as an error or bootloop issue. So, better than skipping it to use Heimdall. You can say that it’s an Odin tool alternative.
How Android Devices Get Bricked During Flashing?
Well, there can be several reasons behind a device bricking issue while flashing firmware or any other custom third-party file. One of the main reasons is that whenever users try flashing any incompatible file or try flashing any corrupted file. Second, an improper flashing method or skipping any major step can obviously lead to device bricking or bootloop issues whatsoever.
Whereas shutting down the PC/mobile device occasionally, accidental removal or disconnection of the USB cable that you’re using for flashing the file to your device, unsupported flash file format, or even not reliable flashing tools. Additionally, faulty USB ports, corrupted or missing USB drivers on the PC, damaged or loose USB cable, low quality USB cable, etc can be some other possible reasons in specific scenarios.
Which Platforms Support Heimdall?
All three major platforms are officially supported such as Linux, Mac OS X, and Windows (XP, Vista, 7, 8, 8.1, 10, 11, etc.)
Heimdall Tested List Of Devices (Official)
The Heimdall application has been tested officially for the following devices. However, some other device models or a group of specific chipsets for Galaxy devices can also be compatible with the Heimdall flash tool.
- GT-I9000
- GT-I9100[T]
- GT-I9300
- GT-I9505
- SGH-I727
- SGH-I777
- SGH-I927
- SGH-I797
Is Heimdall Safe Than Odin?
Both of these are flashing firmware tools developed for Android devices. The developers have tested this application with so many devices. However, any flashing software may be harmful if you used it incorrectly. Therefore before executing the application please read the correct instructions.
You need to connect your device properly to your PC before executing the application. This may cause a recoverable error while you are running with Heimdall.
Follow these instructions before downloading Heimdall……

Steps To Install Drivers:
- Put your device into download mode and plug it in.
- Run zadig.exe included in the Drivers subdirectory.
- From the menu choose Options > List All Devices.
- From the USB Device list choose “Samsung USB Composite Device”.
- Then press “Install Driver”, click on “Yes” to the prompt and if you receive a message about being unable to verify the publisher of the driver, click on “Install this driver software anyway”.
- You’re Done.
Steps To Uninstall Drivers:
- Put your device into download mode by pressing and holding the Volume Down + Home + Power key.
- Plug your phone into your PC.
- Open up Device Manager on your PC (Control Panel > System > Device Manager).
- Under “Libusb (WinUSb) devices” right-click on “Samsung USB Composite Device” and choose Properties.
- Go to the Driver tab and select Update Driver.
- Choose to browse your computer for the driver.
- Choose to pick from a list of devices drivers on your computer.
- Pick the original Samsung Composite driver, press Next and then follow the prompts.
- Done. Enjoy!
For Apple iOS Devices Users:
Pangu 8 is one and only Apple device rooting software for iOS 8 running devices. You can use Pangu 8 to jailbreak your iOS devices successfully. It’s best that you get the necessary guides related to Pangu 8. Click Here for More information.
If you are iOS 8.1.1 and iOS 8.1.2 user, Taig can be downloaded to jailbreak your device. Because Pangu 8 will no longer work for jailbreak iOS 8 latest versions. Download Taig and jailbreak your device, also follow TaiG instructions properly to avoid jailbreak errors. Follow our recommended website for the successful jailbreak process.
If you have an Apple device running on iOS 7.1.2 / iOS 7.1.1 / iOS 7.1.0, we recommend downloading Pangu for jailbreaking your devices.
Maybe Pangu will not support all Apple Devices. We recommend using jailbreak complete installer to your device to get Cydia successfully. Download from here – Download Cydia Installer.
Download Heimdall Flash Tool
You can download the tool from the link given below for your specific platform.
Download Heimdall Tool for Linux
Download Heimdall Tool for Mac OS X
Download Heimdall Tool for Windows
Important Notice:
- For Windows Heimdall Tool, you must have to download and install the Microsoft Visual C++ 2012 Redistributables on your computer.
- For Linux Heimdall Tool frontend usage, you must install the command line package on the PC.
How to Flash using Heimdall Tool on Mac
Now, here we will gonna guide you How to Flash using Heimdall Tool on Mac.
The main reason for using the Heimdall flash tool on Mac or Linux is that the Odin flash tool supports Windows OS only. So, macOS users can easily follow this guide to install the stock firmware or root on their Samsung devices by using the Heimdall flash tool. Thanks to RandomAwesomeGuy (XDA member) for sharing this guide with the download link.
Use Command Line on Terminal for Heimdall
- The terminal is located under:
Applications/Utilities/
- When the terminal loads up, use Heimdall via the below command:
heimdall <action> <action arguments> <common arguments>
Here are a list of all the Actions/Arguments:
- Common Arguments:
[–verbose] [–no-reboot] [–stdout-errors] [–delay <ms>]
- Action: flash
- Arguments:
–repartition –pit <filename> [–factoryfs <filename>]
[–cache <filename>] [–dbdata <filename>] [–primary-boot <filename>]
[–secondary-boot <filename>] [–param <filename>] [–kernel <filename>]
[–modem <filename>] [–normal-boot <filename>] [–system <filename>]
[–user-data <filename>] [–fota <filename>] [–hidden <filename>]
[–movinand <filename>] [–data <filename>] [–ums <filename>]
[–emmc <filename>] [–<partition identifier> <filename>]
OR:
[–factoryfs <filename>] [–cache <filename>] [–dbdata <filename>]
[–primary-boot <filename>] [–secondary-boot <filename>]
[–secondary-boot-backup <filename>] [–param <filename>]
[–kernel <filename>] [–recovery <filename>] [–efs <filename>]
[–modem <filename>] [–normal-boot <filename>] [–system <filename>]
[–user-data <filename>] [–fota <filename>] [–hidden <filename>]
[–movinand <filename>] [–data <filename>] [–ums <filename>]
[–emmc <filename>] [–<partition identifier> <filename>]
- Description: Flash firmware files to your phone.
Warning!
- Action: close-pc-screen
- Description: Attempts to get rid of the “connect the phone to PC” screen.
- Action: download-pit
- Arguments: –output <filename>
- Description: Downloads the connected device’s PIT file to the specified
output file. - Action: detect
- Description: Indicates whether or not a download mode device can be detected.
- Action: dump
- Arguments: –chip-type <NAND | RAM> –chip-id <integer> –output <filename>
- Description: Attempts to dump data from the phone corresponding to the
specified chip type and chip ID.
Note:
- Action: print-pit
- Description: Dumps the PIT file from the connected device and prints it in
a human-readable format. - Action: version
- Description: Displays the version number of this binary.
- Action: help
- Description: Displays this dialogue.
You can easily get all of the actions/arguments in Terminal by typing the below command:
heimdall
Example Guide: To Install CWM Recovery
Follow the below steps:
- First of all, you will need to download the zip file ‘RootGalaxyNote10.1’ from the link.
- Once downloaded, extract the file on your Mac.
- Inside the folder, you will find the “HighOnAndroidCWMRecoveryGTN8000.tar” file.
- Just extract (untar) it as well.
- Now, you will see a file name called “recovery.img”.
- Reboot your handset in the download mode by pressing & holding Volume Down + Power and plugging it into your PC.
- In the Terminal window, type the following command:
heimdall detect
- You will get a message “Device detected”.
- Then type the following command
heimdall flash --recovery <path to the recovery.img>
Like, heimdall flash –recovery /Users/rag/Desktop/recovery.img
- Once done, your device will boot into CWM Recovery mode.
- That’s it.
However, if the above method won’t work or the Samsung Kies is installed on your handset, type the following commands into the terminal.
sudo kextunload -b com.devguru.driver.SamsungComposite

sudo kextunload -b com.devguru.driver.SamsungACMData

sudo kextunload -b com.devguru.driver.SamsungACMControl
We hope this guide was helpful to you. For any support, you can go to the source link below and ask for additional help.
Source: XDA Developers
