Amlogic Flash Tool is one of the popular and reliable applications for Windows OS that allows users to easily flash the stock firmware on any of the Amlogic chipset-equipped devices. It offers kernel/recovery flashing, porting TWRP recovery, flashing zip files, taking backups, etc. If you’re also using a device with an Amlogic chipset and want to flash Stock ROM or recovery then you can Download and Install Amlogic Flash Tool on your PC.
The tool comes with a portable application to run easily without even installing it on the computer. So, you’ll get a hassle-free user experience with a very easy-to-use application interface whatsoever. Just connect the handset with the PC, load the .img file for the firmware, and start flashing it using this tool. Keep in mind that it only supports Amlogic chipset devices.
Also Read

Page Contents
Features of Amlogic Flash Tool
Amlogic Flash Tool is created and distributed by one of the XDA Developers Ricky Divjakovski for sharing it for free. Here we’ve mentioned to you a couple of highlighted features of this tool that you should check out.
1. Portable Application
The tool comes with a portable application that doesn’t require to install on your computer. Simply run the portable application and start using the tool. Make sure to download and extract the tool on your computer then open the AMLogicFlashTool.exe file to launch the application.
2. Flash Firmware
It basically allows you to install or flash the Stock ROM on any of your Amlogic chipset-equipped devices. All you need is to get the correct firmware file according to your device model which is really important. An incorrect firmware file for an incorrect device model can easily damage the system.
Simply get the latest and correct firmware file for your Amlogic device model > Install the Amlogic Driver on the PC > Launch the Amlogic Flash Tool > Click on the Connect button > Enter the IP address of the handset > Click on Connect again > Load the .img file > Click on Flash to start installing the firmware.
3. Supports Amlogic Chipset
Make sure that the Amlogic Flash Tool only supports Amlogic chipset-enabled devices. Once you’ve installed the Amlogic Driver on the computer, the Amlogic tool will automatically detect the connected device and you’ll be ready to rock.
4. Supports .img Format
It supports the .img file format for flashing/installing stock firmware on any of the Amlogic chipset devices. You’ll be able to use the tool on any of your Windows OS running computers from Windows XP to Windows 11 (32-bit or 64-bit).
Download Link:
- Amlogic_Flash_Tool_v3.1.0
- Amlogic_Flash_Tool_v3.5.0
- Amlogic_Flash_Tool_v3.5.1
- Amlogic_Flash_Tool_v4.0.0
- Amlogic_Flash_Tool_v5.0.0
- Amlogic_Flash_Tool_v5.0.8
- Amlogic_Flash_Tool_v5.0.9
- Amlogic_Flash_Tool_v5.1.2
- Amlogic_Flash_Tool_v5.1.5
- Amlogic_Flash_Tool_v5.2.0
- Amlogic_Flash_Tool_v5.3.0
- Amlogic_Flash_Tool_v5.3.1
- Amlogic_Flash_Tool_v5.5.0
- Amlogic_Flash_Tool_v6.0.0 (Latest)
Disclaimer: GetDroidTips won’t be held responsible for any kind of issue that may happen on your handset while/after following this process. Do this at your own risk. Flashing boot.img, recovery.img improperly may brick your device. So, it’s highly recommended to take a backup of your important data before doing anything.
Steps to Install Amlogic Flash Tool on your PC
- First of all, make sure to download and install the Amlogic-Driver.zip on your PC. [Amlogic USB Burning Tool is also a great alternative to Amlogic Flash Tool]
- Now, download and extract the Amlogic Flash Tool (zip) on your computer.
- Head over to the extracted folder and double-click on the AMLogicFlashTool.exe file to launch it.
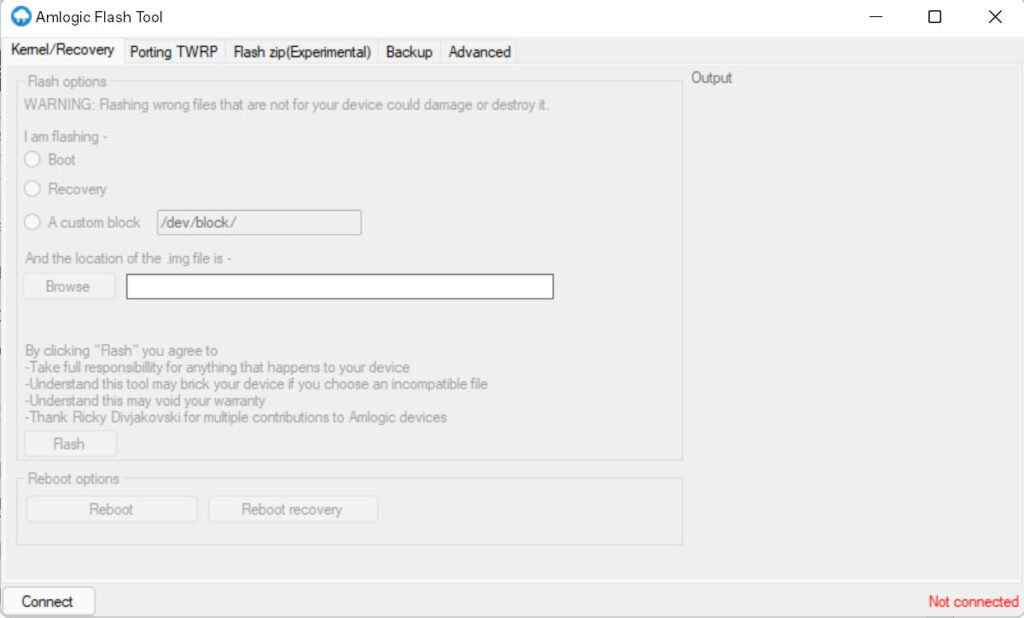
- Once the tool is launched, you can see the following user interface.

- Click on the Connect button > Now, enter the IP Address of your connected Amlogic device. [You can find out the IP address from Settings > About > IP of your Amlogic handset]
- Next, click on the Connect button again > Once your device is connected, make sure to check whether the status is showing Connected in green color at the bottom right corner of the interface or not.
- From the Kernel/Recovery tab, click on either Boot or Recovery under the ‘I am flashing’ text according to your preference.
- Now, you’ll have to click on the Browse button > Locate the .img file from your PC where you’ve saved the stock firmware.
- Make sure to select the file and then click on Open > Next, click on the Flash button.
- This will start the firmware flashing process. So, wait for some time until it gets completed.
- Once the firmware flashing process is done, you’ll see a SUCCESS! message on the right side of the interface.
- You’re done. Now, close the flash tool, disconnect the USB cable, and restart the handset.
- Enjoy!
That’s it, guys. We assume this guide was helpful to you. For additional queries, you can comment below.
