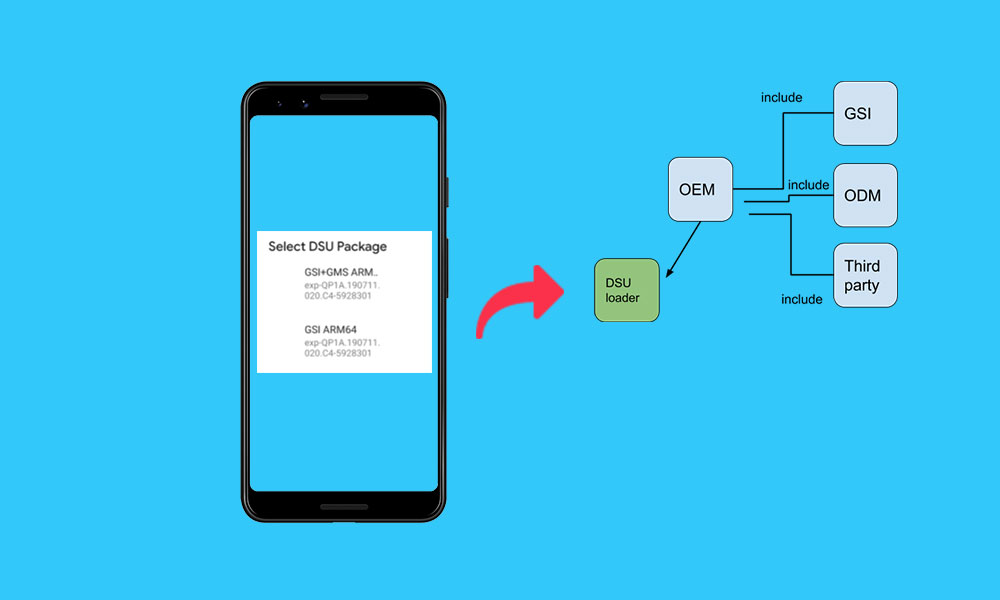
Previously it was quite tough and time-consuming for the OEMs and chipset manufacturers to complete the required changes in the software update then they could roll out the specific update to the eligible devices via OTA. Now, if you’re one of the Android device users and don’t want to wait further to receive the official stable update by OEM, you can easily Install GSI on Android Phone Without Fastboot Commands via DSU Loader.
Well, things have changed a lot and due to the Project Treble support, Google has made it easier for the OEMs to push updates faster. That means OEMs only have to take care of the framework part as Google has separated the framework & vendor implementation a couple of years ago. Now, OEMs have to boot a signed Generic System Image (GSI) file to check other aspects. That’s why the GSI ROM builds are now common for Android.
Although it was meant for developers only, most of the early Android testers or even advanced Android users can now easily flash the GSI build on their handsets depending on the latest Android OS version. The Project Treble supports Android 8.0 Oreo or higher version running devices. It also providing benefits to those Android model users which aren’t gonna receive official Android version updates anymore. Cool! Isn’t it?

What is DSU Loader (Dynamic System Updates)?
Android 11 introduced the DSU Loader, a tool available in the device’s developer options that lets you download, install, and manage GSIs entirely through the system’s UI. Although the feature was already implemented in Android 10, now it’s been more stable and working properly. It not only downloads the new GSI build on your device but also creates a new dynamic partition, loads up the GSI in the created partition, and boots the GSI too.
DSU (Dynamic System Updates) also allows you to easily switch between the current system image and the GSI build seamlessly so that you can try the GSI build even without fully formatting your device or taking any unknown risk of corruption in the current system image. DSU usually depends on the Android Dynamic Partition feature that requires a signed GSI by Google or the device manufacturer as a trusted system image.
So, if you don’t like the new Android OS or the GSI build, you can easily go back to the stock ROM. It’s also worth mentioning that the device manufacturer provides the DSU feature on the device model respectively. So, you should refer to your device manufacturer’s support page for the availability of your particular model. As of now, Google has enabled DSU on its Pixel 3 and other newer devices since the Android 10 Beta 4 was released.
Steps to Install GSI on Android Phone Without Fastboot Commands using DSU Loader
GSU Loader basically flashes the GSI build on the device temporarily on a newly created dynamic partition without even touching the system/boot partition whatsoever to test out the ROM easily. Thanks to Google for implementing the necessary option with Android 10 or higher devices to have logical partitions that can easily or dynamically resize itself during boot.
So, if your device is running on Android 10 or higher then you can easily install GSI using the DSU Loader. Now, without wasting any more time, let’s jump into the guide below.
Warning: You don’t need to download the GSI file manually because the DSU Loader will do the job for you. However, you may require an unlocked bootloader on your device to use this feature right now. In the upcoming future, Google is planning to remove the unlocked bootloader requirement. GetDroidTips won’t be held responsible for any kind of issue or damage to your handset. You should know what you’re doing and proceed at your own risk.
- First of all, make sure to turn on Developer options on your device. Go to Settings > About Phone > Tap on Build Number for 7 times continuously to enable Developer options.
- Now, go back to the main Settings menu > Tap on System > Look for Developer options at the bottom of the page [The option may vary on some devices] > Tap on Developer options > Turn on the USB Debugging toggle.
- As mentioned above, you may also require an unlocked bootloader on your Android handset. If you haven’t, do it right now.
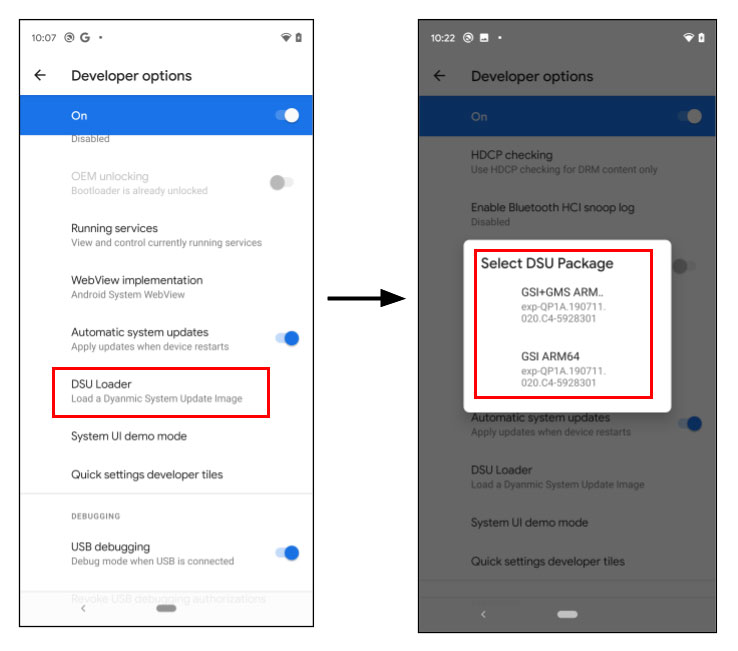
- Go to Developer options again > Scroll to the DSU Loader option. [Keep your device connected to the internet]
- Next, tap on DSU Loader, and the system will automatically start searching as well as gathering all the supported GSI ROMs for your specific device model. So, select your preferred one.

Please Note: You may see a couple of ROM packages such as GSI ARM64 and GSI+GMS ARM64 something like that. If you want Google apps pre-installed in the GSI build then make sure to select the GSI+GMS ARM64 package. If you don’t want Google apps then select the GSI ARM64 package.
- Once the GSI package is selected, it’ll start downloading on your handset automatically.

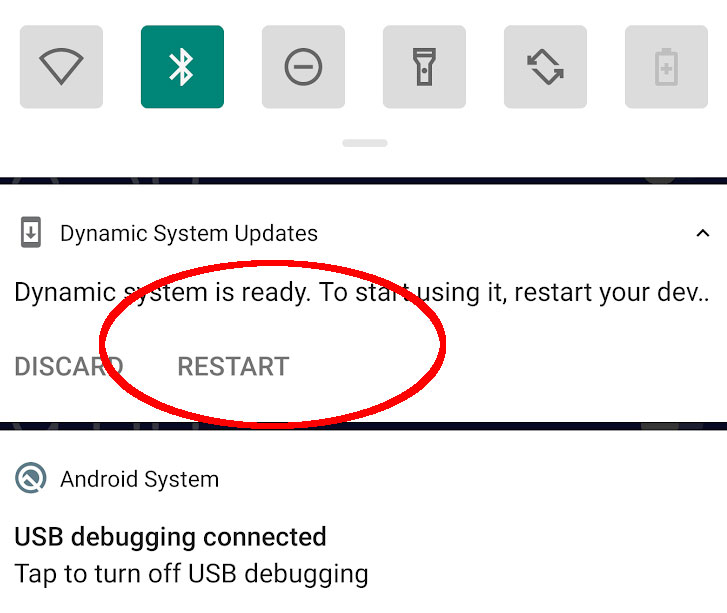
- After completing the download process, you’ll have to select Restart to boot your device into the newly installed GSI ROM easily.
- Enjoy!
Conclusion
This method is so simple and even a new user in the Android world can perform this task without any additional knowledge. It also decreases the chances of device bricking, stuck in the bootloop issue, etc. Whereas the adb & fastboot method is a conventional way to flash GSI builds on Android devices but it requires a little bit of patience and any wrong step can cause issues to your device or you may need to start over again.
That’s it, guys. We assume this guide was helpful to you. For further queries, you can comment below.
