Microsoft Windows operating system users often encounter several issues or errors which are quite common these days. Multiple users are receiving the Fatal Error C0000034 When Applying Windows Update or even after installing the pending Windows update which is very much frustrating. This particular error appears whenever the system startup fails on Windows 8.1 and Windows 10 version. If you’re also facing the same problem, make sure to check out this troubleshooting guide completely to fix it.
The mentioned error says something like “Fatal error C0000034 applying update operating xxx of xxxxx (xxxx)”. It doesn’t mention anything specific about the error or the reason behind it. But according to a couple of reports, it seems that corrupted or missing Windows update files, bad sector data in the hard drive, issues with the antivirus program, etc can cause several issues.
Also Read
Page Contents
Fix: Fatal Error C0000034 When Applying Windows Update
Now, without further ado, let’s jump into it.
1. Perform Startup Repair
- First of all, try simply restarting your computer, and then check for the error again.
- If the startup error appears again on your computer, then you can choose the Launch Startup Repair option. [You may need a Windows installation disc or USB drive to get the module interface]
- So, whenever the Startup Repair screen starts, click on Cancel.
- Now, select Don’t Send > Click on View advanced.
- Click on Command Prompt at the bottom of the screen.
- Next, type the following command and press Enter:
%windir%system32notepad.exe
- It will open the Notepad application.
- Once the Notepad opens, click on File > Select Open.
- Change the type of file format from .txt to All Files.
- Now, go to installed Windows C: drive [It may vary for your computer]
- Look for winsxs folder and find the pending.xml file.
- Simply copy and paste it into the same folder.
- Now, open the original pending.xml file [May take a while to open]
- Press Ctrl + F keys on your keyboard to search the following:
0000000000000000.cdf-ms
- Next, delete the below text:
<Checkpoint/>

<DeleteFile path="SystemRootWinSxSFileMaps_0000000000000000.cdf-ms"/>

<MoveFile source="SystemRootWinSxSTempPendingRenamese56db1db48d4cb0199440000b01de419._0000000000000000.cdf-ms" destination="SystemRootWinSxSFileMa_0000000000000000.cdf-ms"/>
- Press Ctrl + S to Save the file > Close the Command Prompt.
- Finally, restart the computer to apply changes.
If this method didn’t work for you, try the next method.
2. Perform Clean Boot
By performing a clean boot on your Windows 10 computer should come in handy if there is any third-party app or program causing issues to you.
- Click on the Start Menu > Type System Configuration.
- Click on it from the search result.
- Now, go to the Services tab > Select the Hide all Microsoft services checkbox.
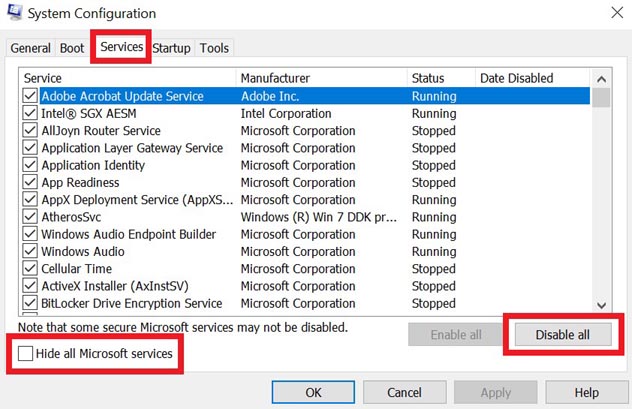
- Then click on Disable all.
- Click on Open Task Manager from the Startup tab.
- Make sure to select all items in the Startup tab and click on Disable one by one.
- Close the Task Manager and restart your computer.
3. Run Windows Update Troubleshooter
If there is any Windows update-related error or issue appearing on your system and somehow the Fatal Error C0000034 When Applying Windows Update triggers due to this, make sure to run Windows update troubleshooter.
- First of all, click on the Start Menu.
- Go to Settings > Select Update & Security.
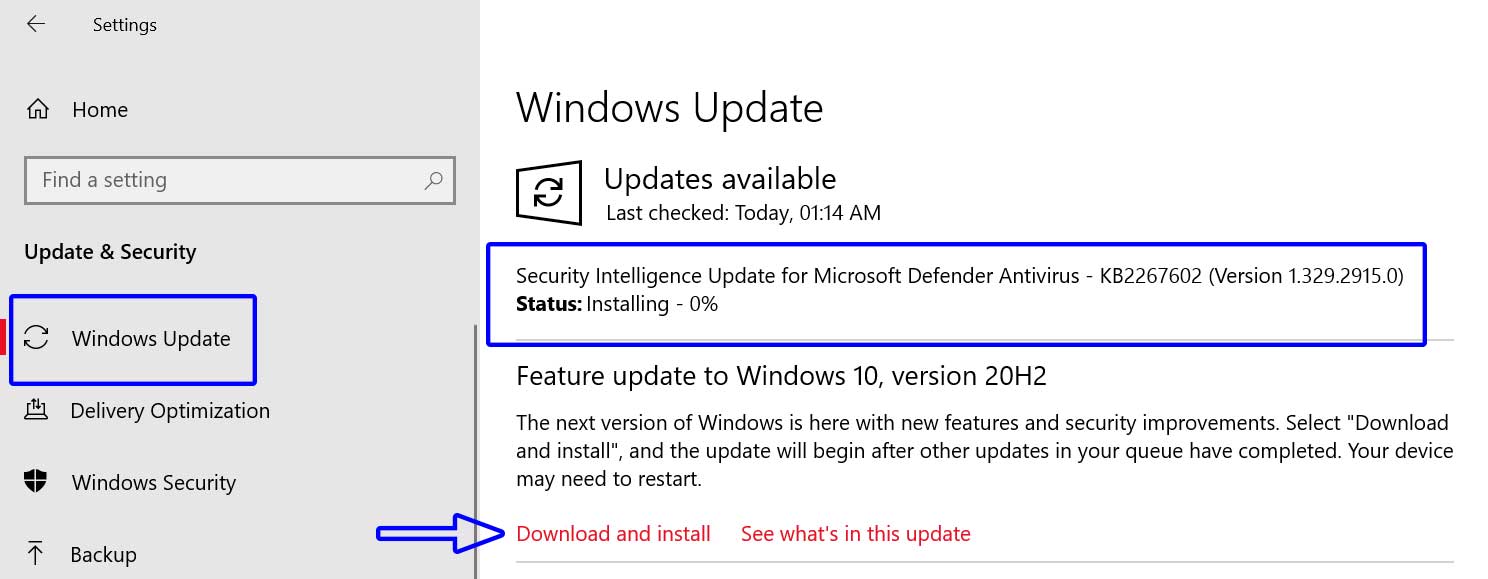
- Click on Check for updates. If there is no update available for you, proceed to the next steps.
- Select Troubleshoot > Click on Windows Update Troubleshooter.
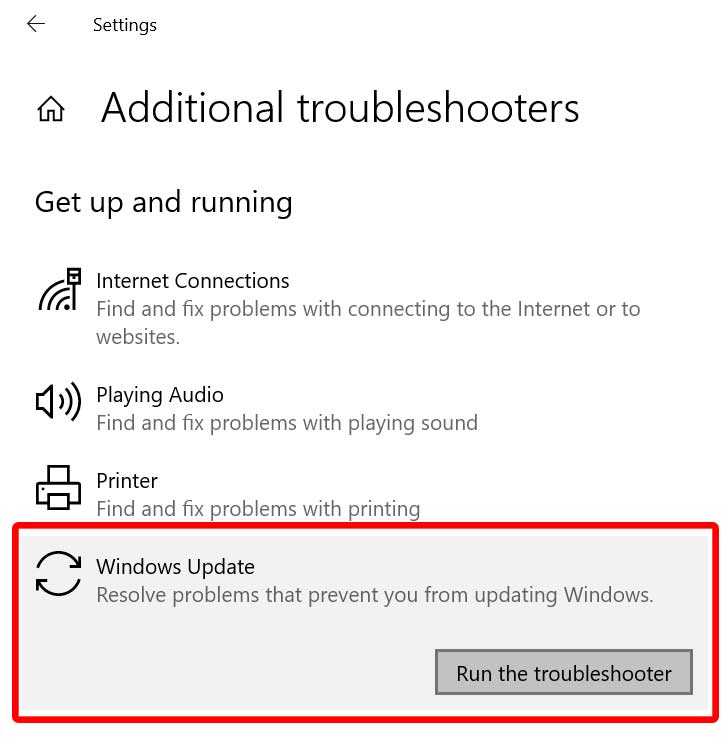
- Simply run it and wait for the process to complete.
- Once done, restart your computer to check if that helps you or not.
4. Refresh Windows Update Components
Before following this particular method, make sure to create a system restore point for a safety backup if something goes wrong.
- Click on the Start Menu > Type cmd.
- Right-click on the Command Prompt > Select Run as administrator.
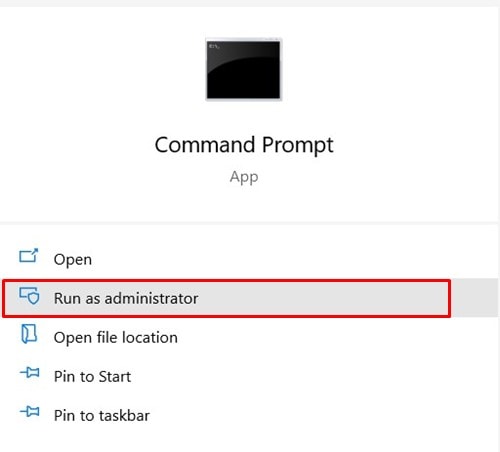
- If prompted by UAC, click on Yes to allow administrator access.
- Now, type the following commands and hit Enter one by one to execute:
net stop bits
net stop wuauserv
net stop appidsvc
net stop cryptsvc
- Once done, reboot your computer and check for the error.
5. Disable Windows Firewall
- Click on the Start Menu (Press Windows key).
- Now, type in Firewall and click on Windows Defender Firewall from the search result.
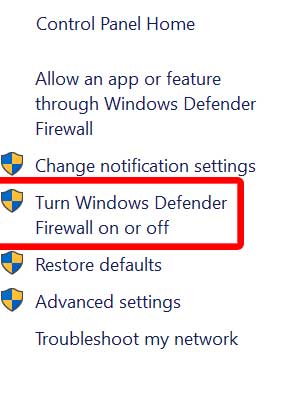
- Click on Turn Windows Defender Firewall on or off from the left pane.
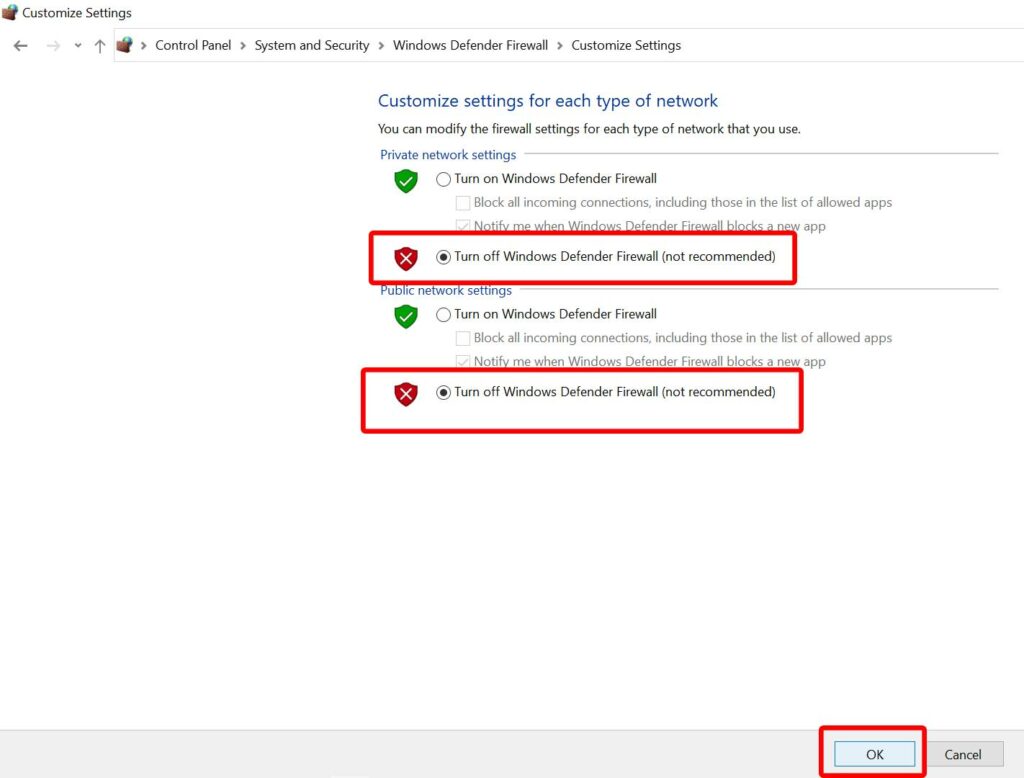
- Next, select Turn off Windows Defender Firewall (not recommended) for both the Public and Private options.
- Once selected, click on OK to save changes.
It should resolve the Fatal Error C0000034 When Applying the Windows Update issue on your Windows 8.1 or Windows 10. But if this doesn’t help you, follow another method.
6. Turn Off Windows Security Protection
- Press Windows + I keys to open up the Windows Settings menu.
- Click on Update & Security > Click on Windows Security from the left pane.
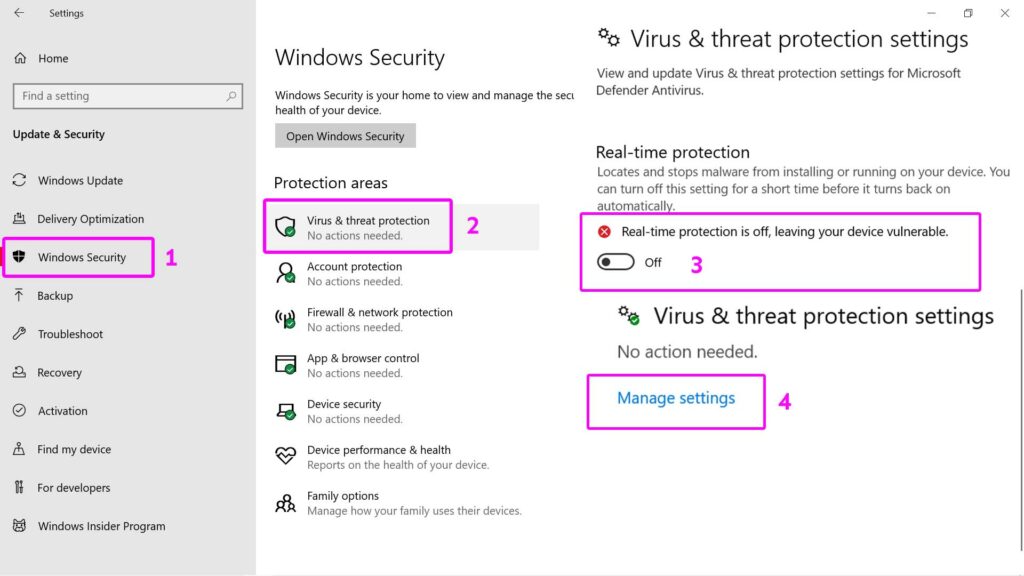
- Go to Virus & threat protection from the right pane.
- Select Manage settings from the Virus & threat protection settings.
- Now, turn off the Real-time protection toggle.
- If prompted by UAC, click on Yes to allow admin access.
7. Use DISM Tool
The DISM (Deployment Imaging and Service Management) tool is useful to repair the system image that may cause Windows update or startup related errors whatsoever. To do that:
- Click on the Start Menu > Type cmd.
- Right-click on the Command Prompt from the search result.
- Select Run as administrator > If prompted by UAC, click on Yes for admin access.
- Now, type the following command and hit Enter:

Dism /Online /Cleanup-Image /RestoreHealth
- Have some patience until the process completes.
- Finally, restart your computer and check whether the error has been fixed or not.
8. Run CHKDSK
Checking disk utility on your Windows 10 system via the command prompt is useful enough to simply check for the errors or bad sectors in your hard drive.
- Click on the Start Menu > Type cmd.
- Right-click on the Command Prompt from the search result.
- Select Run as administrator > If prompted by UAC, click on Yes.
- Now, type the following command and hit Enter to execute it:

chkdsk C: /f /r /x
- The process may take a while depending on the disk size.
- Once done, reboot your computer.
Note: Here the parameters for this command are as follows:
- /f option will attempt to fix any errors if found.
- /r option will locate for bad sectors and recovery any readable information.
- /x option will force the volume that you’re about to check to be dismounted before the utility begins a scan.
- If the C: drive is in use, you can type Y to run a scan when your PC restarts.
That’s it, guys. We assume you’ve found this guide useful. For further queries, you can comment below.
