For maintaining a swift and secure working experience, it is essential to download and install all the latest Windows updates. Windows 10 is by far one of the best OS versions, and it keeps coming up with new improvements, add-ons, and smoother interface. However, lately, a lot of Windows 10 users have been saying that while they try to install any update, they receive the Error Code 0x8024200D.
Also Read
Page Contents
How to Fix the Windows 10 Update Error 0x8024200D?
The said error occurs both on Windows 10 and old versions like Windows 7 or Windows Vista. It usually happens when some updated files are missing or corrupted. However, it isn’t a troublesome deal, and you can resolve it quickly in no time. Have a look at the guide below and learn “How to fix the Windows 10 Update Error 0x8024200D”?
FIX 1: Use the Windows Update Troubleshooter:
If you are one of those users who have been experiencing the “Windows 10 Update Error 0x8024200D,” then the first solution you can try is using the Windows Update Troubleshooter. For doing so, follow the steps given below:
- Firstly, download the Windows Update Troubleshooter for Windows 10 from the official website. Install it into your system.
- Now double-click on the downloaded file (WindowsUpdate.diagcab), to run the troubleshooter, and then click on Next.
NOTE: In case you see a message stating. “A more recent version of Windows Update troubleshooter available, please click below to run it,” make sure you proceed with the latest version.![]()
- On the following screen, again click on Next. (Now the troubleshooter will check the latest updates) then, click on Apply this fix option, and it will begin the required process in the background.
Once done, check whether the Error Code 0x8024200D got resolved or not.
FIX 2: Restart the Windows Update service:
The Windows 10 Update Error 0x8024200D can also be a result of some glitch with the Windows Update service. Here to resolve the situation, the best solution is to restart the Windows Update service. For doing so, follow the steps given below:
- Firstly, launch press Windows + R altogether and launch the RUN dialogue box.
- Now inside the empty text box, type services.msc, click on OK, and it will launch the Service window on your screen.
- Now from the list of options, scroll down and locate Windows Update.
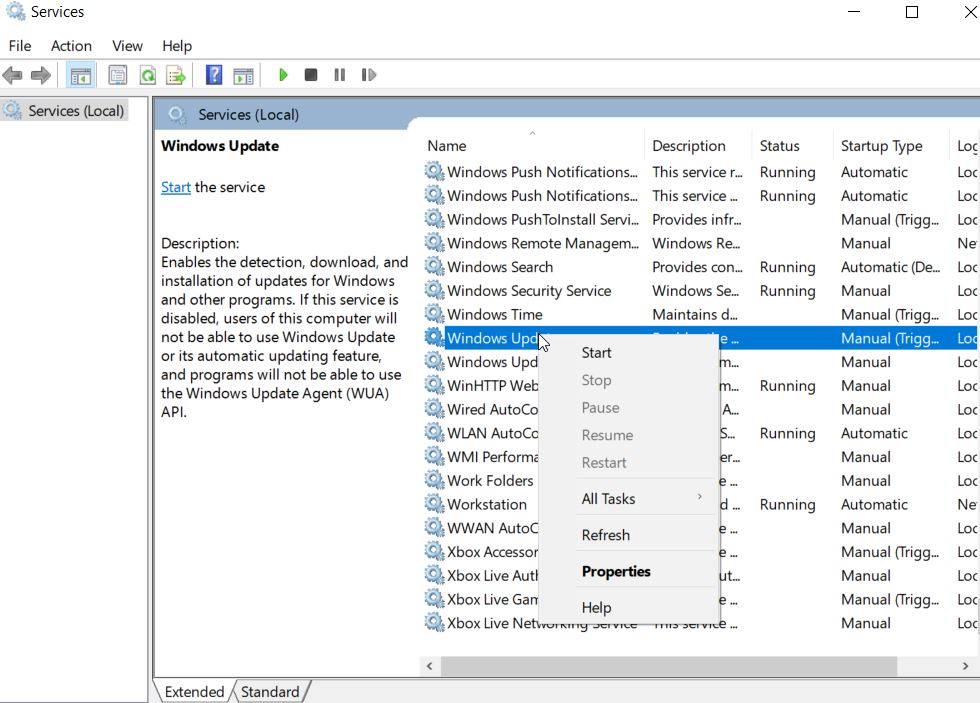
- Right-click over Windows Update and select Stop. (If the current status is not “Running,” you can skip this step).
- Now press Windows + E altogether, and it will launch the File Explorer window on your screen.
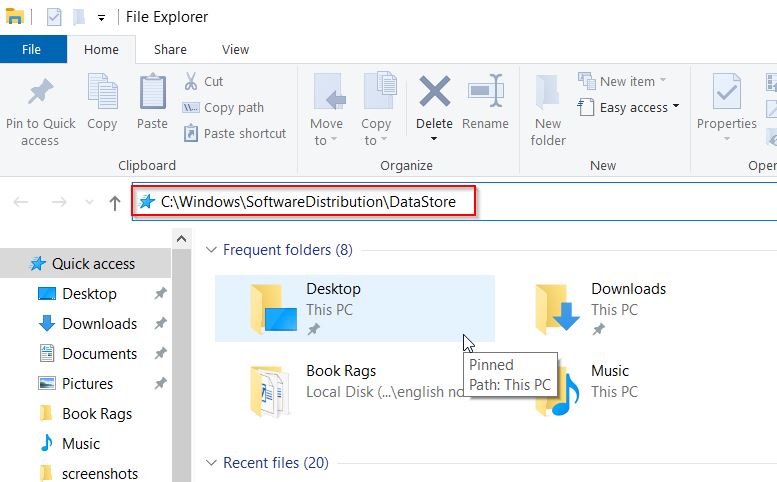
- On the next window, type C:\Windows\SoftwareDistribution\DataStore in the address bar and then press Enter. You will be redirected to the DataStore folder.
- Inside the DataStore Folder, delete all the existing files. Simply press Ctrl + A and then press the Delete button on your Keyboard.
- Now again, on the File Explorer address bar, type C:\Windows\SoftwareDistribution\Download, press Enter and it will open the Download Folder.
- Here press Ctrl + A and then press the Delete button on your Keyboard and delete all the files inside the Download Folder as well.
- Again, navigate to the Service Window, go to the option Windows Update, right-click over it and select Start.
- Lastly, check whether you can perform Windows update again or not.
FIX 3: Run System File Checker:
As we discussed earlier, the Windows 10 Update Error 0x8024200D can be a result of missing or corrupt update files, so the best solution here is to run System File Checker. Doing so will scan for the corrupted files and will resolve it on its own.
Follow the steps given below:
- Firstly, launch press Windows + R altogether and launch the RUN dialogue box.
- Now inside the empty text box, type cmd and then click on OK. It will launch the Command Prompt Window. Though make sure you launch it with administrator access.
- Now inside the Command Prompt window, type or Copy + Paste the following command and then press Enter.
DISM.exe /Online /Cleanup-image /Restorehealth
- The scanning process might take a while. Let it get completed on its own.

- Now type sfc /scannow and then press Enter.
- Again, wait for the scanning process to get completed.
- Once done, close the Command Prompt window, then again run the Windows update and check whether the Windows update issue got resolved or not.
FIX 4: Download the updates manually from Microsoft Update Catalog:
If none of the above-mentioned worked for you, then, at last, try to download the updates manually from the Microsoft Update Catalog and install it. For doing so, follow the steps given below:
- Firstly, go to the desktop search bar, type Windows Update, and open the relevant search result.
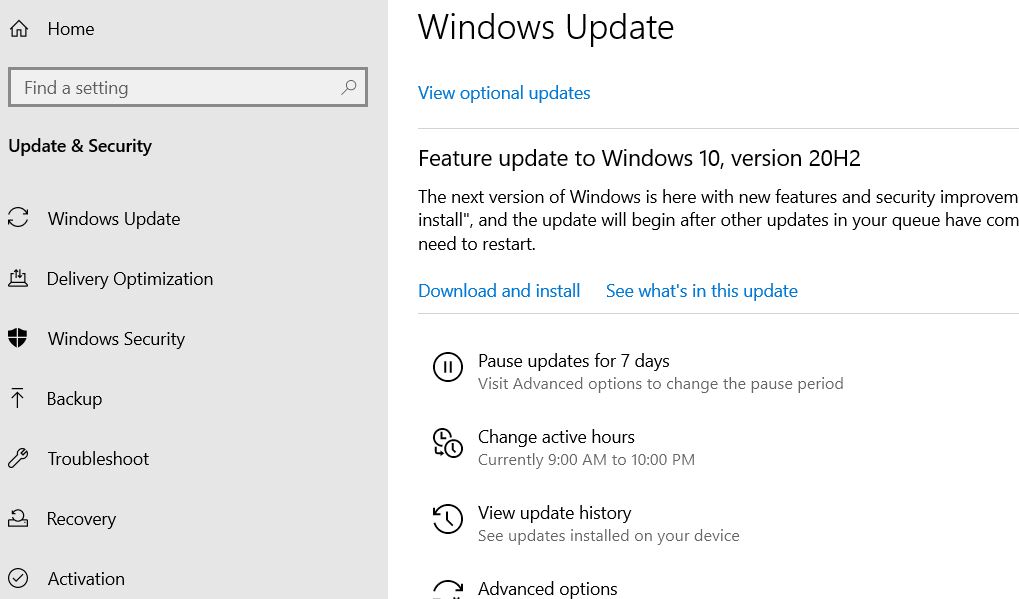
- Now on the right-pane menu, click on View update history and look for the updates you failed to install. If theirs is any failed update, you can further download and install it manually.
For doing the process manually, follow these steps,
- Firstly, launch press Windows + R altogether and launch the RUN dialogue box.
- Now inside the empty text box, type cmd and then click on It will launch the Command Prompt Window. Though make sure you launch it with administrator access.
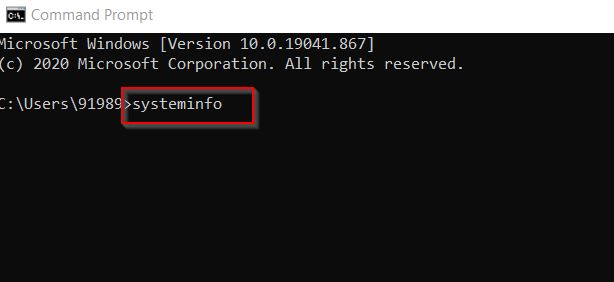
- Now inside the Command Prompt window, type systeminfo and then press Enter.
Note: Here, X64-based PC means your Windows OS is 64-bit, whereas X86-based PC means your Windows OS is 32-bit.
- Further, visit the Microsoft update Catalog official site.
- In the search bar, type the update number that you want to download and install, and then click on the Search button.
- Now from the list of options, locate the right update for your operating system, and then click on Download.
Note: Here, considering whether your Windows OS is 64-bit, consider, download the update name contains “x64-based”.
- On the next window, click on the download link. (Now it will start downloading the updates)
- Once downloaded, double-click on the file, follow the on-screen instructions and complete the installation process.
- Lastly, check whether you can perform the Windows update or not.
Windows update is one of the most crucial processes for a smooth user experience, and when you face an error related to the same, it can become really problematic and annoying. However, with the above-mentioned fixes, resolving the Windows 10 Update Error 0x8024200D is relatively easy and quick.
At the end of this article, we hope that you will find one or the other fix helpful for the Windows 10 Update Error 0x8024200D. If you have any queries or feedback, please write down the comment in the below comment box.
