In this guide, I will tell you how to enable and use Google Photos Face tagging on your devices. Normally, with every Android device, Google Photos is available for free to store photos. It even backups the media to its web server. Later users can browse their images from the browser. All smartphone users click photos every single day. It includes solo and Group Photos with friends or family.
When we have our friends with us ina a photo, we love to sort these photos into separate collections with name tags. It helps in easily finding the photo collection for any memorable event you attended with your friends. Now, Google photos provide this feature that allows users to manually tag their dear ones with whom they have a picture. I have put up the manual tagging process for both smartphones and PC. You can use them depending upon whichever platform you are using.
Related | How to Move Google Photos from One Account to Another
Page Contents
How to Enable and Use Google Photos Face tagging
First, you have to enable Face grouping to use manual face tagging.
- Launch Google Photos app
- Make sure that you have logged in to the app using your Gmail account.
- tap on the hamburger button
- Go to Settings > select Group Similar Faces
- Now tap on the toggle beside Face Grouping to enable it
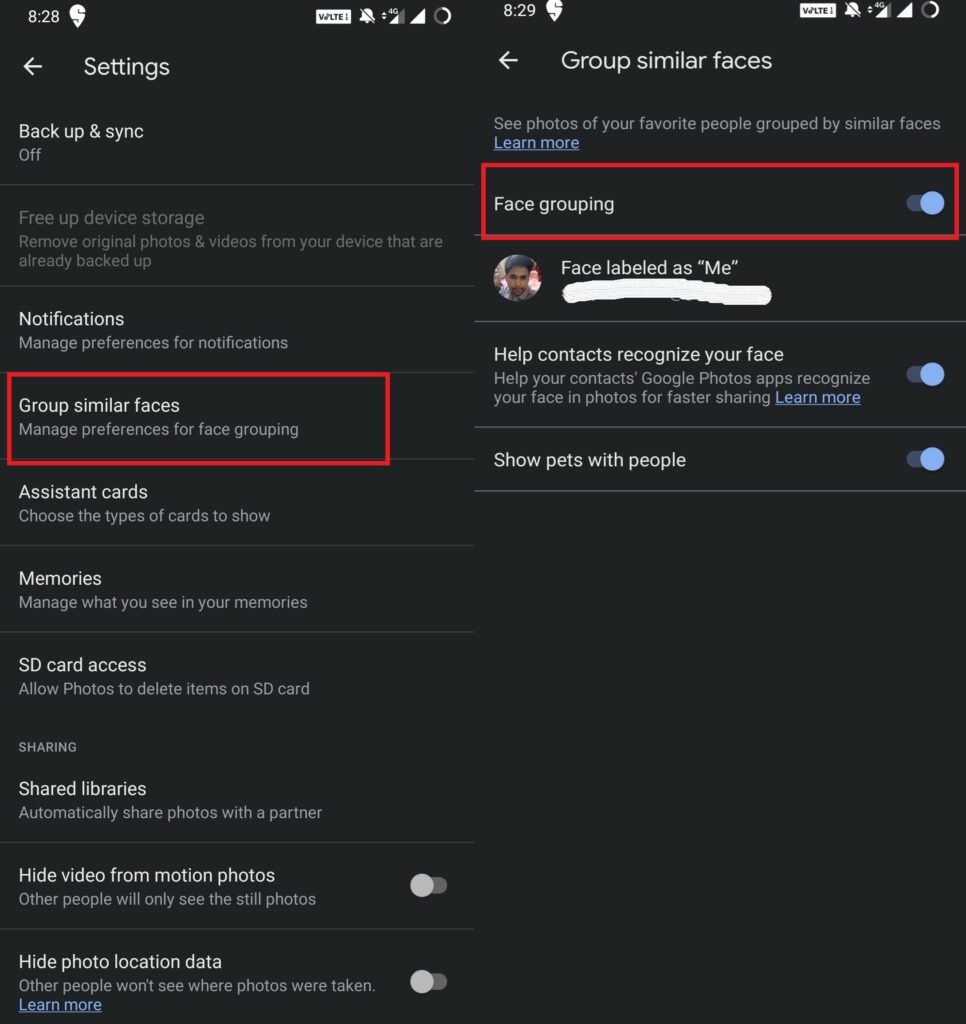
- If you wish to see/tag people with pets then keep the feature enabled or disable it.
Google Photos Face Tagging on Smartphone
- Go to the Photos App
- Tap on Albums
- Go to People & Pets
- You can see the photos of the people grouped under a folder with their name who are present in various pictures. For example, my own photos are grouped with my name Swayam Prakash.
- You have to name your friends so that their names can be displayed.
- For that, if you open a folder with no name tag on display, you should see an option Add A Name.

- Click on that to add a name.
How to Tag Someone in Photos App on PC
- Open up your PC
- Go to the Google Photos Web version.
- Select any Picture that you wish to tag
- Click on the info button on the image.
- If you see any photo with people that you may tag, you have to add their names
- On the info of any untagged image, you should see an option x Faces available to Add [x is the number of people in the photo who do not have a name tag yet]
- Click on it
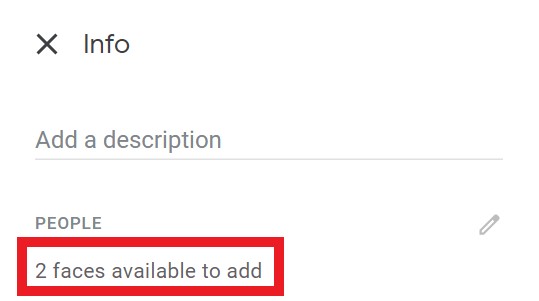
- Then the Edit Faces section will open up. The face of the people in the photo gets highlighted in a square box with + option. So, you can individually add the name of the people to tag them.

- If you have tagged the name of someone, then searching for them gets easier. All you need to type in their name and the images in which they will be present will show up.
Free Wallpaper | Download Sony Xperia 1 II Stock Wallpaper [Live Wallpaper Included]
So, this was all about enabling Google Photos Face Tagging manually on a smartphone or on a PC/Laptop. I hope that you’ve found the guide useful.
Read Next,
- How to Stop Google Photos From Automatically Uploading Screenshots
- Download Google Camera for Redmi 10X and 10X Pro
