Imagine you’ve just turned on your beloved Android phone. But instead of the familiar home screen, you’re greeted with a seemingly never-ending loop of the boot-up process. That’s right. Your phone is stuck in an Android boot loop!
What’s particularly challenging about a boot loop is that attempting to fix it can sometimes worsen the situation.
But fear not, Android users! With the proper knowledge and expert guidance, you can overcome this frustrating obstacle in no time. In this brief guide, we’ll show you how to fix your Android device when stuck in a boot loop.
Page Contents
- Part 1. What Causes the Boot Loop Issue on Android?
- Part 2. Remove and Reattach Phone’s Battery
- Part 3. Fix Android Boot Loop Permanently with One Click [Easy&Fast]
- Part 4. Remove SD Card to Fix Android Boot Loop
- Part 5. Fix Android Boot Loop with Factory Reset
- Part 6. Use CWM Recovery Mode to Fix Boot Loop on Android
- Conclusion
Part 1. What Causes the Boot Loop Issue on Android?
A boot loop is a frustrating and often bewildering experience for Android users. It’s when your device keeps restarting repeatedly, never making it past the initial boot-up sequence. This can happen for many reasons. Here are some of the major ones that are the culprit in most cases.
- Corrupt system files or partitions.
- Outdated or incompatible firmware/software updates.
- Faulty apps or malware.
- Issues with the device’s hardware, such as a damaged battery or power button.
- Failed attempts at rooting or modifying the device’s software.
- Overheating or other physical damage to the device.
But no matter the reason behind your Android boot loop, let’s see the methods to fix this issue once and for all.
Part 2. Remove and Reattach Phone’s Battery
You can perform a soft reset by removing and reinserting your Android phone’s battery. It has a high chance of resolving the boot loop problem. This is one of the simplest & most effective methods for getting your phone back up and running. And you don’t have to go through the hassle of data recovery.
Steps to Remove & Reattach Phone’s Battery
Follow these simple steps to fix the Android boot loop.
- Turn off your Android device. Then use a screwdriver and remove the back cover of your device.
- Remove the battery and wait for a few seconds before reattaching it.
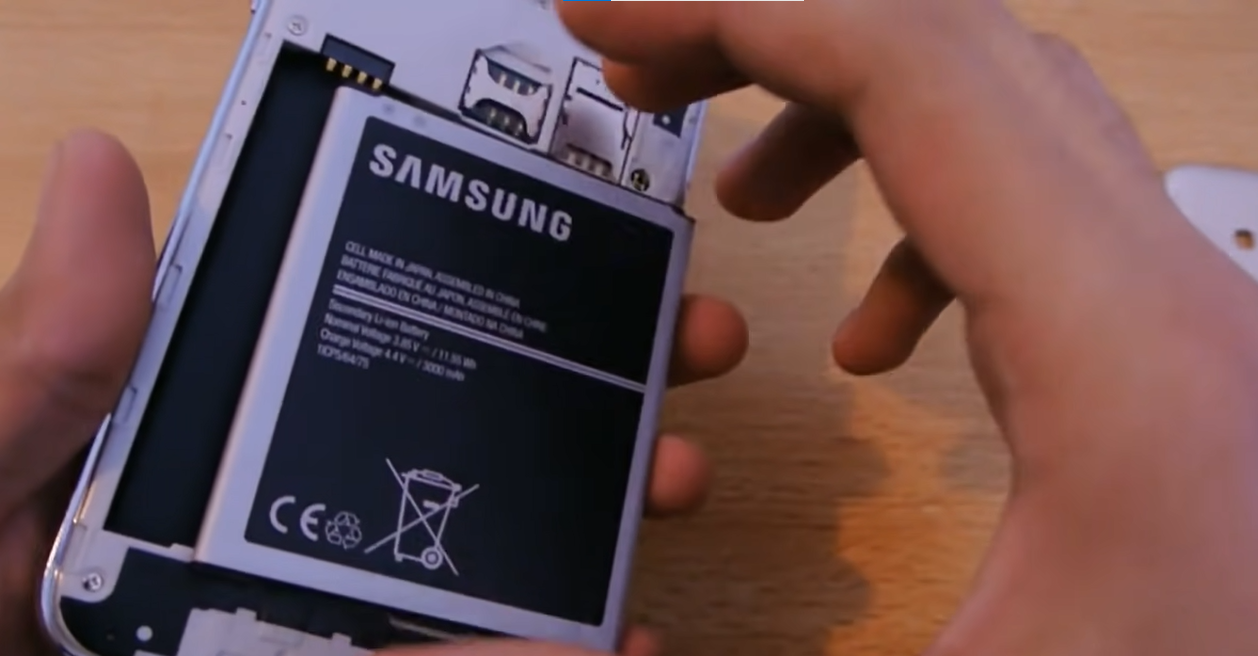
- Put the back cover of your device back on.
- Power on your Android device and check if the boot loop issue has been fixed.
But if you can’t remove the battery of your Android model, try using some Android fixer tool.
Part 3. Fix Android Boot Loop Permanently with One Click [Easy&Fast]
You can quickly fix the Android boot loop issue with an Android fixer tool. And if you have a Samsung phone, we highly recommend: DroidKit – Android Phone Toolkit.
DroidKit is a one-stop tool for managing your Android device. You can easily unlock lock screens, remove google accounts or even recover lost photos. And of course it is very powerful and professional in fixing such situations as getting stuck on the boot loop. Let’s take a look at its features:
- Official Samsung ROM tools provided.100% safe and stable.
- Designed with simplicity in mind. No advanced skills are required!
- Fix your device with simple clicks. Save your precious time,no need to wait days.
- It also can fix Android stuck in recovery mode, tablet black screen, or firmware upgrade encountered an issue, etc.
Steps to fix Android Boot Loop with DroidKit
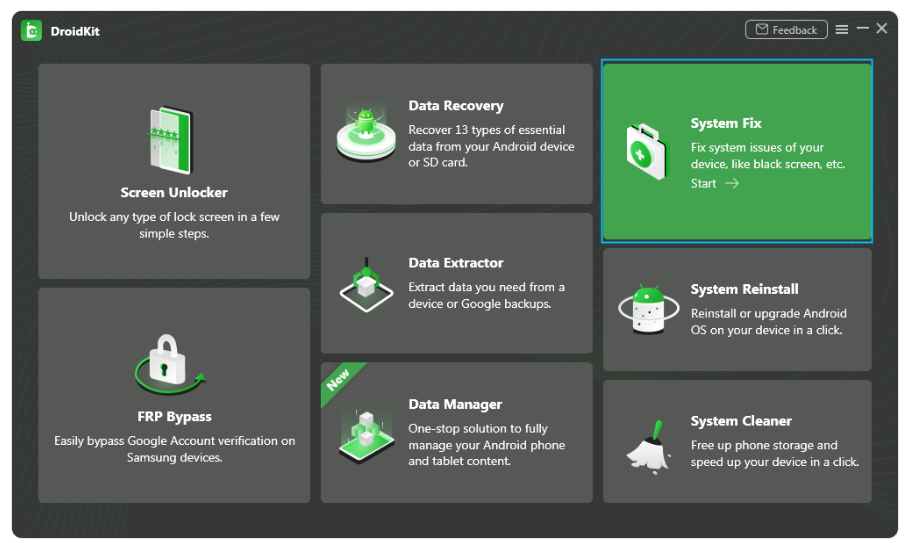
Step 1. Free get and install DroidKit on your computer. > Select System Fix mode.
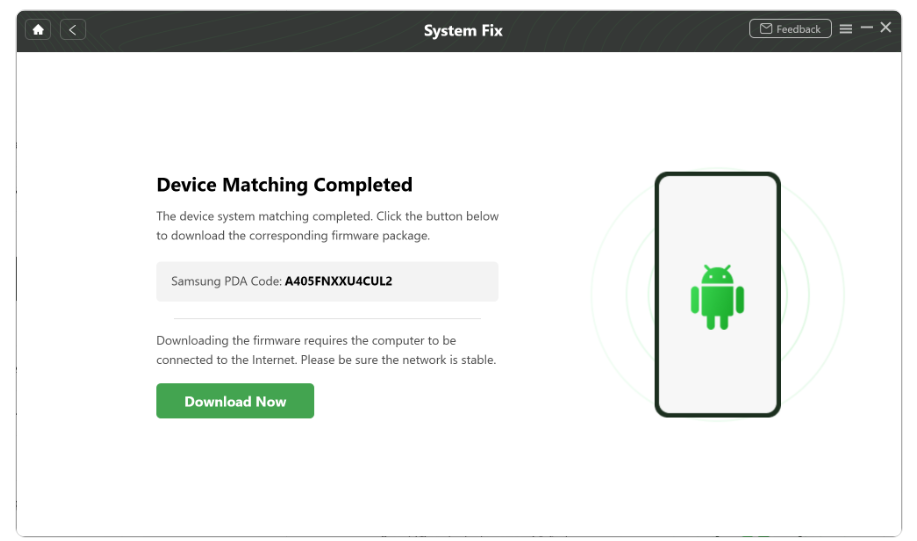
Step 2. Connect your device to PC. Tap on Start. DroidKit will automatically get the PDA code. > Click on Download Now to proceed.
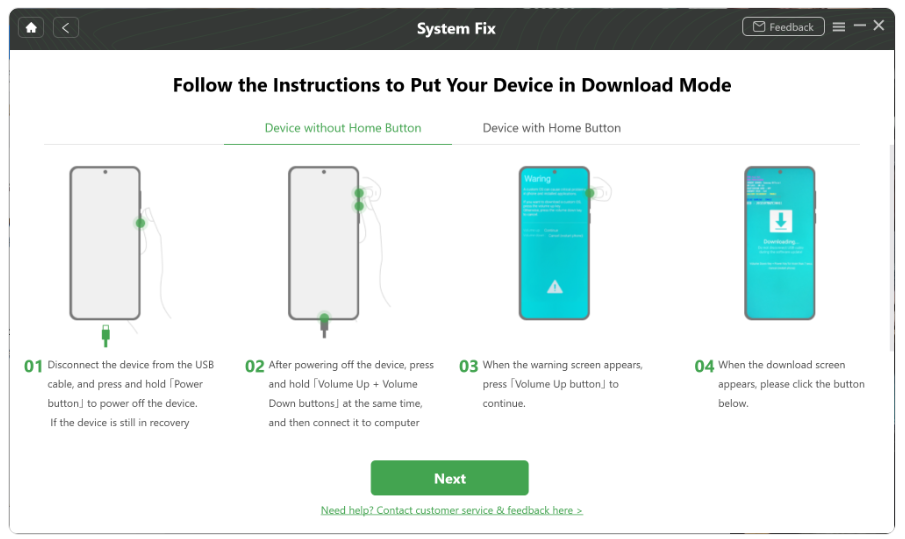
Step 3. Wait until the firmware downloads. When it’s done, put your device in download mode by following the instructions on the screen. Then click Next.
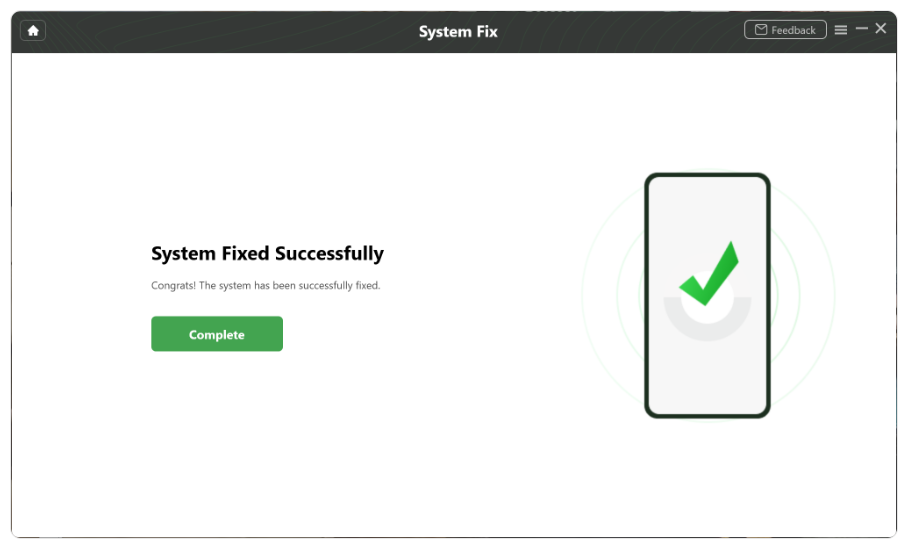
Step 4. DroidKit will start fixing your issue. Wait a moment and you will get the System Fixed Successfully page.
Part 4. Remove SD Card to Fix Android Boot Loop
If the phone tries to access a corrupt file on the SD card during boot-up, it can cause the system to crash and enter into a boot loop. Removing the SD card prevents the phone from accessing corrupt data. This can sometimes resolve the issue and allow the device to start.
Steps to Remove SD Card to Fix Android Boot Loop
Step 1. Turn off your Android device and locate the SD card slot.
Step 2. Use a SIM ejector tool or a paper clip to eject the SD card tray.
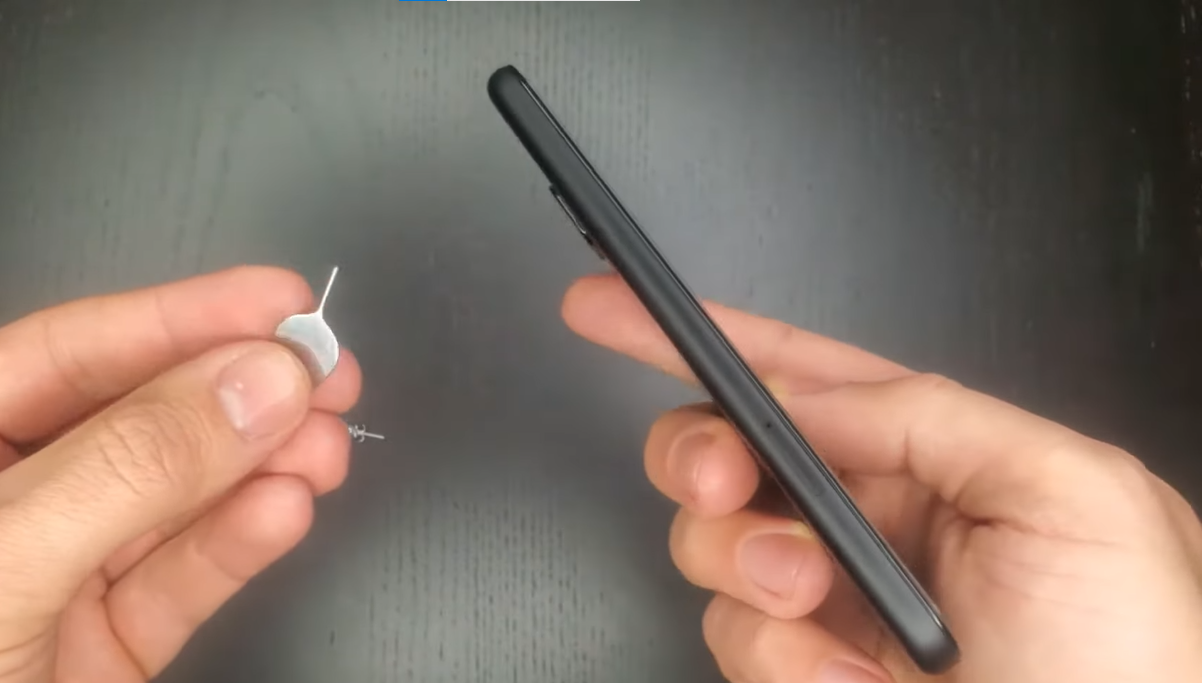
Step 3. Remove the SD card from the tray carefully and reinsert the tray back into the device.
Step 4. Turn on your Android device and check if the boot loop issue has been resolved.
However, it’s important to remember that this is not a guaranteed fix. Other factors may also be contributing to the boot loop problem. So if you fail, proceed to the next method.
Part 5. Fix Android Boot Loop with Factory Reset
A factory reset is often the best solution to any system issue on your Android device. However, when your operating system is not functioning correctly, you can’t complete the reset through the Settings app. So is there no way to perform a factory reset? Of course not!
That’s where a hard factory reset comes in handy. It is performed using the power and volume buttons.
But before you go this route, it’s important to note that a factory reset will erase all data and documents on your device. So, it’s always best to have a backup of your Android device beforehand.
Steps to Fix Boot Loop with Factory Reset
- Turn off your Android device. Then press & hold power and volume down buttons simultaneously until the device starts to boot up.
- Use the volume buttons to reach the recovery mode option and use the power button to select it.
- Once in recovery mode, go to the “Wipe data/factory reset” option. Select it with the power button.
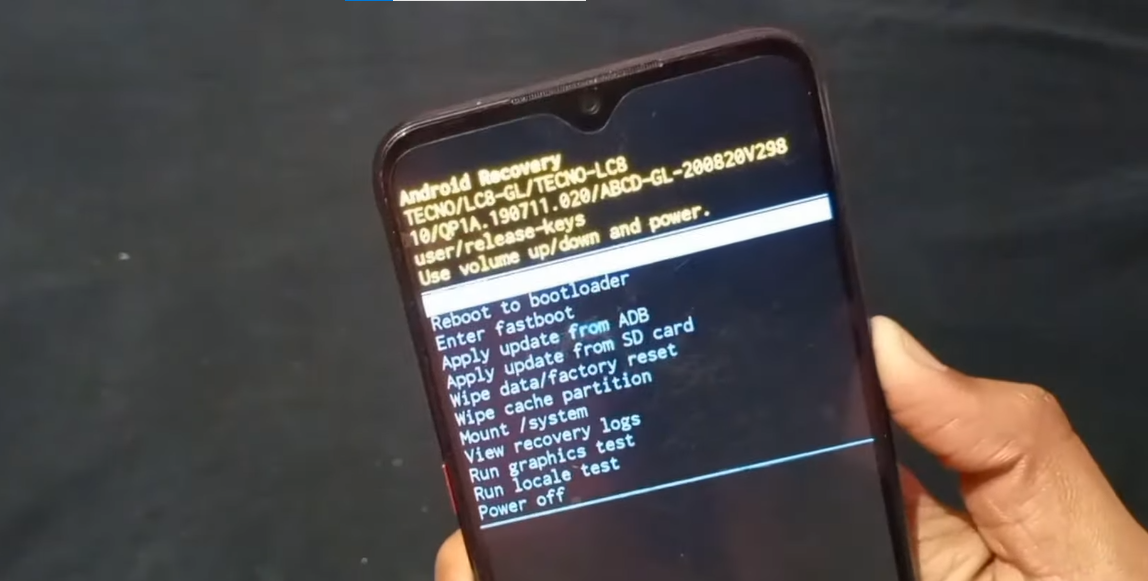
- After the reset is complete, go to the “reboot system now” option and select it.
- Wait for the device to reboot and check if the boot loop issue has been resolved.
If it still doesn’t solve the issue, we can take the help of CWM recovery mode.
Part 6. Use CWM Recovery Mode to Fix Boot Loop on Android
CWM (ClockworkMod) custom recovery is a powerful tool that allows Android users to perform various advanced operations. It replaces the stock recovery mode that comes with Android devices.
While CWM custom recovery can be a way to fix boot loop issues, this method is not for everyone. If you lack technical expertise, it’s advisable to seek assistance from a professional.
Steps to Use CWM Recovery Mode
Step 1. Turn off your Huawei EMUI phone. Then hold the “Volume Down” and “Power” buttons simultaneously for a few seconds. Release the buttons once the list appears.
Step 2. Now, navigate the list and select “Recovery Mode” or “CWM Recovery” (depending on your device).
Step 3. Once you enter the CWM recovery mode, select the “Advanced” option.
Step 4. Choose “Wipe Dalvik Cache” from the options and then go to “Mounts & Storage.”
Step 5.Choose “Wipe Cache Partition” and confirm the action.
Step 6. Finally, select “Wipe Data/Factory Reset” and confirm the action.
Alt Text: Using CWM custom recovery
After completing these steps, reboot your Huawei EMUI phone and check if the boot loop issue has been resolved. Remember that these steps may vary depending on your device and version of CWM recovery.
Conclusion
Experiencing an Android boot loop issue can be frustrating, but there are multiple ways to fix it. From removing the battery to using a third-party tool, we’ve discussed different methods to approach this issue.
And speaking of tools, DroidKit is an all-in-one Android toolkit that offers a wide range of features. Whether you need to unlock a forgotten password, bypass FRP, recover lost data, or fix system issues, DroidKit provides a simple and effective solution.
If you’re looking for a comprehensive toolkit to handle your Android device needs, DroidKit is worth checking out.
