In this tutorial, we will show you how to unbrick your Huawei devices using the Huawei Flash Tools IDT 2.0. While most smartphone manufacturers use the Qualcomm and MediaTek chipsets, some go for the Exynos ones. However, Huawei takes an altogether different approach. They have the ‘home-made’ Kirin SoC as the underlying chipsets. But even then, they are still quite an active player in the customization domain.
There is a plethora of custom binary, mods, and tweaks available for a wide range of devices. While unlocking the bootloader is still a challenging task, yet once you are able to do so, there are a plethora of customizations waiting for you. Right from the ability to installing a custom recovery like TWRP to rooting your device via Magisk, the possibilities stand endless.
However, while trying out the aforementioned tasks, there is always a chance of things going south. In other words, just a slight mistake in flashing any file, and your device might be in a bootloop or even worse, get bricked. But even if that happens, there is still a handy way out. You could easily unbrick your Huawei devices using the Huawei Flash Tools IDT 2.0. And in this guide, we will show you how to do just that. So without further ado, let’s get started.
Page Contents
Huawei Flash Tools IDT 2.0 | Flash Dead Phones Back To Life
Before we get started, there is an important point worth discussing. While Qualcomm devices come with the EDL mode that allows the respective tool to interact with their bricked devices, there is no such mode for Kirin devices. As a result, you will have to go for the Test Point method for your Huawei devices.
As for references, you could refer to some of our detailed guides on ISP EMMC PinOUT and Test Point and get yourself acquainted with this terminology. Once done, you may then head over to the below requirements section to unbrick your Huawei devices using the Huawei Flash Tools IDT 2.0.
STEP 1: Backup Data (if Possible)
The process is going to wipe off all the data on your device. But since your device is already dead, there isn’t any method as such to create a backup. However, if you do find a way to take a backup, then do so right away.
STEP 2: Charge your Device
Since you have a bricked device, you might not be able to get hold of the current battery percentage. So just to be on the safer side, keep it plugged in for around half an hour or so. This will charge your device sufficiently so that it doesn’t turn off midway during the process.
STEP 3: Install Huawei USB Drivers
Now download and install the Huawei USB Drivers on your PC. This will make it possible for your Huawei device to be identified by your PC.
STEP 4: Download Huawei Flash Tools IDT 2.0
Next up, download the Huawei Flash Tools IDT 2.0. This tool is developed by HiSilicon and allows you to flash XML image files onto Kirin based devices. Using this tool, we will bring your dead Huawei phone back to normal working condition.
STEP 5: Download Huawei XML Firmware File
Finally, you will have to download your device’s stock firmware in the form of the XML format. Double-check the file format as the IDT Tool only reads the XML files, any other format, and the tool wouldn’t be able to recognize. As far as downloading the firmware is concerned, you could check out our comprehensive Stock Firmware collection. If you can’t find one, then you could also search it online and download it from a trustworthy place.
STEP 6: Unbrick Device using Huawei Flash Tools IDT 2.0
- To begin with, extract the contents of the downloaded Huawei Flash Tools IDT 2.0 to any convenient location on your PC.
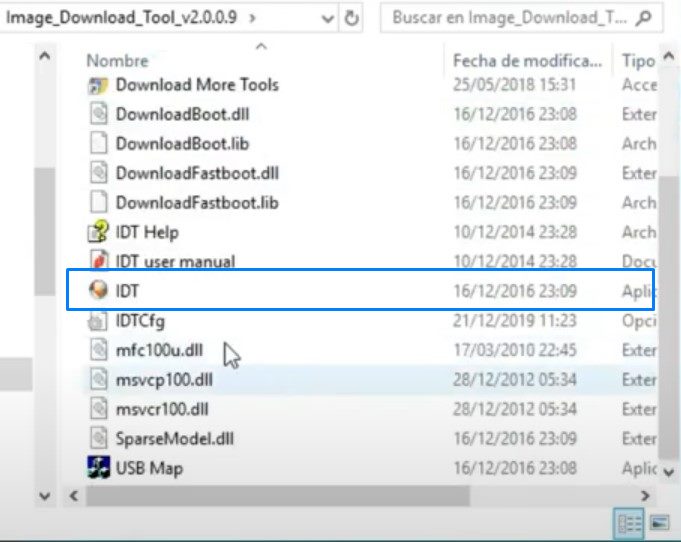
- Go to the extracted folder and you should see the IDT file. Right-click on it and select Run as Administrator.
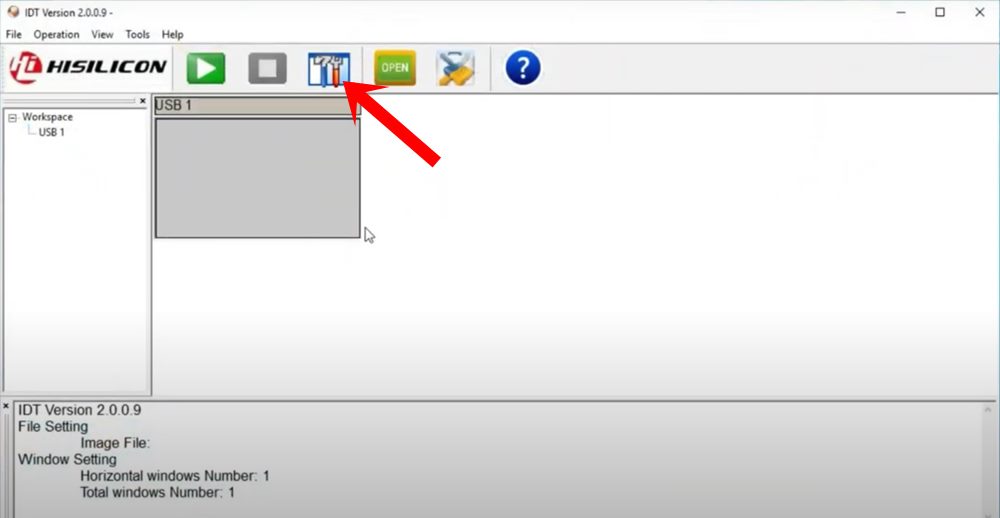
- This will launch the IDT Tool. Click on the Tools icon situated at the top menu bar.
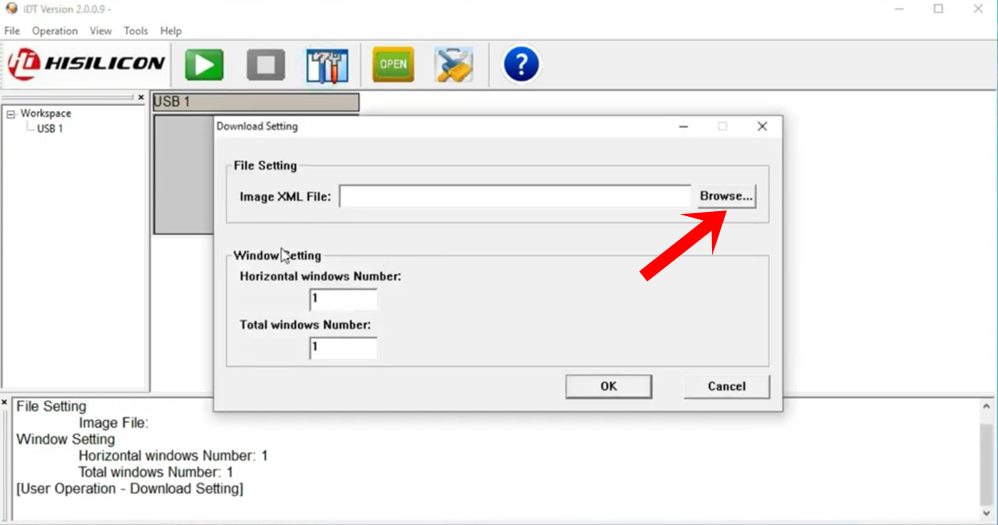
- Doing so will bring up the Download Settings dialog box. Click on Browse next to Image XML File.
- Then navigate to the XML file that you have downloaded for your device, select it and click Open.
- Now connect your Huawei device to the PC and Short Pinout it for the Test Point method. This will then make your device identifiable by the IDT Tool.
- Then from the USB Port, select the correct COM port to which your device is currently connected.
- If the tool isn’t able to read your device, you may also try switching over to any other port and then change the COM port accordingly.
- Finally, click on the Start button situated at the top menu of the IDT Tool. You could also go to the Operation menu and select Start.
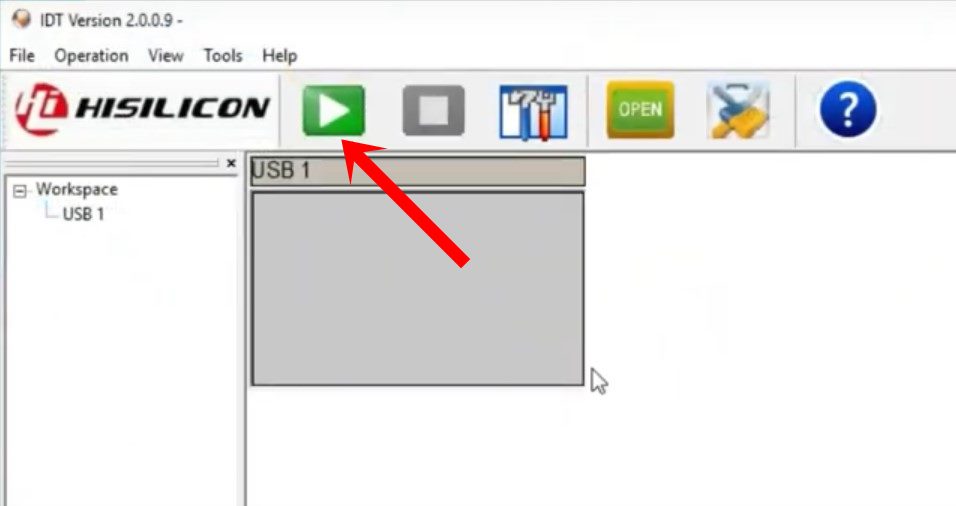
- The flashing process will now start and might take a few minutes. Once that is done, you will be notified of the same.
- You may then remove your device from the PC and boot it to the OS (if it doesn’t do so automatically). Likewise, you may now close the tool as well. That’s it. The process stands complete.
With this, we conclude the guide on how to unbrick your Huawei devices using the Huawei Flash Tools IDT 2.0. If you have any queries concerning the aforementioned instructions steps, do let us know in the comments section below. Rounding off, here are some equally useful iPhone Tips and Tricks, PC tips and tricks, and Android Tips and Tricks that deserve your attention as well.

where is xml file, the zip file not include this xml