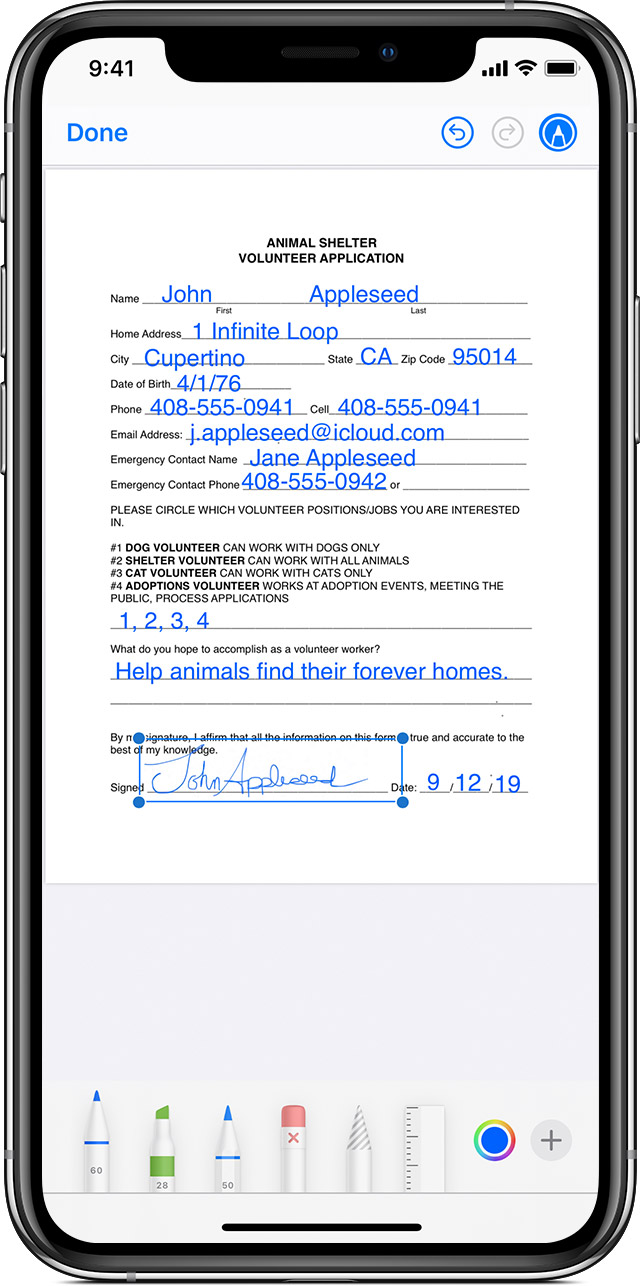
It is easy to understand if you are communicating with an image adding annotation. If you are the person who always shares screenshots with annotation, then you must know this feature. You will find so many third-party applications on the Apple app store, which allows you to annotate screenshots.
Apple’s in-built screenshot markup tool works best if you understand how it works. There is no meaning of downloading the third-party application and creating a mess.
Apple’s Markup tool works flawlessly on the iPhone and iPad. If you are using your Apple devices for business purposes, then it is the best tool for hands-on. Sometimes pictures require to add shapes, text, drawing and there are so many things, to get it highlighted to understand. You can sign the PDF documents without installing a third-party application on your Apple devices.
Let me direct you to the steps to access the markup tool on iPhone or iPad.
Also Read

How to Markup Screenshots on iPhone or iPad
It is easy to markup the screenshots captured on the iPhone or iPad by using the in-built photo editing tool of the Apple Photos app. You don’t need to go to the Photos app after each screenshot captured on your device. You can also edit the photo by tapping on the preview button on the bottom-left corner of the screen.
There are two methods to use this tool. Let’s take you to the quick small tour of understanding markup tool working.
- Open the Photos app on your iPhone or iPad and open the screenshot to edit.
- Tap on the “Edit” button on the top-right corner of the screen.
- Now tap on the three-dot button on the top-right corner of the screen and select the “Markup” option.
- There are a bunch of tools you will see at the end of the screen to annotate the screenshot. From left to right, you have a pen, marker, pencil and eraser to add and remove drawings.
- Next to the eraser, you have a lasso tool which allows you to select the drawings and move around the screenshots.
- There is a ruler tool available next to the lasso tool. Ruler tool helps you to draw a straight line.
- Next to the ruler, color pallets are available used to choose the color of your drawing.
- You can also add shapes, text, and even signature by tapping on the “+” icon next to the color pallets.
- If you want to undo any action, then you can reverse it by tapping on the “Undo” button on top of the screen. Once editing completed, you have to tap on the “Done” button.
- Tap again on the “Done” button to save the edited screenshot.
After you save the edited screenshot, it will overwrite the original file. Don’t worry about it, as you can remove all of your edits too. Go to the edit menu and tap on the “revert” button to remove the action.
In the markup tool, along with shapes, you can add a signature and save it for future use.
A Quick Way to Markup Screenshots on iPhone or iPad
The situation arises when we need to take a quick screenshot and markup it. You can do it too by capturing the screenshot and edit it by tapping on the preview icon.
You have to take a fresh screenshot as usual, and tap on the “Preview’ thumbnail option on the corner of the screen. Once you see the preview of the screenshot, it will take you to the brief window where you can annotate the screenshot before you saved it permanently to your photos. You will see the markup image edited in starting if you open the photos album.
This quick edit feature is what makes it different from any third-party app available in the Apple app store.
If you don’t prefer to use the in-built markup tool, then third-party apps such as annotate, PDF viewer, Liquidtext, skitch, etc are available on the app store. It provides better flexibility and more features to use.
How do you use this markup tool to annotate the screenshots? What are the key features of this markup tools you like a lot? Which are the third-party applications you prefer to annotate the screenshots?
Let us know all of your experience, thoughts, and preferences in the comment box down below. We would love to hear it from you.
