Nowadays, Microsoft rarely focuses on revamping hardware compatibility on Windows 10 PCs. Therefore, most device drivers are either roll out via feature updates or preloaded. No doubt, it has provided a unified experience for the users. Still, we will find that users complain about NVIDIA high-definition audio not being plugged in error after a Windows 10 update.
Nevertheless, there are many reasons why this issue occurs on your Windows 10 PC. But, the main cause for this error is the NVIDIA graphics driver. So, it is time to fix this issue. However, now you need not worry because we have something for you. Today, we will teach you how to fix NVIDIA high-definition audio not plugged in error.
Due to this issue, users may also face a problem where they cannot authorize the sound for their HDMI output. So, without reciting more stories. Let’s directly jump into the main highlights, i.e., fix NVIDIA high definition audio not plugged in error.
Also Read
Page Contents
Fix: NVIDIA High Definition Audio Not Plugged In Error
Generally, this type of problems caused either by outdated drivers or the newest driver, which can’t work well with your device. However, if you need to get rid of this issue, follow the methods we describe below.
Method 1: Update Your NVIDIA Graphics Driver
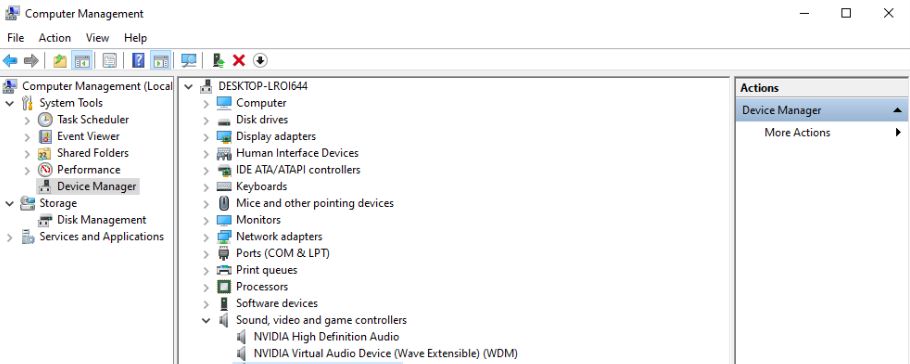
- The first and foremost step is to go to the start menu and search for Device Manager in the windows search bar.
- Now, open the device manager from the search result. You may also opt for the windows key+ R button simultaneously to open the Run prompt box. Then, simply type in devmgmt.msc inside the Run dialogue box and hit the OK button.
- After all, it is a video card driver. Therefore, we need to expand the Display adapters tab. Then, right-click on the graphics card and select the Uninstall device option from the appeared drop-down menu.
- Now, you need to follow the on-screen instructions to confirm your present graphics device driver’s installation process and wait until the process is completed.
- Well, now find out your graphics card driver on NVIDIA’s input and note down the required information about the card and your OS. Then, hit the OK button to initiate the search process.
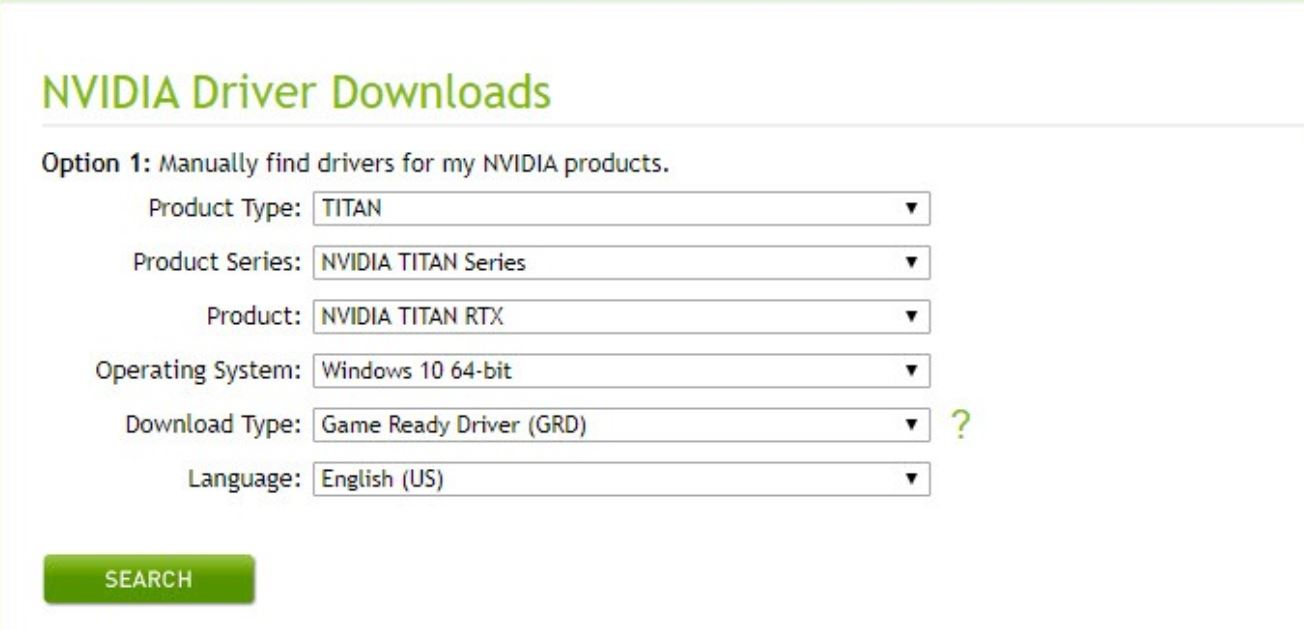
- After that, a list of available drivers will appear. Now, you need to find out the driver that you needed and download it.
- Once your NVIDIA graphics card driver downloaded on your PC, please open it and follow the on-screen instruction.
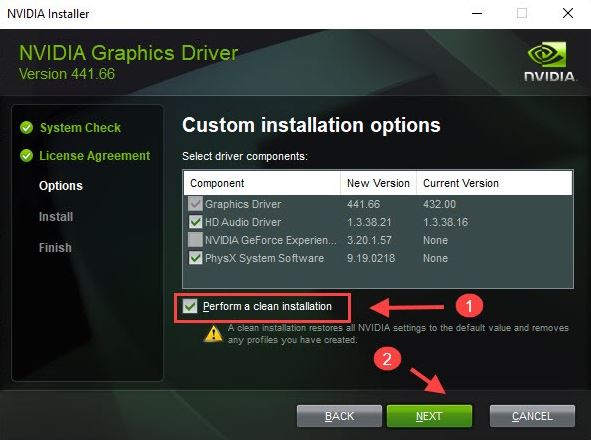
- Afterwards, when you reach the installation window. You can choose the Custom (Advanced) option and click on the Next button.
- After a few seconds, it will present a list of elements to you that will be installed on your PC. You need to checkmark the box located right next to the Perform a clean installation and hit the Next button to proceed further.
- At last, restart your PC and see whether the NVIDIA high definition audio not plugged in error resolved or not.
Method 2: Try to Rollback the Driver Update
Sometime it may occur due to the newest installed updates for the graphics card. However, the only option to fix the issue is to rollback the driver updates. There are various methods by which you can rollback the driver updates with just one click.
- Initially, you need first to uninstall the driver that you have already installed on your PC.
- Then, open the Device Manager and expand the display adapter. Now, it will present a list of all the installed drivers to you.
- After that, right-click on the display adapter and choose the properties option from the newly appeared drop-down menu.
- Then, navigate to the Driver tab and find out the rollback driver option.
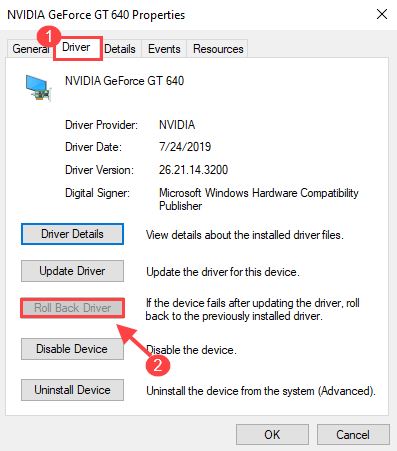
- In case you notice that the Roll Driver Back option is greyed out, that means your device wasn’t updated with the latest version or recent version, and it has no backup files to remember the old one.
- Well, if this option is available on your device, then click on it and follow the on-screen instruction carefully to proceed further.
Method 3: Enable it in the NVIDIA Control Panel
Your HDMI port may not be set up according to broadcast audio. So, if you want to fix this, you need to set up proper settings to set up the NVIDIA audio output in the NVIDIA control panel. Follow the steps given below to resolve the issues like NVIDIA high definition audio not plugged in error.
- On the desktop, right-click to open the system drop-down menu and choose the NVIDIA Control Panel setting. You can find this setting in the Control Panel as well.
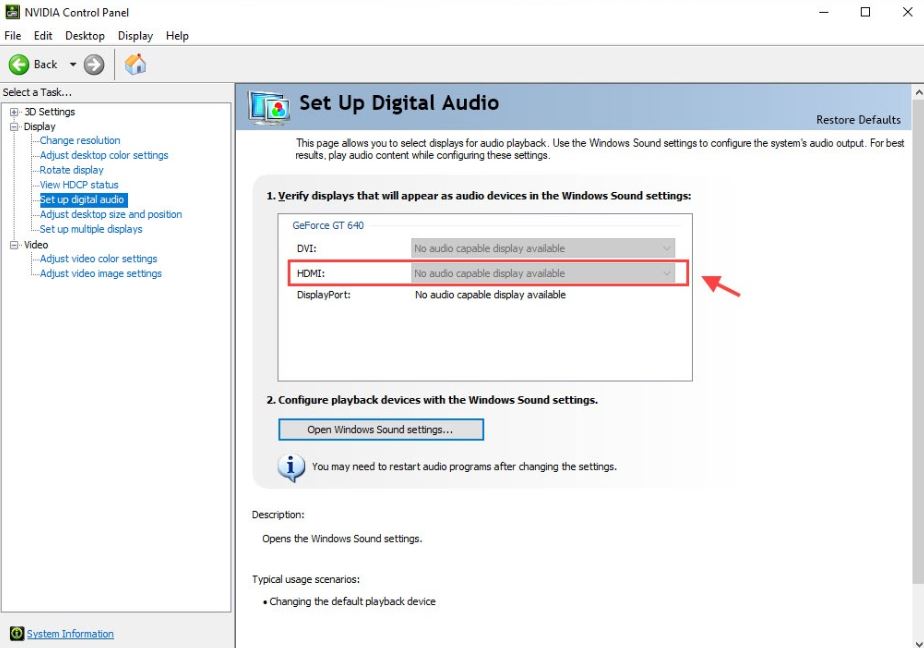
- Inside the navigating menu, you need to click the + button located right next to the Display section. Then, from the drop-down menu, select the set up digital audio option.
- After that, on the next screen, find out the HDMI entry for your graphics card. But, you need to make sure you choose the device that you’re connected to.
- Now, right-click on the Volume icon found at the bottom of the screen and select Playback devices.
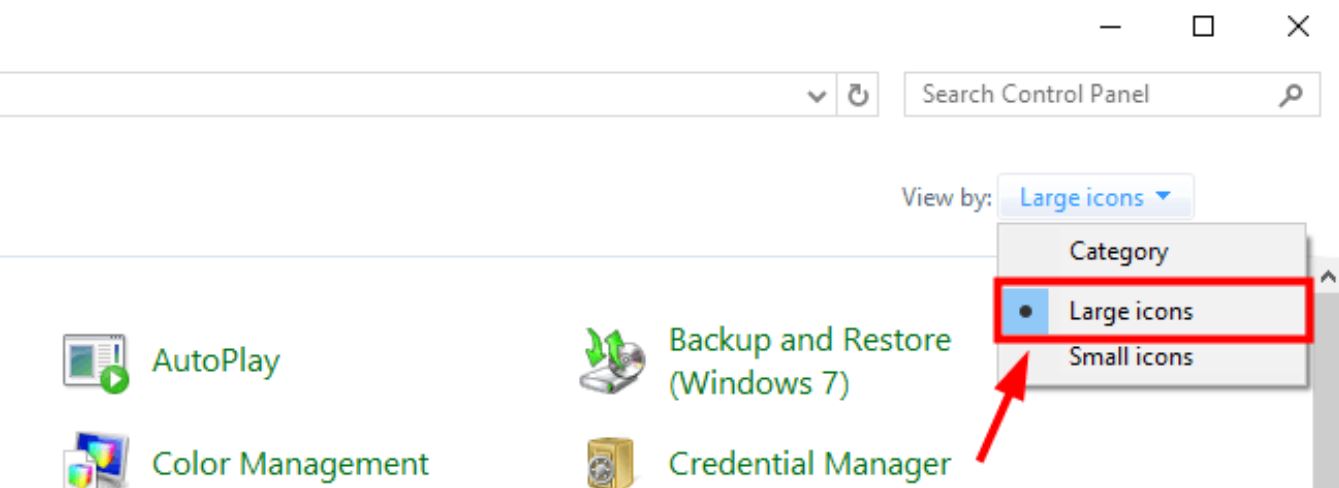
- Then, in the next window, set the view by setting it too large icons. After that, you need to find and select the Sound option to open the same window.
- Now, stay for some time in the playback tab of the sound window. You will see the NVIDIA output device that you wish to set for your default device.
- But what if you didn’t see the output devices? Don’t worry. You can right-click anywhere in the sound window and checkmark the boxes located next to the Show Disabled Devices and Show Disconnected Devices.
- Now, the device you want to set as your default device appears in the playback devices section.
- To set the default device, you need to left-click on the newly appeared device and select the option set default button.
Also Read
