Overwatch 2 is a popular free-to-play multiplayer first-person shooter video game that allows players to team up with friends on any platform for a PvP experience. Since its release in October 2022, Blizzard Entertainment has done an excellent job of providing frequent patch updates and bug fixes. However, Overwatch 2 is still prone to bugs and errors, such as server errors and waiting for other update errors. One such error is the “Overwatch 2 Stuck on Initializing Update” error.
If you are facing the issue of being stuck on the initializing update error while playing Overwatch 2, then you can refer to this troubleshooting guide to resolve it. It is important to note that Blizzard Entertainment is aware of this issue and has already released a few workarounds to fix the Game Install or Update Stuck on Initializing error. It appears that there are common issues related to being unable to install, download being stuck at Initializing (0%), or being stuck at Initializing.
Page Contents
Fix Overwatch 2 Stuck on Initializing Update in 2023
The chances are high that conflicts with the security program, an outdated game version, issues with the corrupted or missing game files, conflicts with the Battle.net tools folder, third-party background tunning tasks, an outdated system software, etc. Fortunately, there are several possible workarounds mentioned below behind the game installing or updating in Battle.net is stuck at initializing.
Make sure to check out the following methods below until the problem gets fixed. So, without further ado, let’s jump into it.
1. Reboot the PC
First of all, you should restart your PC to ensure there is no issue with the gaming device or the temporary system glitch whatsoever. Multiple reports claim that restarting the system did fix the issue in most cases.
2. Restart the Battle.net Desktop App
Another thing you should do is simply restart the Battle.net desktop app on the computer after force-closing the application. It’ll eventually refresh the cache data issue with the Battle.net desktop app.
3. Run Overwatch 2 as an Administrator
Make sure to run the game application file as an administrator to avoid user account control regarding privilege issues. You should also run the Battle.net client as an administrator on your PC. To do this:
- Right-click on Overwatch 2 exe application file on your PC.
- Select Properties > Click on the Compatibility tab.

- Make sure to click on the Run this program as an administrator checkbox to checkmark it.
- Click on Apply and select OK to save changes.
Note: You should also run the Battle.net client as an administrator on the PC using the same steps.
4. Check for Overwatch 2 Updates
An outdated game version might trigger multiple issues with the game launching or stuck on the initialization screen. You should always check for the game update manually by following the steps below on your PC to fix several issues.
- Open the Battle.net launcher app on your PC.
- Click on the Overwatch 2 game.
- Next, click on the Settings menu (cogwheel icon).
- Select Check for Updates.
- Wait for the update process to be completed.
- If there is an update available, you should download and install the update.
5. Verify the Game Files
In some cases, missing or corrupted game files on the PC might trouble you a lot when it comes to the game launching as well as getting into the matchmaking sessions. So, you can try verifying and repairing the game files via the launcher by following the steps below.
- Launch the Battle.net client on your PC.
- Click on Overwatch 2 > Now, click on the Settings menu (cogwheel icon).
- Select Scan and Repair.
- Click on Begin Scan.
- Wait for the repair process to complete.
- Once done, reboot the PC to apply changes.
Also Read
6. Temporarily Disable Security Programs
The chances are that maybe your default Windows Defender Firewall protection or any third-party antivirus program is blocking the ongoing connections or game files from running properly. So, temporarily disable or turn off the real-time protection and firewall protection.
- Click on the Start Menu > Type firewall.
- Select Windows Defender Firewall from the search result.
- Now, click on Turn Windows Defender Firewall on or off from the left pane.
- Select the Turn off Windows Defender Firewall (not recommended) option for both the Private & Public Network Settings.
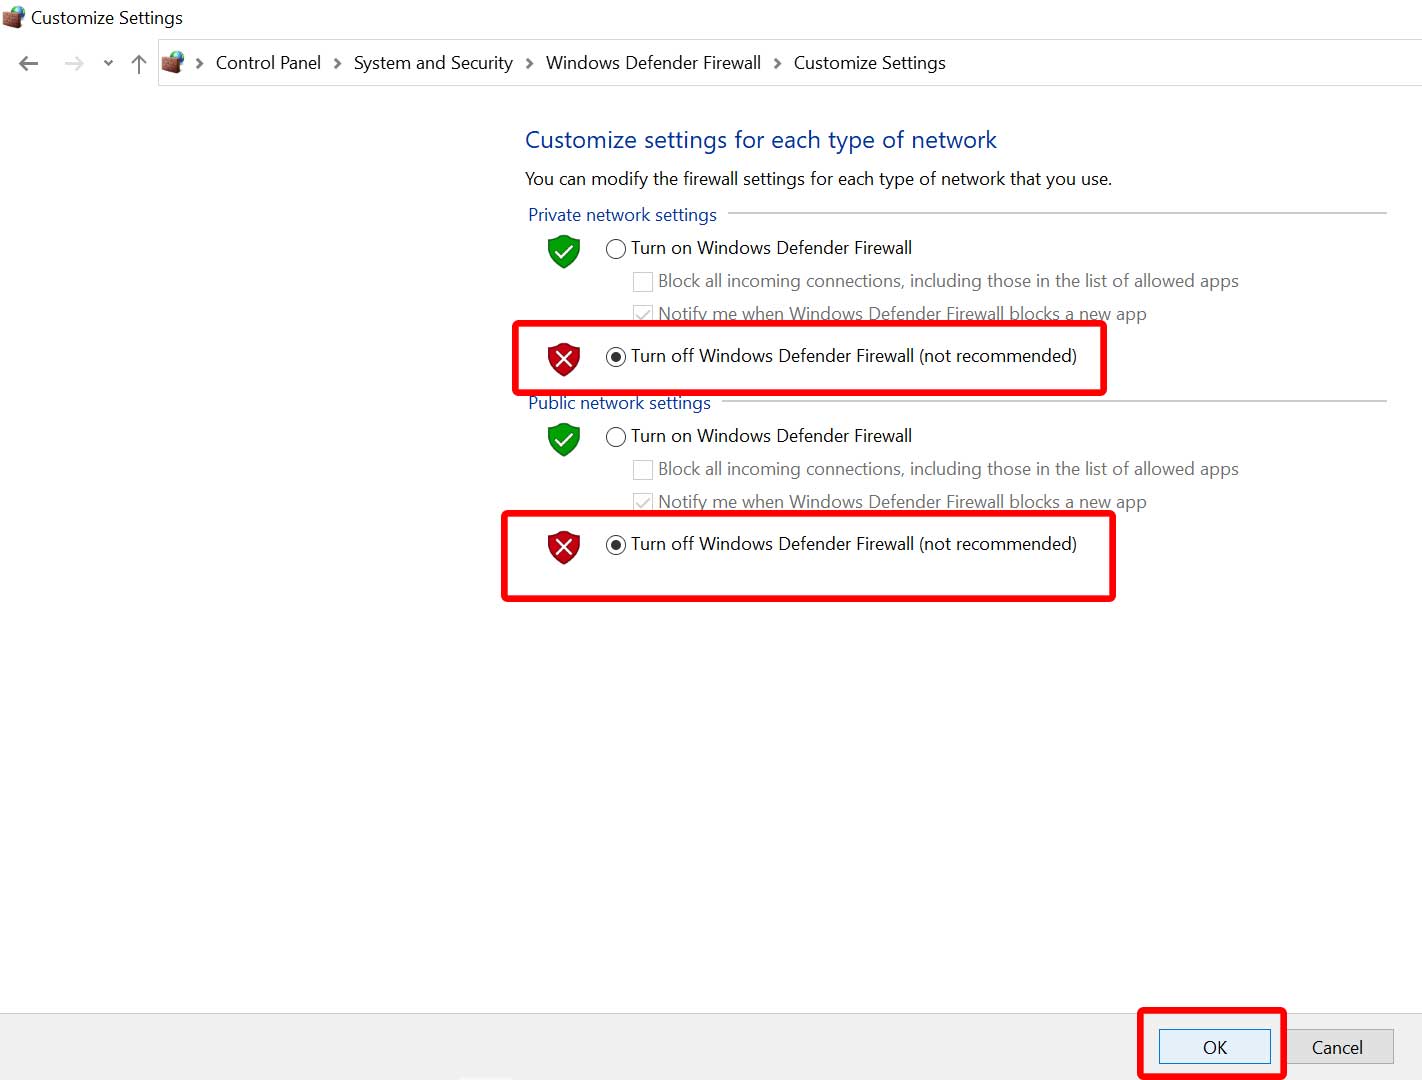
- Once selected, click on OK to save changes.
Similarly, you have to turn off the Windows Security protection. You can follow the steps below:
- Press the Win+I keys to open Windows Settings.
- Click on Update & Security > Click on Windows Security from the left pane.
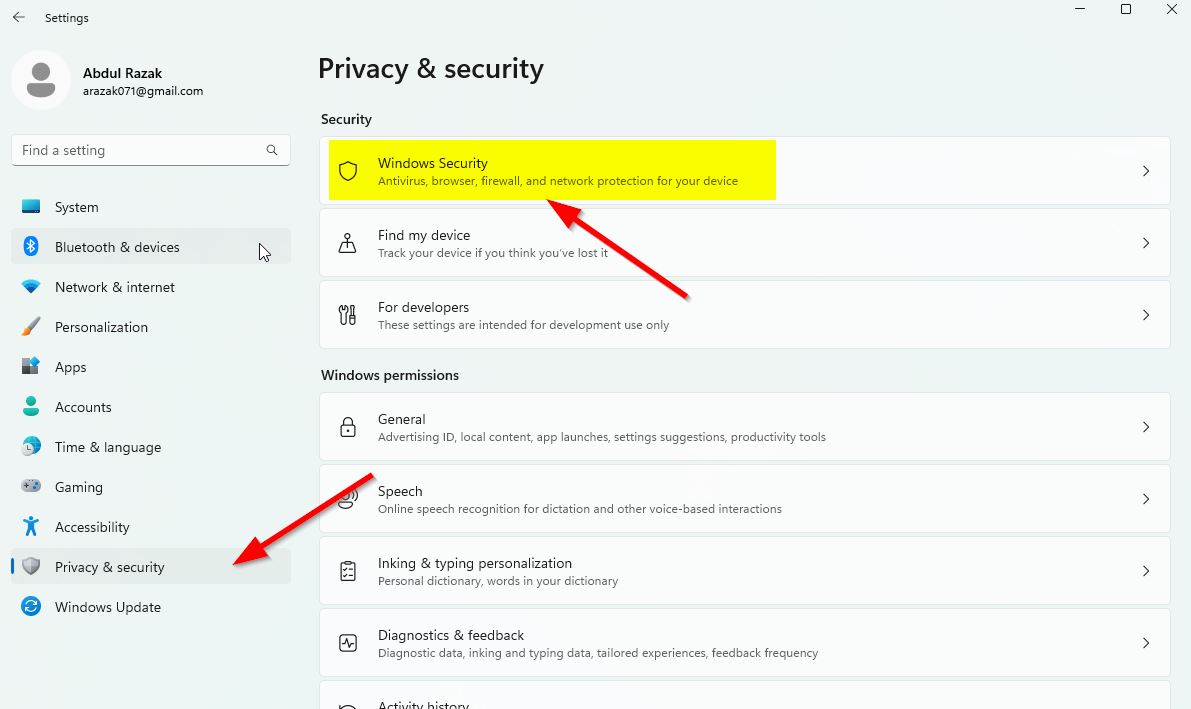
- Click on the Open Windows Security button.
- Go to Virus & threat protection > Click on Manage Settings.
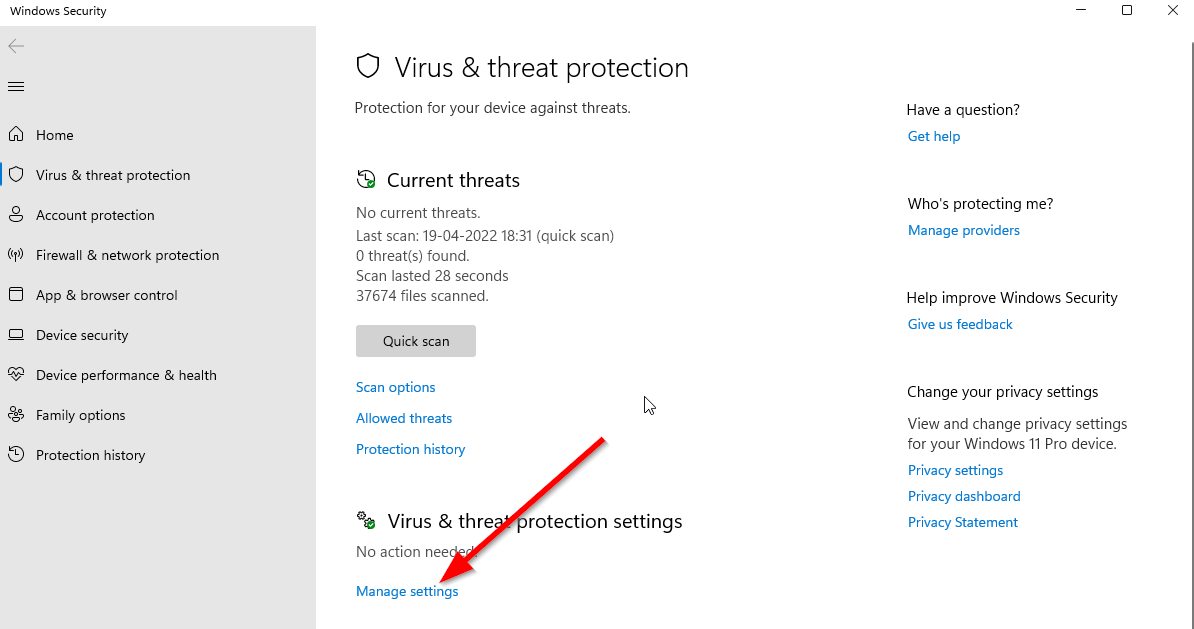
- Then turn off the Real-time protection option.
- If prompted, click on Yes to proceed further.
7. Delete the Battle.net Tools Folder
Sometimes outdated, corrupted, or missing Battle.net folders/files on the PC can also trigger several issues with the Blizzard application. You can check the following steps to delete the battle.net tools folder.
- Make sure to close the Blizzard processes.
- Press the Ctrl+Shift+Esc keys to open Task Manager.
- Click on the Processes tab.
- Right-click on the Blizzard tasks individually > Click on End Process.
- Then head over to the Battle.net folder directory:
- Press the Win+R keys to open the Run dialogue box.
- Type C:\ProgramData\ into the field and press Enter.
- Ensure to Delete the Battle.net folder.
- Next, run the Battle.net client, and launch the game again.
8. Close Unnecessary Background Tasks
In some cases, unnecessary background running tasks might trigger performance issues with the system which can occur in the Overwatch 2 Stuck on Initializing Update issue. Make sure to close background tasks by following the steps below.
- Press the Ctrl+Shift+Esc keys to open Task Manager.
- Click on the Processes tab > Click to select the third-party task that’s consuming higher resources.
- Select End Task to close it.
- Next, do the same steps for other unnecessary background tasks that you want.
9. Update the Windows Software
An outdated Windows OS version or build number can eventually trigger system performance issues, game launching issues, etc. You can follow the steps below to install the update.
- Press the Win+I keys to open Windows Settings.
- Click on Update & Security.
- Select Check for updates under Windows Update.
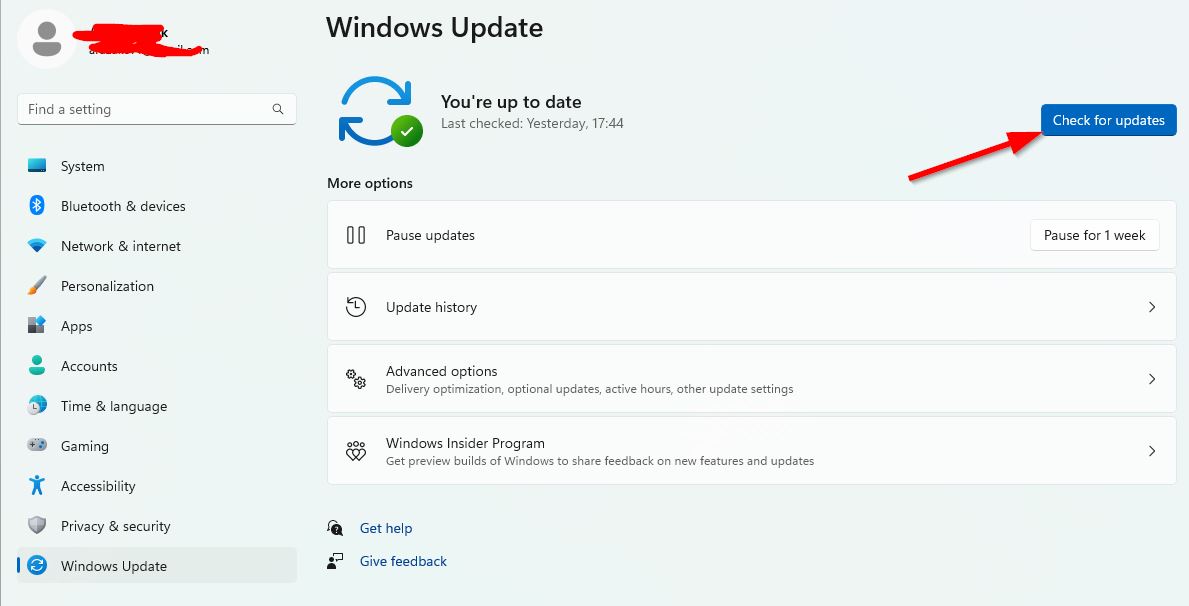
- If there is a feature update available, select Download and Install.
- Wait until the software update is complete.
- Once done, restart your computer to install the software update.
That’s it, guys. We assume this guide was helpful to you. For further queries, you can comment below.
