Recycle Bin is one of the most used features for daily Windows users. Users might have used it several times in their day-to-day life without even thinking twice about it. It is undoubtedly one of the crucial features; however, it isn’t left alone without errors. As per some Windows users, the Recycle Bin File Association Error has been troubling them a lot lately.
Page Contents
- Fixes for Recycle Bin File Association Error
- FIX 1: Delete all files from the Recycle Bin:
- FIX 2: Use Command Prompt:
- FIX 3: Perform SFC and DISM scans:
- FIX 4: Add your account to the Administrators group:
- FIX 5: Perform a Full system scan using dedicated Software:
- FIX 6: Perform a System Restore:
- FIX 7: Enter Safe Mode:
- FIX 8: Install the missing updates:
Fixes for Recycle Bin File Association Error
Now, as this is one of the unusual errors, not a lot of users know about it. And when it occurs, it indeed brings a state of panic amongst them. However, after detailed research, we have found out that it is one of the resolvable errors, and it can be removed quite quickly than thought. In the article below, there are several fixes that will swiftly resolve the Recycle Bin File Association Error for you. Have a look:
FIX 1: Delete all files from the Recycle Bin:
The Recycle Bin File Association Error can be triggered due to some corrupt or problematic file present in the recycle bin folder. Now here the best solution is to remove all the files present in the recycle bin folder.
Files in the recycle bin folder are usually the ones that the user would have deleted when they no longer require it. Thus, these files are no longer helpful for the user. In such cases, deleting them is easy. Just follow some quick steps,
- Launch the Recycle Bin folder, press Ctrl + A (it will select all the files) and then press the Delete button on the keyboard.
- Once done, your Recycle Bin folder is clear now. Check whether it has helped in resolving the said error or not.
FIX 2: Use Command Prompt:
As discussed above, Recycle Bin is one important Windows feature, or in other words, it is a directory on your computer that stores the deleted files for a certain period. Users can access it and delete those temporarily saved files manually as well.
Now, as per a few suffered users, while they removed this directory (Recycle Bin) using Command Prompt, the file association error issue got resolved for them. Here we recommend you to try the same and follow the steps given below:
- Firstly, go to the desktop search bar, type cmd, and launch the Command Prompt window. Make sure you launch it with administrator access.
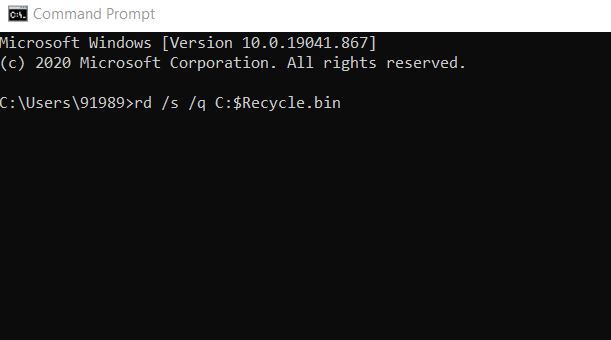
- Now inside the Command Prompt window, type rd /s /q C:$Recycle.bin and then press Enter. You will receive a confirmation prompt asking if you remove this directory. Here type Y and then press Enter again.
- In the end, it will remove the Recycle Bin. However, do not worry, as Windows will automatically create a new Recycle Bin.
FIX 3: Perform SFC and DISM scans:
The Recycle Bin File Association Error can also get resolved by using the SFC and DISM scans. Use both of them one after the other, by following the steps given below:
- Firstly, go to the desktop search bar, type cmd and launch the Command Prompt window. Make sure you launch it with administrator access.

- Now inside the Command Prompt window, type sfc/ scannow and then press Enter. It will begin the scanning process. The scan might take some time, do not interfere or close it in between.
Once it is done, check whether it has resolved the issue. However, if not, then use the DISM scan by following the steps given below:
- Launch the Command Prompt window as explained above.

- Now inside the Command Prompt window, type DISM /Online /Cleanup-Image /RestoreHealth and then press Enter. It will begin the scanning process. The scan might take some time, do not interfere or close it in between.
- Check again whether the said error has resolved or if it persists.
FIX 4: Add your account to the Administrators group:
As per a few of the suffered users, while they added their account to the Administrators group, the Recycle Bin File Association Error was well get resolved. Additionally, users have to remove their account from other groups as well. For doing so, follow the steps given below:
- Firstly, launch the RUN dialogue box by pressing Windows + R altogether.
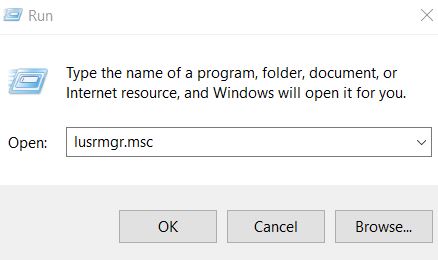
- Now inside the empty text space, type lusrmgr.msc and then click on OK.
- Now on the next window, navigate to the left-pane menu and click on Users. Further from the right-pane menu, double-click over your account.
- On the next window, navigate to the Member Of tab (from the vertical menu) and then click on the Add button.
- Further in the Enter the object names to select a section, type Administrators, and then click on the Check Names tab. After that, click on OK.
Now for removing user account from other groups,
- Select Users group and click the Remove tab. (Note: Doing so can potentially cause issues; thus, perform it at your own risk).
- Lastly, click on OK and then restart your computer.
FIX 5: Perform a Full system scan using dedicated Software:
The Recycle Bin File Association Error can also be a result of a Malware infection in your computer, and thus the best solution here is to perform a full system scan. You can use dedicated software for the same. Though depending upon the size of your hard drive, the process might take really long, ending up in a few hours as well.
FIX 6: Perform a System Restore:
If the Recycle Bin File Association Error is relatively new to your system, then performing a System Restore can be another excellent solution for you. System Restore will take your computer back to the time when the said error does not even exist.
For performing a system restore, follow the steps given below:
- Firstly, go to the desktop search bar, type System Restore and then click on Create a restore point from the search result.
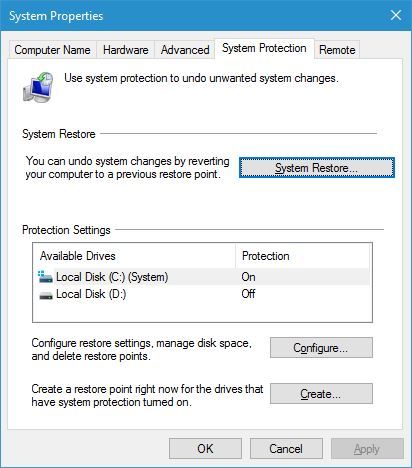
- Now inside the System Properties window, click on the System Restore tab.
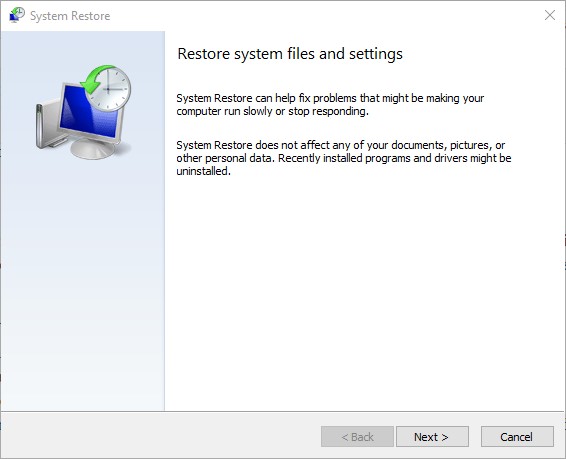
- On the window further, click on Next.
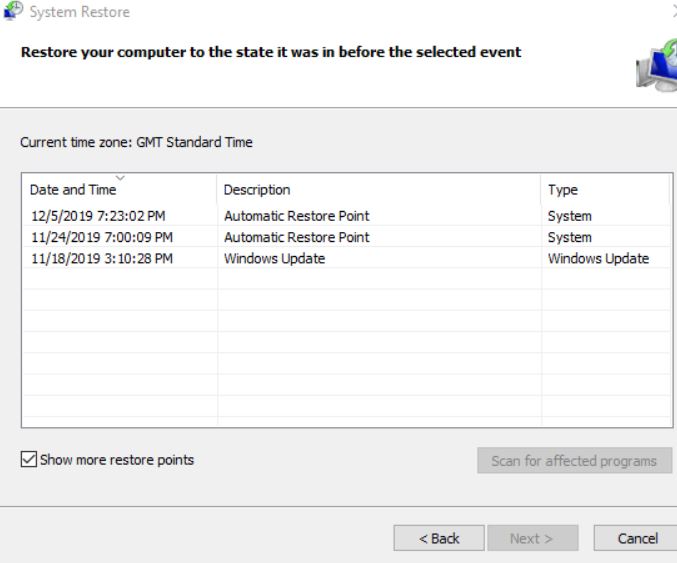
- Select the desired restore point (date & time) and then click on Next. Follow the on-screen instructions to complete the process.
- Once done, the Recycle Bin File Association Error will no longer exist now.
FIX 7: Enter Safe Mode:
The Recycle Bin File Association Error can also get fixes by entering the Safe Mode. For doing so, follow the steps given below:
- Firstly, press Windows + I all together, and it will launch the Settings app for you.
- Here navigate to Update & Security and then click on Recovery from the left-pane menu.
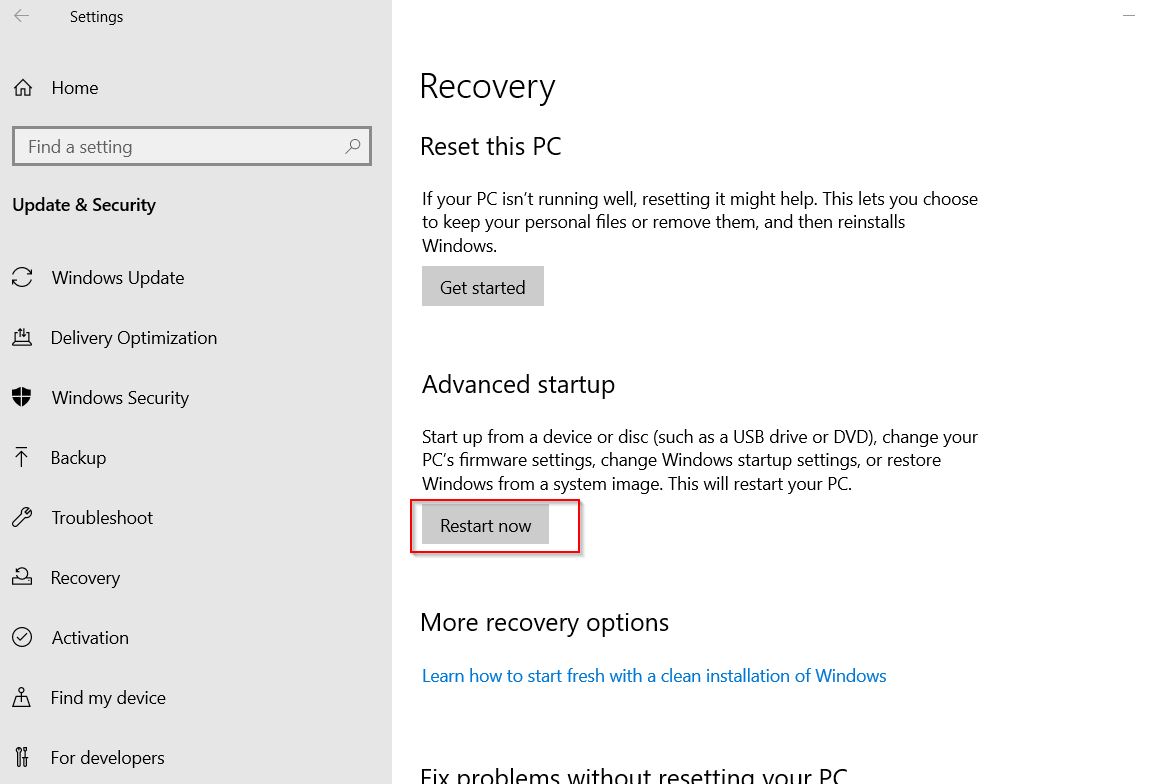
- Now from the right-pane menu, click on the Restart now tab.
- Further, navigate to Troubleshoot -> Advanced options -> Startup Settings and then click on the Restart now tab again.
- Now while your computer will restart, you will see a list of options. Out of them, press the appropriate number on your keyboard and select the desired version of Safe Mode.
- Lastly, check whether the said issue got resolved or not.
FIX 8: Install the missing updates:
If none of the above fixes works for you, then, at last, try to install the missing updates. Latest Windows updates can possibly resolve the existing errors, and thus it might work for the Recycle Bin File Association Error as well. For installing the missing updates:
- Firstly, press Windows + I all together, and it will launch the Settings app for you.
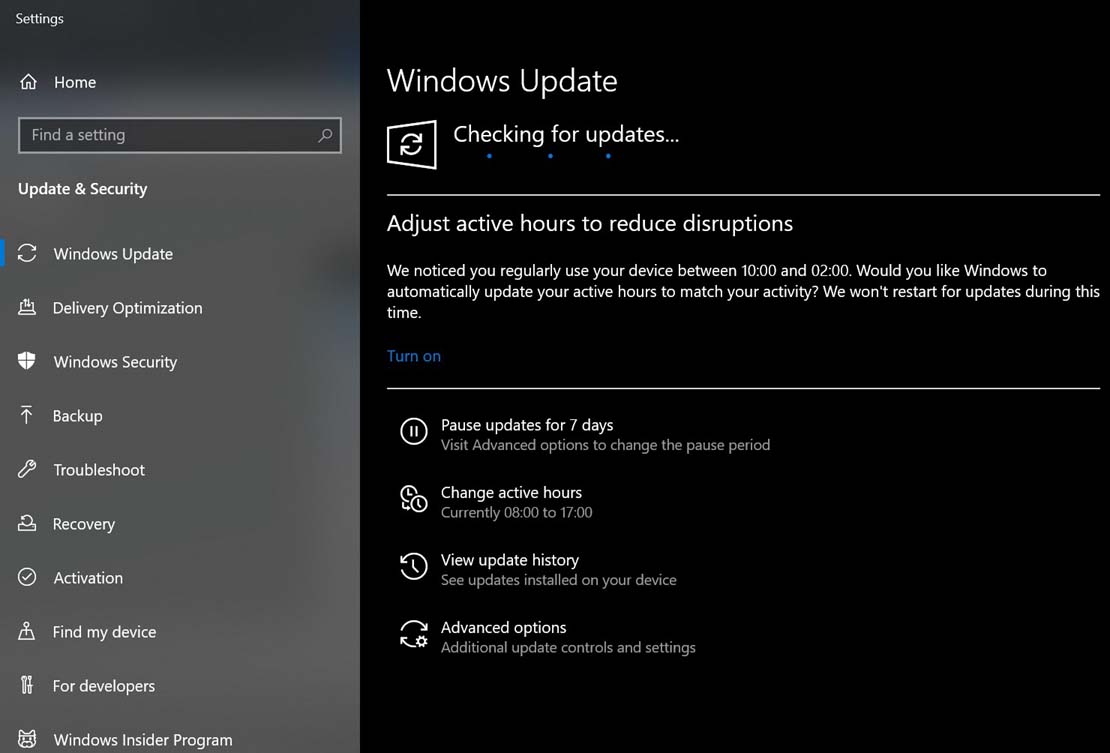
- Here navigate to Update & Security and then click on Check for updates If there are any updates available, your system will automatically download them.
- Once the process gets completed, restart your computer and check whether the said issue got resolved or not.
The Recycle Bin File Association Error, though, is one of the fundamental errors in the Windows operating system; however, if not resolved, it can become annoying. Though with the list of fixes mentioned above, you can resolve the said error in no time.
By the end of this article, we hope that you have got enough reliable and helpful information regarding the Recycle Bin File Association Error. If you have any queries or feedback, please write down the comment in the below comment box.
