In this guide, we will provide you with step-by-step instructions to flash Magisk and root your Samsung Galaxy J6 Plus (SM-J610x: “x” denotes all versions). Root access allows you to gain superuser privileges and control various aspects of your Android device such as the clock, cache access, and more. We will show you how to modify your phone to gain access to the root directory.
For those who may not know, the Samsung Galaxy J6 Plus features a 6.0-inch Full HD Display. It is powered by a Snapdragon 425 chip, Adreno 308 GPU, and 4GB of RAM. The device comes with a dual-camera setup at the rear consisting of a 13MP and a 5MP camera. For selfies, there is a single 8MP camera at the front. The phone is equipped with a 3300mAh battery.
![Easy Method To Root Galaxy J6 Plus Using Magisk [No TWRP needed]](https://www.getdroidtips.com/wp-content/uploads/2018/09/Galaxy-J6-Plus.jpg)
To gain root access on your Samsung Galaxy J6 Plus, we will use Magisk to patch the stock boot image and then flash it onto your device’s boot partition. Simply download the patched image file from Magisk Manager and follow the instructions below.
However, before you proceed with rooting, it is important to note that you must have an unlocked bootloader on your device. We have provided the steps to unlock the bootloader below.
It is important to understand that rooting your device is not the same as hacking into someone else’s system. Rooting is a process that is typically performed by the owner of an Android device to gain superuser privileges and take control of various aspects of the device.
Page Contents
Steps To Root Galaxy J6 Plus Using Magisk
First, we need to unlock the device bootloader on Samsung Galaxy J6 Plus. Then you can continue with the next steps. After this, we need to download and flash the patched ramdisk file which we mentioned above.
Remember,
- After Rooting, it may void the warranty of your phone.
- Rooting will block the OTA updates
Download Stock ROM and Extract the Boot Image
Here is the link for the same.
Download the patched boot image here.
Before moving on to the flashing steps, you need to follow a few,
Pre-Requisites
- Make sure to have enough battery charge on your phone to avoid interruption during the patch installation.
- Before performing any modification take backup of your device data.
- This image file is strictly for Samsung Galaxy J6 Plus only. Do not use it on any other Samsung or other Android devices.
- Download Latest ODIN File
- A PC/Laptop and a micro USB cable.
- Drop the Patched boot image file inside your ADB/Fastboot folder
- Install Samsung USB Drivers.
Disclaimer: We are at GetDroidTips will not be responsible for any bricking/damage to your phone while/after installing this ROM.
How To Install the Patched Boot Image on Samsung Galaxy J6 Plus (SM-J610)
Assuming that you have used our above instruction and unlocked the bootloader, we will continue on flashing the patched boot image.
- First, let’s begin by booting our phone into download mode.
- Connect your phone to PC using the USB cable
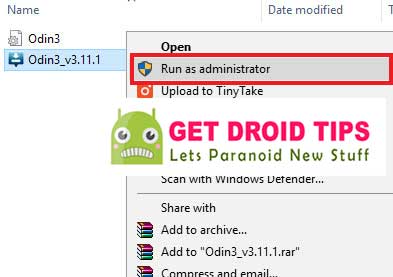
- Once you are connected, now open the downloaded ODIN exe

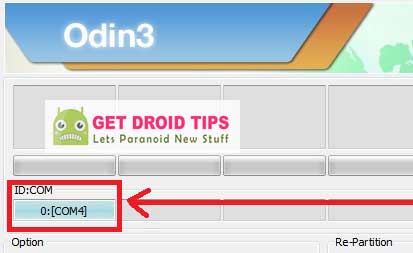
- When you connect the USB cable you will see a blue sign in Odin

- Now Load the patched boot tar file in the AP section.

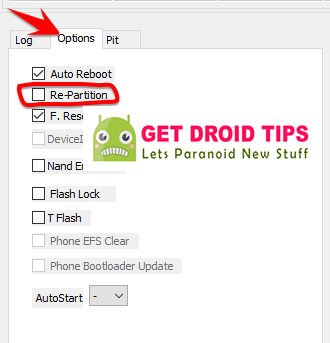
- Make sure re-partition is NOT ticked – Go to Option and see (Let the Auto Reboot and F-Reset Time be ticked)

- Now tap on the start button to root your device.
- Once it is done, your device will reboot.
- First boot will take some time.
So, that’s it. You can try this out now that you have rooted your Samsung Galaxy J6 Plus (SM-J610). If you have any queries regarding this, do let us know.

Thx a lot you helped me a lot.
hi sir
is it normal when after root it will stuck on samsung logo, it keep going showing the samsung logo
It’s not normal. For how long?
i have a tiny word saying “set warranty bit: kernel”
and it loopnig samsung logo
please help me
i also have that, im not sure whats causing that’
Ok so i found the solution, do you remember the modem name of firmware? (eg: J610FNXXS8CVI1) if not, then no booting, if yes download the original firmware from SamFw and follow the tutorial from this: https://www.youtube.com/watch?v=dLGtUSBV_tE
Hope i did help