In this guide, we will show you the steps to run Android on Linux with the help of a Virtual Machine. While emulators could perform the said task, the results were much better with the VM, both in performance and feature-wise. Now let’s address the “why” and “how” parts of this guide. One of the biggest perks why you would like to carry out the aforementioned is that you could run your favorite Android apps and games directly on your Linux setup.
As far as how this task would be carried out, we would be using a Virtual machine and an Android-x86’s ISO image. At the time of writing, Android Pie 9.0 was the latest available image. Hence we would be porting this build itself. While the entire steps might seem daunting at first, the efforts are worth the rewards. So with that said, let’s get on with the guide on how to run Android on Linux with the help of Virtual Machine. Follow along for the instructions.
Also Read
Page Contents
How to Run Android on Linux Using Virtual Machine
To begin with, there are a few files that you need to download. So head over to the requirements section below, get holds of the required files, and proceed with the instructions steps.
Prerequisites
- First off, download the Android 9 ISO image corresponding to the architecture: Android-x86
- Next up, download the Virtual Box for your Linux Setup: VirtualBox for Linux Hosts.
That’s it. You may now proceed with the steps to run Android on Linux.
STEP 1: Setting up the Virtual Machine
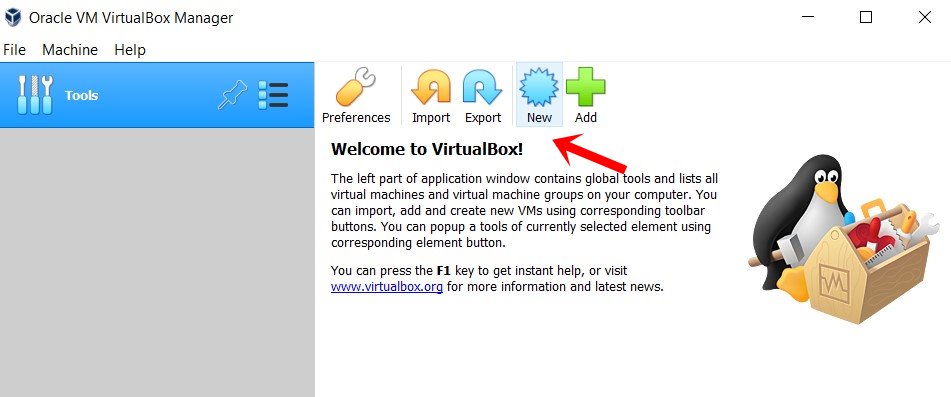
- Launch Virtual Box on your Linux and click on New.
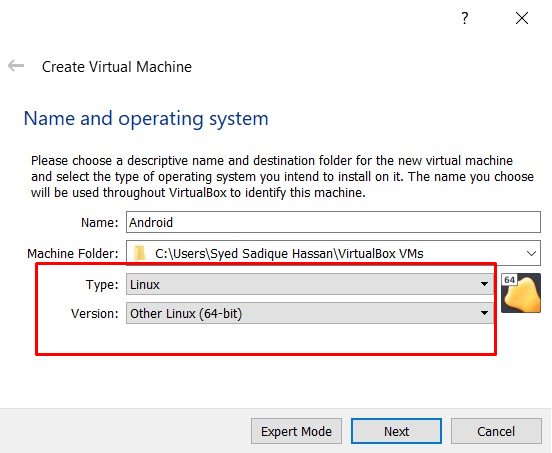
- Now give it a name of your choice, let’s say Android. Then choose Linux as the Type, and under Version, select Other Linux (64-bit). Click Next.
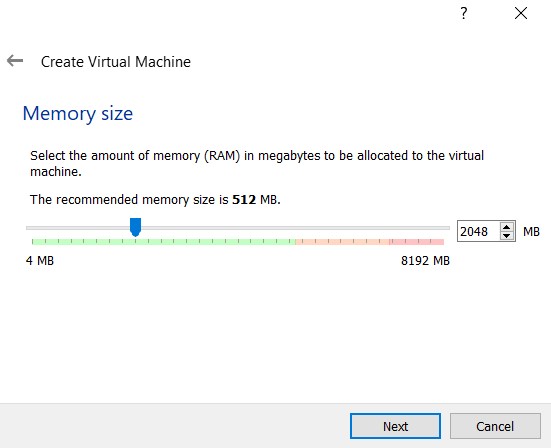
- You will now have to allocate RAM; at least 2GB is recommended. After this, again click Next.
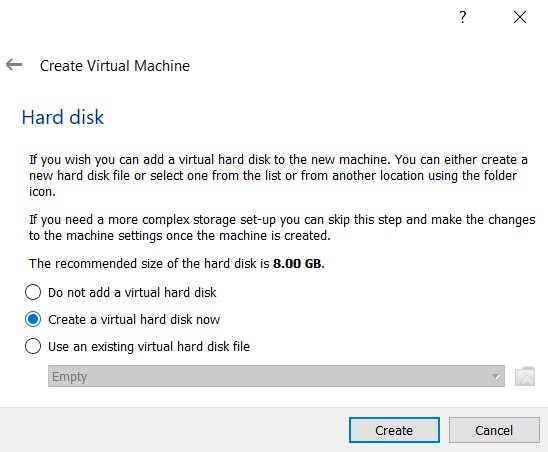
- In the Hard disk section, select Create a virtual hard disk now and click Create.
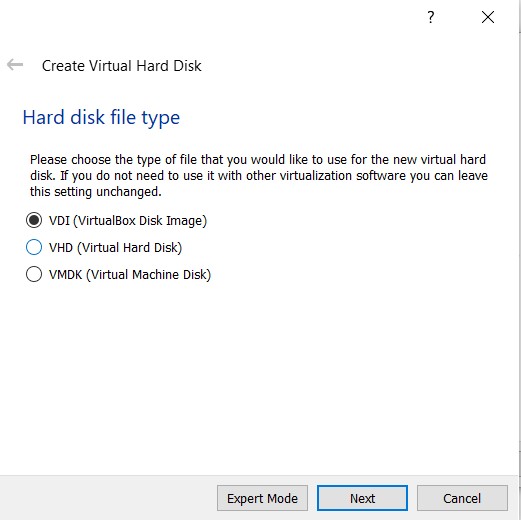
- Select VDI under the Hard Disk File Type and click “Next.”
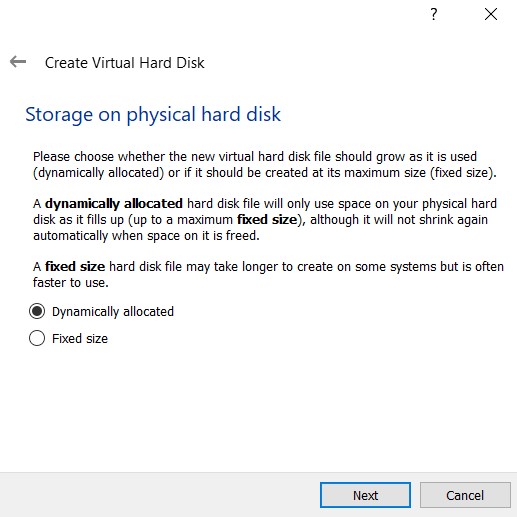
- Under Storage on the physical hard disk, select Dynamically allocated and click Next.
- You will now have to allocate the storage space to the Android-x86’s ISO image. Give it at least 10GB and click Create.
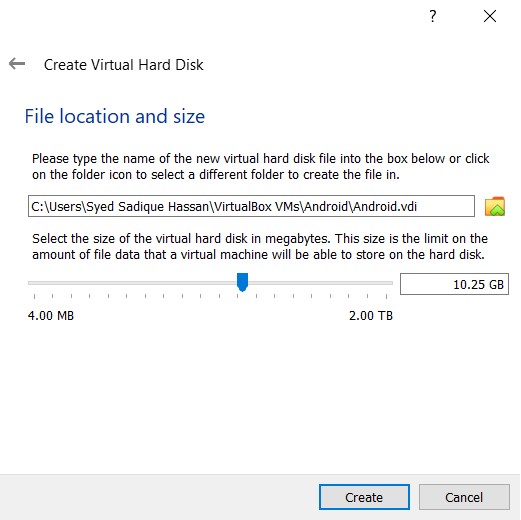
With this, you have successfully set up the Virtual Machine to run Android on Linux. Now head over to the next set of instructions to carry out other optimizations.
STEP 2: Configure Virtual Machine for Android
- Head over to the home screen of Virtual Machine and select Android (or the name you have given) from the left menu. Then click on System from the right menu.
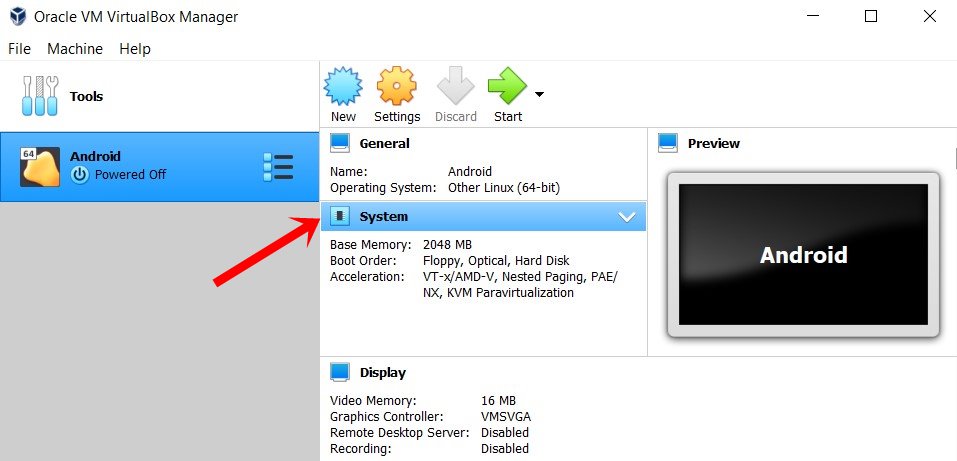
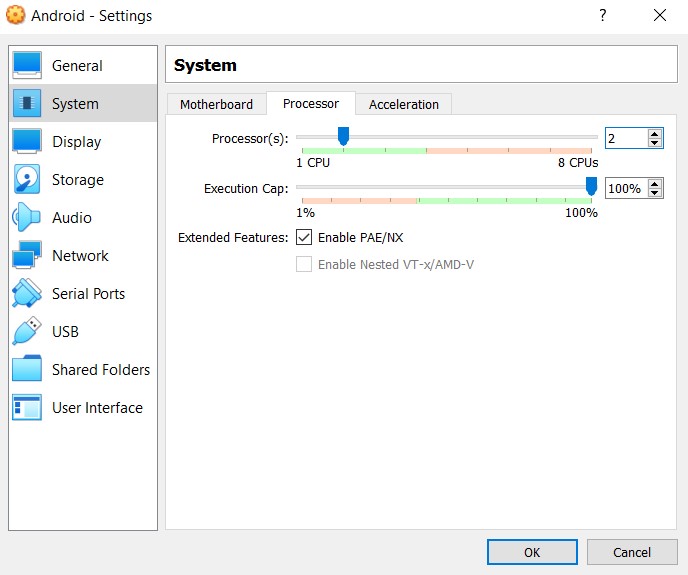
- Go to the Processor tab and allocate at least 2 cores.
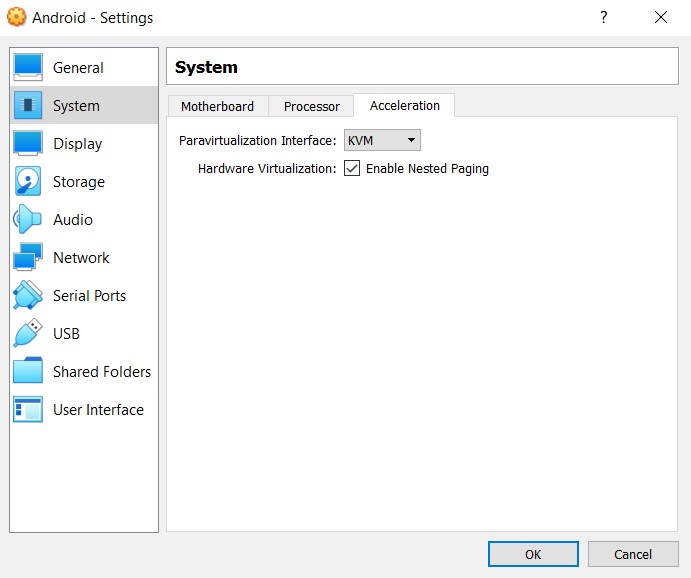
- After this, go to the Acceleration section and select KVM under Paravirtualization Interface.
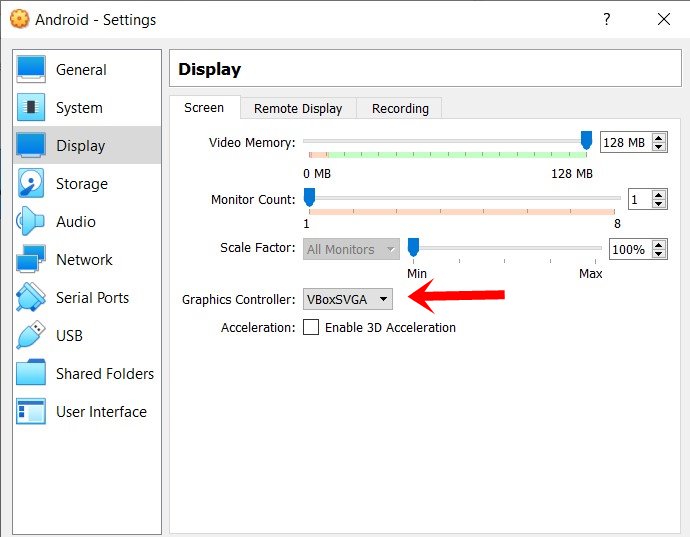
- That’s all from the System tab. Now go to the Display section from the left menu and change the “Graphics controller” to “VBoxSVGA. “
- Now go to the Storage section and select Empty under Storage device. Then click on the Disk icon at the extreme right and select “Choose a disk file” from the menu.
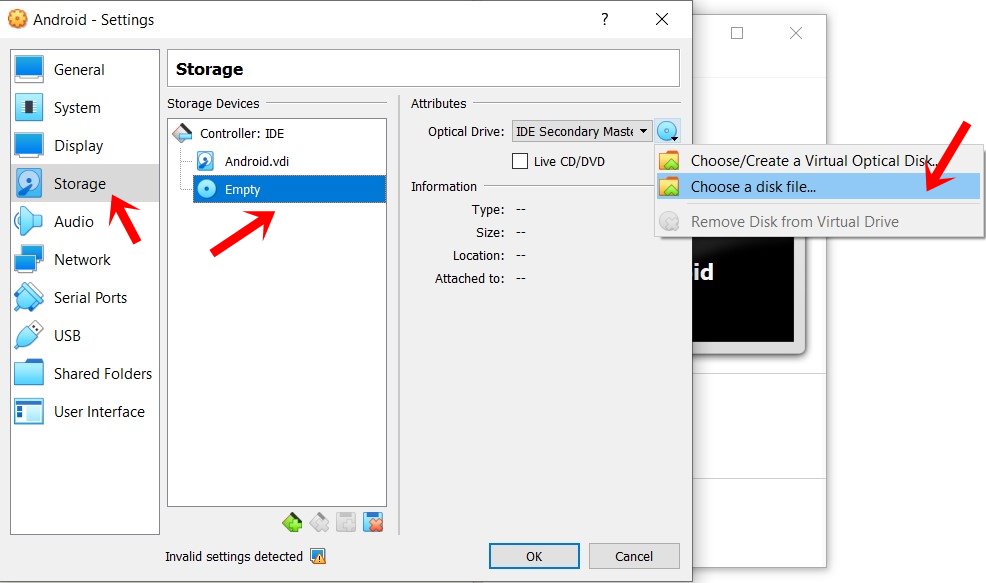
- Select the Android-x86’s ISO image and click OK. These were the required configurations. You may now proceed with the steps to run Android on your Linux setup.
STEP 3: Run Android on Linux
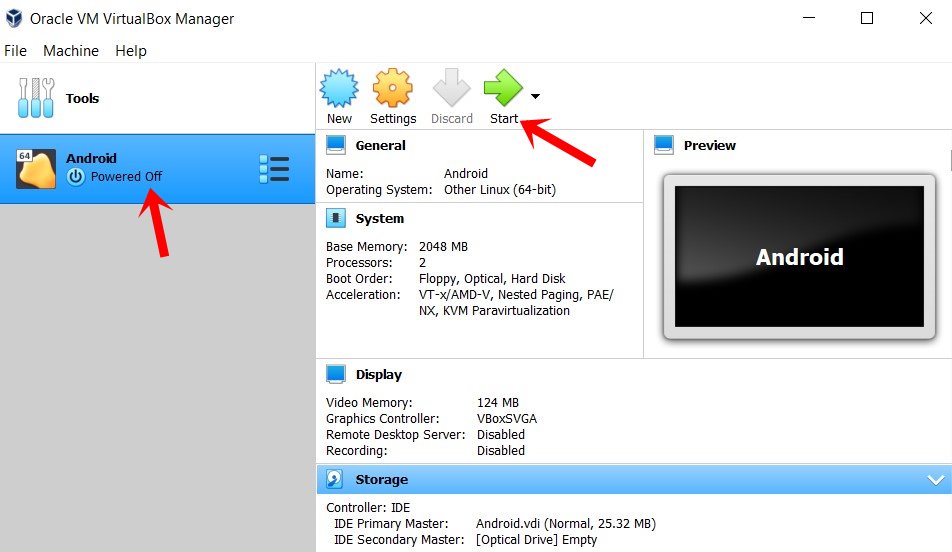
- Go to the main menu of Virtual Box and select Android from the left menu.
- Then click on the Start arrow situated at the top menu bar.
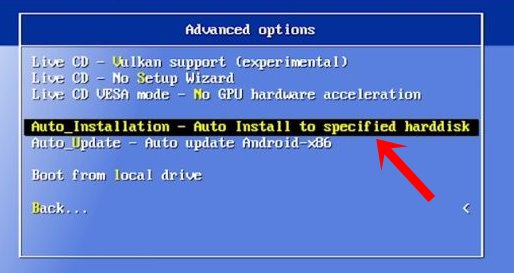
- From the blue menu screen that appears, select Advanced options.

- Then select “Auto_Installation- AutoInstall to Specified Hard Disk
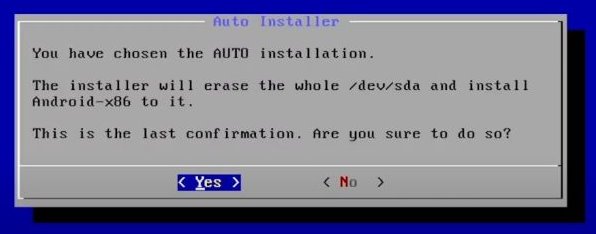
- Select Yes from the Auto Installer dialog box that appears.
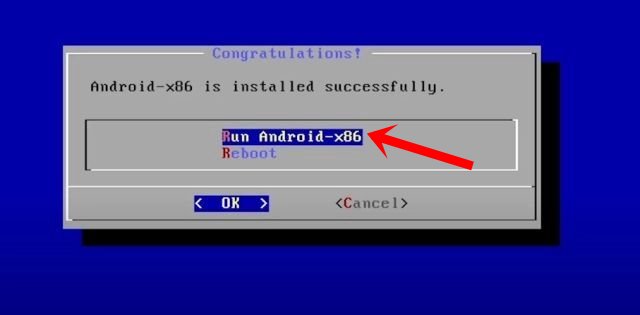
- Finally, select Run Android-x86 and hit Enter.
That’s it. These were the steps to run Android on your Linux using Virtual Machines. You may now head over to the Play Store, log in with your Google Account, and make full use of the open-source ecosystem. Furthermore, if you have any queries about the above instructions, let us know in the comments. Rounding off, here are some equally useful iPhone Tips and Tricks, PC tips and tricks, and Android Tips and Trick that deserve your attention as well.
Also Read
