The latest version of Windows 10 has a feature of the native bandwidth monitoring tool. Everyone may face Internet Connection problems Such as High-speed internet connectivity or stable internet connection problem in their day-to-day activities. Some major issues like where the internet stops working suddenly or a drastic drop in internet speed.
Before, we assumed that the drop in internet connections due to device or network issues. The older versions of windows had no such feature as the Speed monitoring taskbar option. To overcome this issue, Windows 10 has come up with a solution that is Internet Speed Meter tools.
Internet Speed toolbar helps us to upload or downloading the speed of your network. Now internet speed meter facility is available with Android Mobile phone devices. So without an Internet Speed Meter, it’s very odd to work on a Computer. If you are looking to add the internet Speed toolbar on your Personal Computer, this is the right place where you will get the idea of how to show this taskbar in windows 10. Let’s get started:
Also Read

Page Contents
Steps to Enable Internet Speed Meter on task-bar:
Make sure to follow the step-by-step guide to enable the Internet Speed Meter on the taskbar in Windows.
Installing Internet Speed toolbar:
To get this tool, you have to download software known as the Net Speed Monitor tool. The App is designed to run on Windows, Android, and Vista applications. However, it does not mean that older versions of Windows support this Internet Speed tool. Steps as follows:
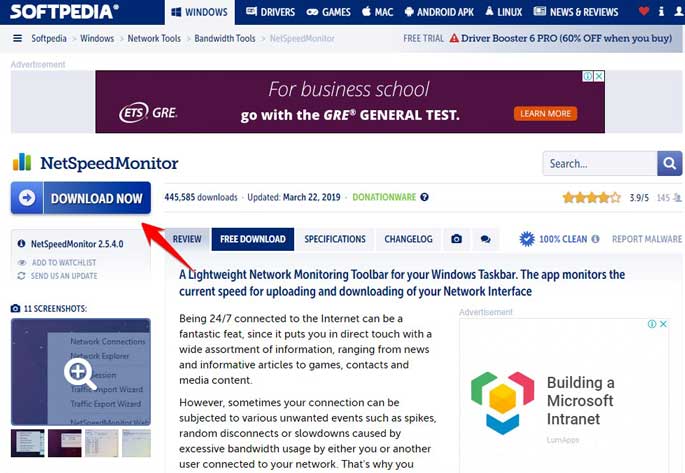
- First, you have to download the Net Speed Monitor tool software, as shown in the figure below. Then click on the “Download” button. You will get options like download it for x86 or x64 systems. You have to choose your available computer memory options. Firstly, the x86 option is available for 32-bit Windows, and another option is available for 64-bit windows.

- Go back to the folder where you have saved this execution file. This Installation file won’t support the Windows versions below Windows 8; installation will start normally. Above this version, you will get an error as “this operating system is not supported as shown in the figure below.
- Right-click on the Setup file -> go to properties
- Under properties, select the Compatibility tab. Then you have to check the Compatibility box next to “Run this program in Compatibility for.” Then the drop-down button should show “Previous Version of Windows.” Click on “ok” to save the changes that you made before.
- Double click on the “Set up File” to start the installation process. Follow the rest of the on-screen instructions during the installation process.
- Once the installation process completed, you will not see the internet speed directly on the task bar. For that, you have to enable the program first.
- For that, Right-click anywhere on the taskbar dialog box and select the Net Speed Monitor option. Under this click on the “Toolbars.” You can immediately enable the programs. On the below dialog box, you will see the upload and download (U and D) on the taskbar.
These are the steps that need for the successful installation of the Net Speed Monitor software.
Steps to check if Net Speed Monitor Stops Working :
Suppose, If Net Speed Monitor stuck in the middle of your task, Follow the below steps to make it functional.
Step 1: Right-click on the “Net Speed Monitor” button and select “Configuration.”
Step 2: After this, you will see Net speed Monitor window -> Select General-> Change the Network Interface to a different one -> Click “OK.”
If it’s still not working properly, keep on repeating the same process, and change the different network interfaces. Hopefully, this time Net speed Monitor works normally.
Tips and Tricks:
The following are the tips for the best usage of this tool.
Change Speed Unit
After the installation process, By default, the tool shows the speed in Kilo-bits/seconds. It may not work sometimes: change the speed unit to KiloBytes/Seconds or Megabits/Seconds. Steps to follow, Right-click on the Net Speed Monitor-> Select Configuration -> Choose the desired Speed unit.
View data usage
The Net Speed Monitor tool also shows the ” Track your data usage” option. To do so, Right-click on the Net Speed Monitor meter-> Select data traffic.
Change Double click action
Steps= Double Click the Net Speed Monitor tool-> Select “Open data Traffic Dialog” -> Click “OK” to save the changes.
Customize Tool Font
If you want to change the font size and style, Go to Configuration->Layout->Change the font
Export Database
You can also use Net Speed Monitor to export the data usage. To do so, Configuration-> database-> Export Wizards. With the help of this Net Speed Monitor tool, you can speed the internet connection. You can also limit the usage of data.
