If you see System Interrupts in the Windows 10 Task Manager randomly that consuming higher CPU usage and you’re unable to find the reason or close the task, don’t worry. You’re not alone here to receive such an issue. Luckily, there are a couple of possible ways that we’ve mentioned below to fix the particular system interrupts high CPU usage issue in Windows 10. Plenty of affected users may think that it’s some kind of a virus or malware. But that’s not the case every time and it’s an operating system process that runs in the background which can be found in the System32 folder inside the Windows folder of the installed Windows drive.
Yes! The path should be like: This PC\Windows(C:)\Windows\System32 by default. It’s not a virus or malware of course. To be very precise, the System Interrupts are a warning or alert system in Windows 10 for CPU overload. Whenever your CPU gets overloaded by the background running processes, it not only reduces the system performance but also affects the CPU. In that scenario, the System Interrupts task will appear that shows how much percentage the CPU is working out of its full strength. The CPU will suspend all other tasks and only runs for the important tasks.
Once the primary task(s) completed, it basically resumes back into its previous state. It means even the System Interrupts seems like a task, it’s not. A continuous system interrupts means there may be a lot of hardware-level errors or compatibility issues are happening in the background. Now, if you don’t manually fix this issue, your PC won’t gonna run expectedly.
Also Read
Page Contents
Fix: System Interrupts High CPU Usage in Windows 10
In most cases, the System Interrupts can take up more than 5-10% of CPU usage which can be alarming because it can damage your CPU at the hardware-level. This kind of issue appears only when there is a hardware issue or driver issue. Those who’re lucky enough can easily fix this issue by simply restarting their computer once. Sometimes a huge backlog of the CPU stays in the loop and causes problems. But if in case, restarting your PC/Laptop won’t help you anyway, you have to follow the methods below.
1. Update Windows OS Build
In some cases, an outdated Windows OS build can cause several issues with the PC performance. If so, you should always check for the latest updates. To do this:
- Press the Windows + I keys to open up the Windows Settings menu.
- Click on Update & Security > Click on Check for updates from the Windows Update section.
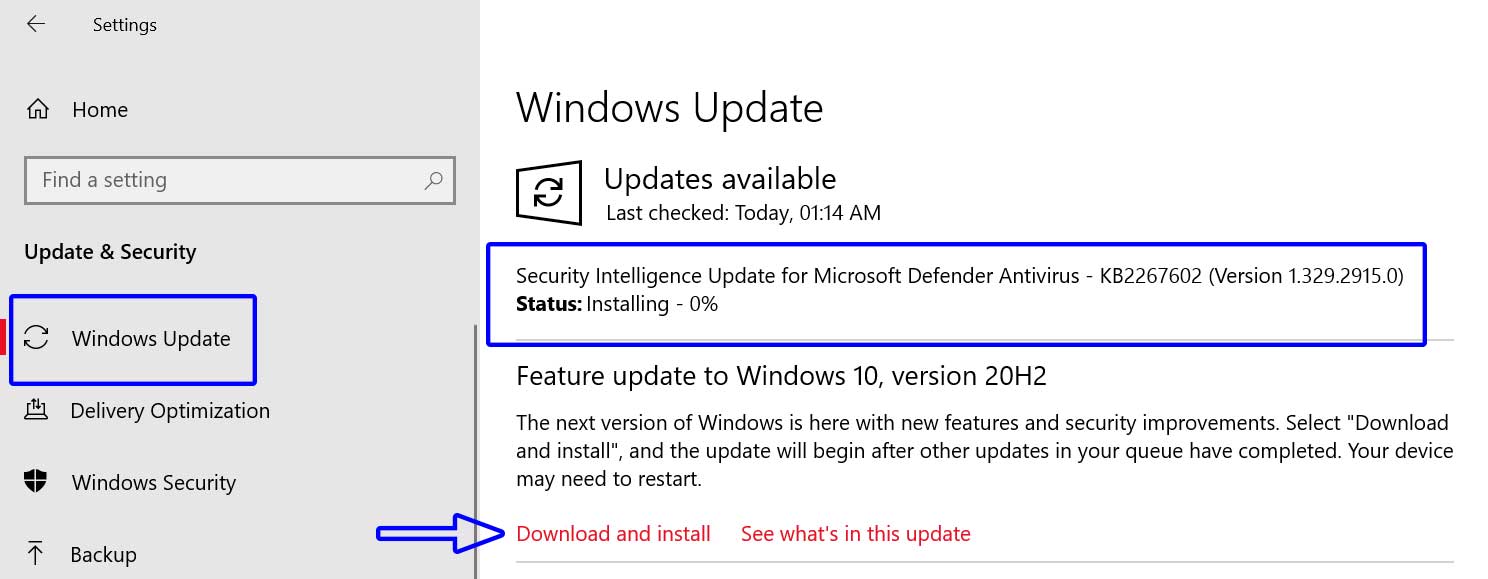
- If there is an update available, download and install it.
- Wait for the update to install completely.
- Finally, restart your computer to apply changes.
However, if there is no update available or Windows update doesn’t help you out, make sure to follow another method.
2. Check Hardware Drivers
If you want to check for the hardware drivers on your computer whether any of the drivers are having issues or not, you can run the DPC Latency Checker by downloading it online. Here DPC stands for ‘Deferred Procedure Call’. It’s a process that’s related to system interrupts and can be able to detect any kind of hardware driver failures or issues.
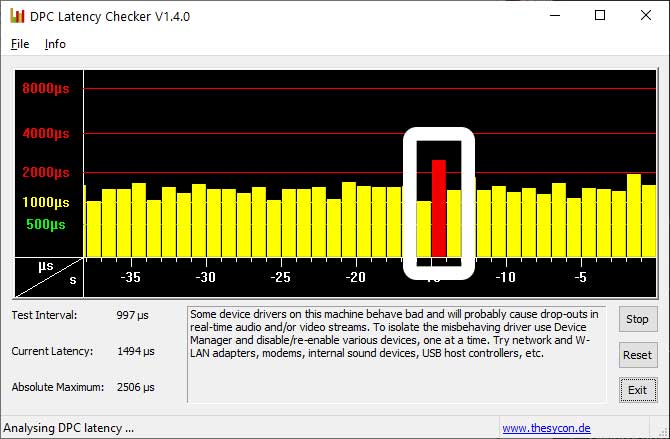
If in case, DPC Latency Checker shows any red bar that means there is something causing the issue.
3. Update Necessary Drivers
Make sure to manually update all the necessary hardware drivers on your Windows 10 via the Device Manager. In that sense, you’ll have to check updates for all the important hardware drivers such as audio driver, display driver, networking driver, peripheral drivers, ports & serial bus drivers, monitors, storage controllers, system devices, everything. All you need to do:
- Press the Windows + X keys to open up the Quick Access Menu.
- Click on Device Manager. (For example, if you want to check update for display drivers, do the following)
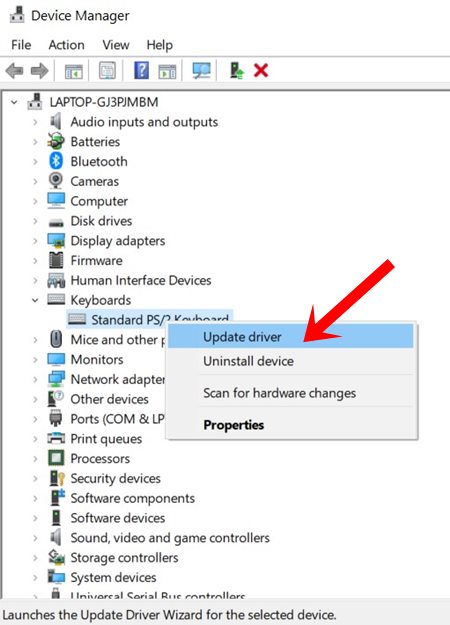
- Double-click on the Display adapters to expand the drop-down list.
- Now, right-click on the dedicated display driver (graphics card driver).
- Select Update driver > Choose Search automatically for drivers.
- If there is an update available, it’ll automatically download and install the latest version.
- Once done, make sure to reboot your computer to change effects.
Similarly, you’ll have to do the same steps for other hardware drivers. Check updates for all hardware drivers one by one and update (if any).
Read More: How to Quickly Remove Windows 10 Temporary Files
However, if that didn’t fix the problem and you’re still experiencing System Interrupts High CPU Usage in Windows 10 then follow the next method.
4. Rollback Driver Version
It’s also highly possible that a hardware driver update is buggy or corrupted for some reasons which have been installed recently. Therefore, your CPU is getting out of control. You should try to roll back the driver version to its previous state to check if the problem gets fixed or not. To do that:
- Press the Windows + X keys to open up the Quick Access Menu.
- Click on Device Manager. (For example, if you want to roll back the display driver to its previous version, do the following)
- Double-click on the Display adapters to expand the drop-down list.
- Now, right-click on the dedicated display driver (graphics card driver).
- Click on Properties > Go to the Driver tab.
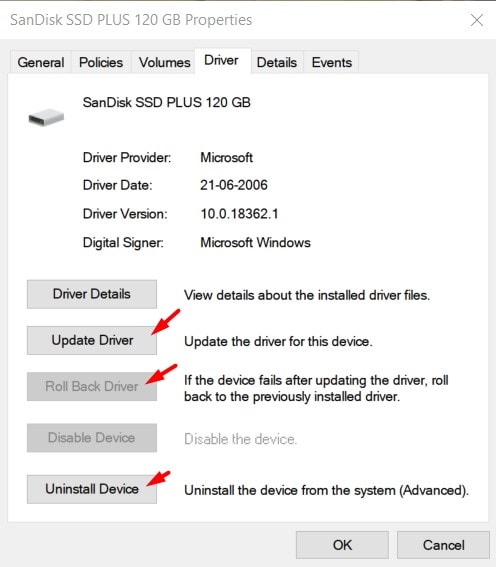
- Select Roll Back Driver (if available).
- Follow the on-screen instructions and if prompted, restart your computer to apply changes.
Do the same steps for all other hardware drivers and check if this helps you or not.
5. Disable and Enable Hardware Drivers
Try disabling and enabling the hardware drivers one by one on your Windows 10 computer from the Device Manager to check for the reason. Here you should have to focus on networking adapters, internal modems, internal sound devices, serial bus drivers, ports, mouse, printer, etc.
Note: DO NOT disable System Devices like CPU, GPU, etc.
- Press the Windows + X keys to open up the Quick Access Menu.
- Click on Device Manager.
- Double-click on the respective driver to expand the drop-down list.
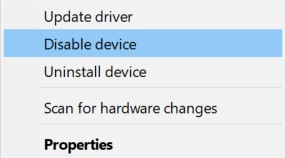
- Right-click on the particular device > Select Disable. (do this one by one)
- Once disabled, open the Task Manager and check if that helps you to fix System Interrupts High CPU Usage in Windows 10 or not.
6. Disconnect and Reconnect External Hardware
If somehow the above methods don’t work for you, try disconnecting and reconnecting the external hardware from your computer (if possible) and check whether there is any hardware damage or dirt, dust, moisture is causing any kind of issue or not.
Sometimes loose connectivity with the external hardware or the lack of enough cooling capacity can also trigger CPU overload or overheating issues. Here unplugging the external hardware means SSD/HDD storage, mouse, keyboard, printer, any USB drive, ethernet cable, external hard drive, webcam, external USB Bluetooth, processor, CPU cooling fan, RAM, GPU card, etc.
However, if you’re a geek computer user then you can keep turning on the system and check the Task Manager while removing external hardware one by one to ensure which one is causing such an issue. If you find the culprit, make sure to connect it to another computer and re-check the issue. Meanwhile, you can also ask for repair or replacement of the problematic hardware (if under warranty). Alternatively, you can try repairing it from a local computer or laptop repairing shop too.
7. Update BIOS
Whenever you power on your computer, BIOS runs first of all and helps your Windows operating system to boot properly. Make sure to check your BIOS version and then download the new update from the respective manufacturer’s website. To do this:
- Click on the Start Menu > Type cmd.
- Right-click on the Command Prompt from the search result.
- Select Run as administrator > If prompted by UAC, click on Yes.
- Now, copy and paste the following command > Hit Enter to execute:
systeminfo | findstr /I /c:bios
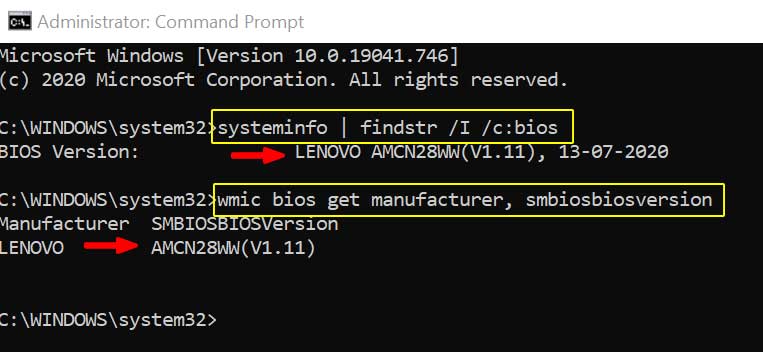
- Next, copy and paste the next command then press Enter:
wmic bios get manufacturer, smbiosbiosversion
- This will show you the actual BIOS version and manufacturer name with the model number.
- Make sure to note down the details and then back up all necessary files from the installed Windows drive (C:).
- Finally, head over to the manufacturer’s website and search for BIOS according to your model.
- You’ll get to know how to update BIOS on your respective model from there. Meanwhile, these days most manufacturers provide a default assistant tool to update all drivers and BIOS easily directly from your PC/Laptop.
That’s it, guys. We assume this guide was helpful to you. For further queries, feel free to ask in the comment below.
