The former Battlefield developers’ team recently released a game called ‘The Finals’ where the destruction and fun combine. The Finals playtest beta access has been closed, and interested players can join THE FINALS by purchasing the same. It’s one of the world-famous, free-to-play, combat-based titles where you can get into multiplayer sessions with your teammates in the virtual arenas. Meanwhile, some players are experiencing The Finals Fatal Error on the PC.
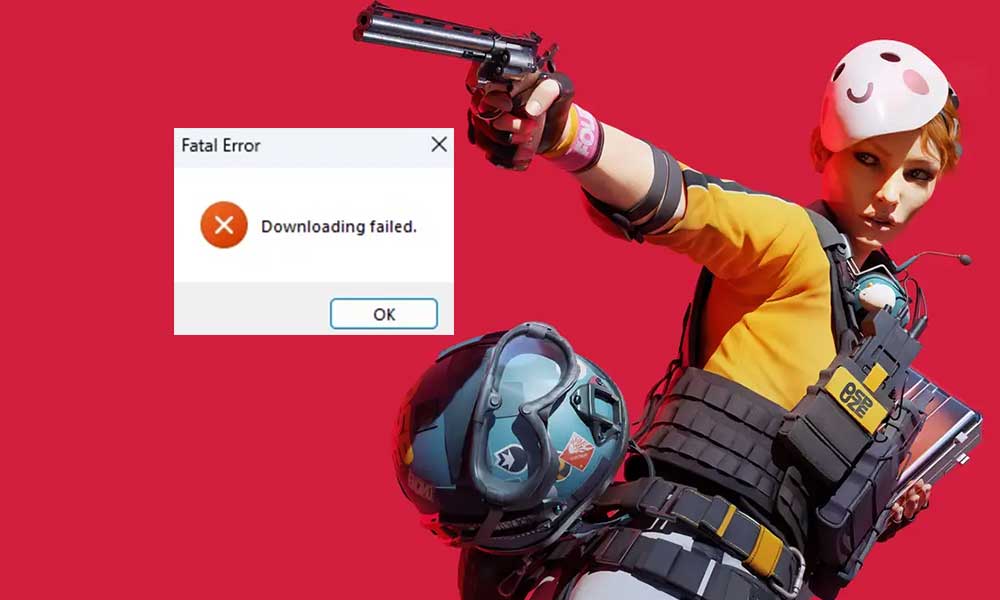
As per several reports, multiple players get the “Downloading Failed” Fatal Error notice on the screen whenever they try to launch The Finals game. At the same time, some players are claiming that the launch option becomes greyed out. It has become quite frustrating since the game surfaced in the market. So, the launch didn’t go as smoothly as we expected earlier. If we talk about The Finals, it’s not a typical first-person shooter title but an impressive gaming experience with interesting objectives.

Page Contents
- How to Fix The Finals Fatal Error
- 1. Restart the System
- 2. Run The Finals as an Administrator
- 3. Update The Finals
- 4. Scan and Repair the Game Files
- 5. Check for Steam Client Updates
- 6. Uninstall MSI Afterburner
- 7. Close Unnecessary Background Tasks
- 8. Use DX11 Launch Options
- 9. Update the Graphics Driver
- 10. Turn Off Antivirus and Firewall
- 11. Clear Steam Download Cache
How to Fix The Finals Fatal Error
Now, talking about the fatal error or downloading failed error might occur due to multiple reasons such as conflicts with the system cache, not running the game with admin access, an outdated game patch version, corrupted or missing game files, issues with the background processes, Steam download cache issues, an outdated client version, issues with the DirectX version, overlay application issues, an outdated graphics driver, conflicts with the antivirus or firewall, and more.
If you’re also one of the victims to encounter such an issue then don’t worry. Here we’ve managed to share with you a couple of workarounds that should come in handy. Make sure to follow all troubleshooting methods until the error has been fixed. So, without further ado, let’s jump into it.
1. Restart the System
First of all, it’s recommended to reboot the system manually to ensure there is no issue with the system cache or temporary glitch. Some PC users have found this trick helpful. Open the Start menu > Click on the Power icon > Select Restart.
2. Run The Finals as an Administrator
Another thing you should do is to run The Finals as an administrator on the PC by following the steps below. Without having the system permissions, some of the programs won’t run properly. To do this:
- Right-click on The Finals application on your PC.
- Select Properties > Click on the Compatibility tab.

- Checkmark the Run this program as an administrator option.
- Click on Apply and select OK to save changes.
- Once done, run the Steam client, and play the game.
3. Update The Finals
An outdated game patch version on the PC can sometimes trigger multiple issues with crashes, Steam download errors, and more. It’s recommended to manually update the game on the respective client to get the latest game patch version. You can check the steps below.
- Open Steam > Go to Library.
- Click on The Finals from the left pane.
- Steam will automatically search for the available update.
- If there is an update available, click on Update.
- Wait for a couple of minutes to complete the update.
- Once done, close Steam, and reboot your PC to apply changes.
4. Scan and Repair the Game Files
Sometimes there might be an issue with the installed game files like corrupted or missing game files on the PC. You can check the following steps to repair the game files to avoid several glitches.
- Launch Steam > Click on Library.
- Right-click on The Finals from the list.
- Click on Properties > Go to the Local Files files.

- Click on Verify Integrity of Game Files.
- You’ll have to wait for the process until it gets completed.
- Once done, restart your computer.
5. Check for Steam Client Updates
It’s suggested to check for the Steam client update by following the steps below to ensure there is no issue with the outdated client version, Any kind of outdated client can cause game-launching issues most of the time. Steam client offers the option to check for updates.
- Exit Steam and go to Task Manager (press Ctrl+Shift+Esc).
- Now, go to Processes > Click to select Steam from the task.
- Click on End Task.
- Then open Steam again > Click on the Steam tab at the top left.
- Select Check for Steam Client Updates.
- If there is an update available, wait for it to download.
6. Uninstall MSI Afterburner
MSI Afterburner is a popular overclocking software that also allows some optimizations and monitoring tools for your graphics card’s usage or performance. However, sometimes it can trouble you a lot with the program running experience and in this case, The Finals low-level fatal error can occur at your end. You should uninstall the MSI Afterburner software from the PC by following the steps below.
- Press Win+R to open the Run dialogue box.
- Type C:\Program Files (x86)\MSI Afterburner\uninstall.exe.
- Hit Enter and go through the uninstallation instructions.
- Once uninstalled, restart your PC > Launch The Finals to check for the error.
7. Close Unnecessary Background Tasks
Background running tasks are useful for the system as well as the respective user to open applications and other tasks seamlessly. However, sometimes a couple of unnecessary third-party applications can run in the background without any of your knowledge. Those not-so-necessary tasks can consume system resources like CPU, RAM, GPU, and data bandwidth. You should manually close those unnecessary tasks individually to free up some system resources.
Please Note: Do not close system tasks or applications without knowledge. Otherwise, your system may get corrupted or you may face some issues.
- Open Task Manager (press the Ctrl+Shift+Esc keys).
- Go to Processes > Choose the specific task that you want to close.
- Click on End Task.
- Now, do the same steps for each task individually.
- Once done, restart your PC.
8. Use DX11 Launch Options
Force using DirectX11 in a specific video game can be useful enough via Steam to avoid launching errors. You can check the following steps to do so:
- Run Steam and go to your Steam Library.
- Right-click on The Finals.
- Select Properties > Under the General tab, click on Set Launch Options.
- Add
-d3d11inside the launch options field. - Now, save the changes, and restart your PC.
9. Update the Graphics Driver
Sometimes issues with the graphics card driver such as an outdated driver or corrupted driver on the system can eventually trigger multiple conflicts while playing video games. It’s suggested to check for the graphics driver and install the latest driver version.
Recommended Update:
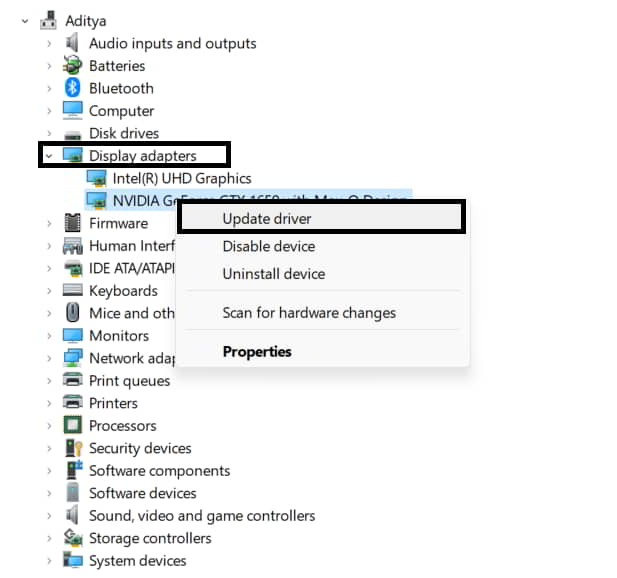
- Press the Win+X keys > Click on Device Manager from the list.
- Double-click on Display Adapters.
- Right-click on the dedicated graphics card that you use.

- Select Update Driver > Click on Search automatically for drivers.
- If an update is available, it’ll automatically download & install the latest version.
- Once done, restart the computer to apply changes.
Manual Update:
If you can’t find any pending updates, head over to the official website of the respective graphics card brand below and search manually for the latest update. Remember that you’ll always have to search for the latest driver version and specific for the model you’re using. If a new version is available for the graphics card, download the driver and install it on your PC. You can jump to the link below to do so:
10. Turn Off Antivirus and Firewall
You can try disabling Windows Firewall manually to ensure there is no issue with the security software blocking the game application. Make sure to follow the steps below to do so:
- Click on the Start Menu > Search and open Windows Defender Firewall.
- Select Turn Windows Defender Firewall ON or OFF.
- From the Customize Settings page, select the Turn off Windows Defender Firewall (not recommended) option in all the Public, Domain, and Private Networks.
- Click on OK to save changes.
- Once done, reboot the PC to apply changes.
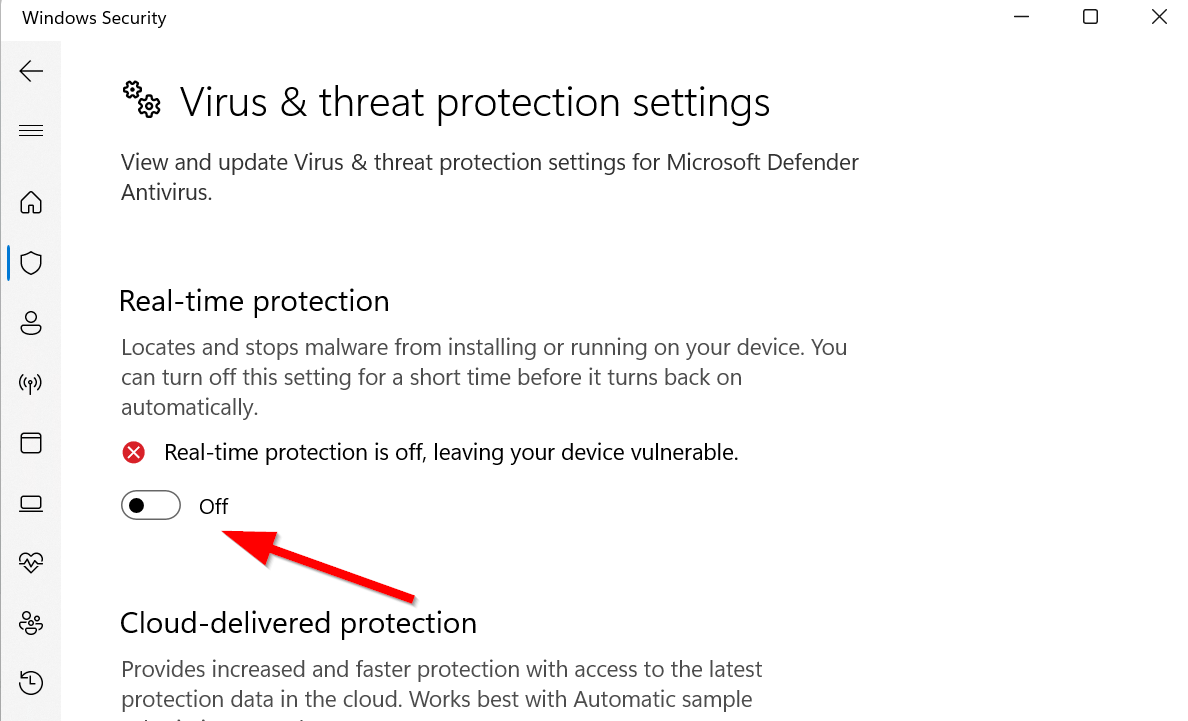
Additionally, you can also try disabling the antivirus protection on your Windows computer manually to prevent game application blocking by the aggressive real-time protection scanning in the background. If you’re using the default Windows antivirus that comes pre-installed then check the following steps to turn it off.
- Press the Win+I keys to open Windows Settings.
- Click on Update & Security > Go to Windows Security.
- Now, click on Open Windows Security > Select Virus & Threat Protection.

- Select Manage Settings > Go to Real-time protection and Turn it Off.
- If prompted, click on Yes to continue.
- Now, you can run The Finals again to check for the issue.
Please Note: If you’re using any other third-party antivirus program on your PC, turn off the real-time protection feature via the program settings menu.
11. Clear Steam Download Cache
Sometimes issues with the game launcher’s cache files may cause game errors. You should try clearing the cache from the Steam client or server. To do so:
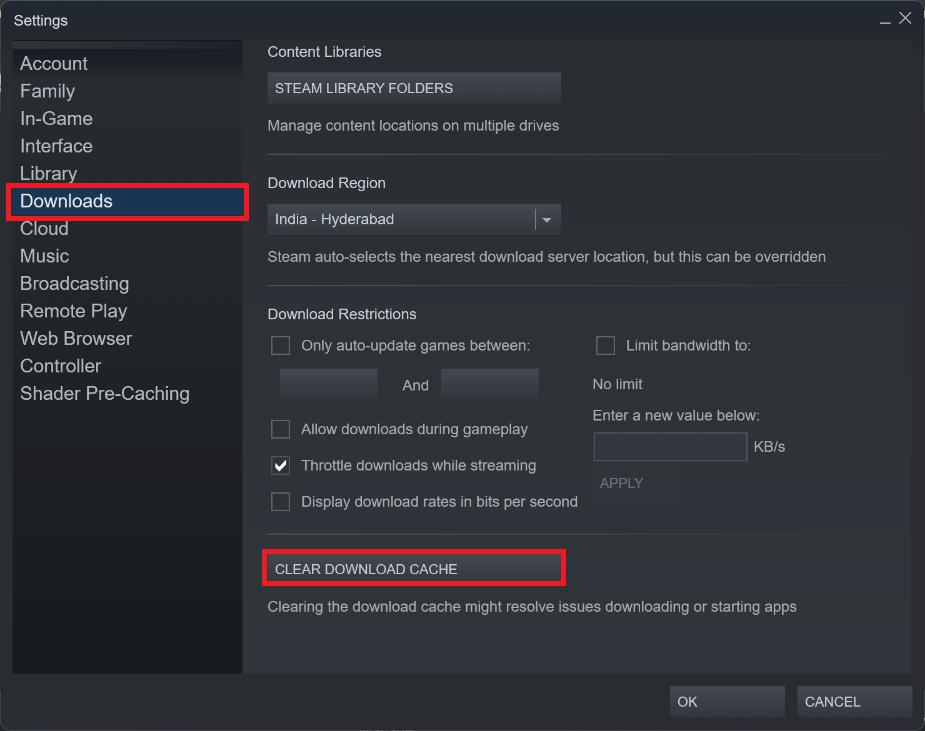
- Open the Steam client > Go to the Steam tab from the top left side.
- Click on Settings > Click on the Download tab.

- Now, click on the Clear Download Cache button.
- Once done, log back into your Steam account.
- Finally, relaunch the game to check for the fatal error.
That’s it, guys. We assume this guide was helpful to you. For further queries, you can comment below.
Also Read
