In this guide, we will tell you how to unlock the bootloader on Sony Xperia 1. Bootloader unlocking is required when the user wants to perform certain modifications on his device. It may be rooting, installing some custom ROM or any other application. Often it happens that people are enthusiastic to perform customization on their devices, but lack the correct tools and guidance to do so. So, here we come to the scene and provide you with this guide.
It is easy to Unlock Bootloader on Sony Xperia 1. We have used the ADB fastboot tool to unlock the bootloader. The process is simple. Even if you are quite new in the world of Android customization, you will find it simple to Unlock Bootloader on Sony Xperia 1.
![How to Unlock The Bootloader On Sony Xperia 1 [J8110, J9110, J8170]](https://www.getdroidtips.com/wp-content/uploads/2020/01/Sony-Xperia-1.jpg)
Remember Sony has a dedicated website to unlock the bootloader, You can select Xperia XA2 to Unlock the Bootloader. It is like same as doing the unlock procedure for all Xperia Device. Follow the Step below carefully! We have also added a screenshot with the steps.
Page Contents
What is Unlock Bootloader?
It is a fragment of code that ensures your device starts or boots up correctly. We can kind of think the bootloader as an intermediary that checks that the hardware and the software are in sync to perform perfectly for the user.
A bootloader on a smartphone is locked by default by the OEM. Your device may lose its warranty when it is unlocked. It is kept locked so as to encourage people to use the device in its stock form and do no customization on it. However, people are more into rooting and trying out custom ROMs on their devices. So, to achieve that they unlock the bootloader of the device.
Steps to Unlock the Bootloader on Sony Xperia 1:
Before proceeding, make sure to understand and download the required tools and drivers.
Warning!
Pre-Requisites:
- To Unlock Bootloader On Sony Xperia 1 (Griffin), you need a laptop or PC.
- Supported Models are J8110, J9110, and J8170
- Charge the Xperia 1 to a sufficient battery level to avoid any sudden shutdowns during the process.
- We strongly recommend you to take a complete full backup of your personal data, including the internal storage. The phone will be formatted, so be prepared for it. You can also follow our Android backup guide for the same.
- You need a USB cable to connect your phone to PC.
Required Files on your PC:
- Official Bootloader Unlock Page from Sony: CLICK HERE
- Now note your IMEI no by dialing *#06# or this 15-digit code can be found on your box and also at the back of the phone
- Download Minimal ADB Tool – CLICK HERE or Download the Full ADB setup for Windows / Mac here
- Make sure to Download Sony USB Drivers
Make sure you have followed the steps properly. Don’t Skip and Read! – We are not responsible for any damage that you make to your phone.
Steps for How to Unlock Bootloader on Sony Xperia 1
- First of all, make sure your device can be unlocked or not. To check, follow the steps below :
- In your device, open the dialer and enter *#*#7378423#*#* to access the service menu.
- Tap Service info > Configuration > Rooting Status. If Bootloader unlock allowed says Yes, then you can continue to the next step. If it says No, or if the status is missing, your device cannot be unlocked.
- Now Go to the official Unlock Bootloader website of Sony: CLICK HERE.
- Scroll down and select your device, and press Continue.

- Now register your email.
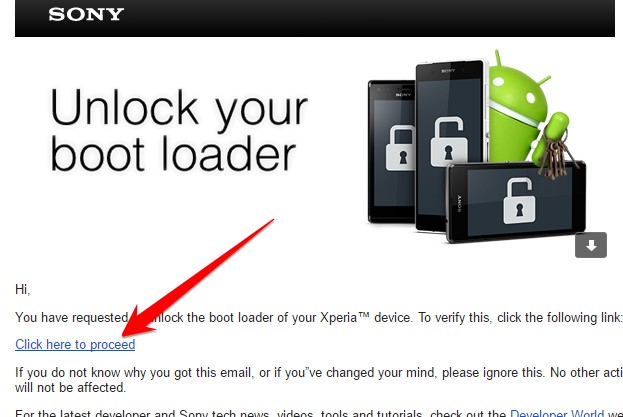
- You will receive an mail to confirm, Tap on “Click here to proceed”.

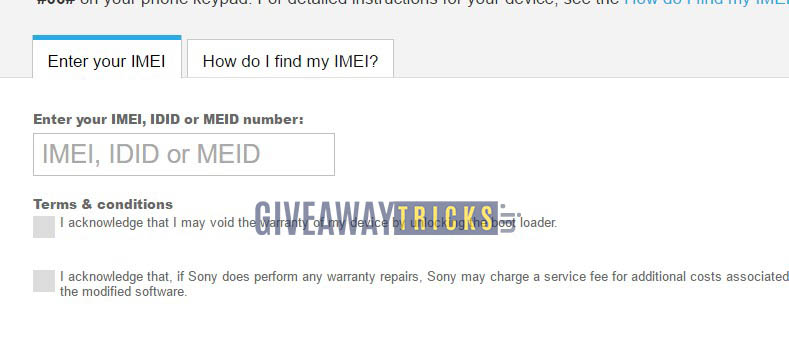
- Once you enter into the Sony Unlocker page, you will be asked to enter your smartphone IMEI no, Now ENTER THE IMEI NO inside the BOX.

- You will get your unlock key once, Now Copy the unlocker key in a notepad.

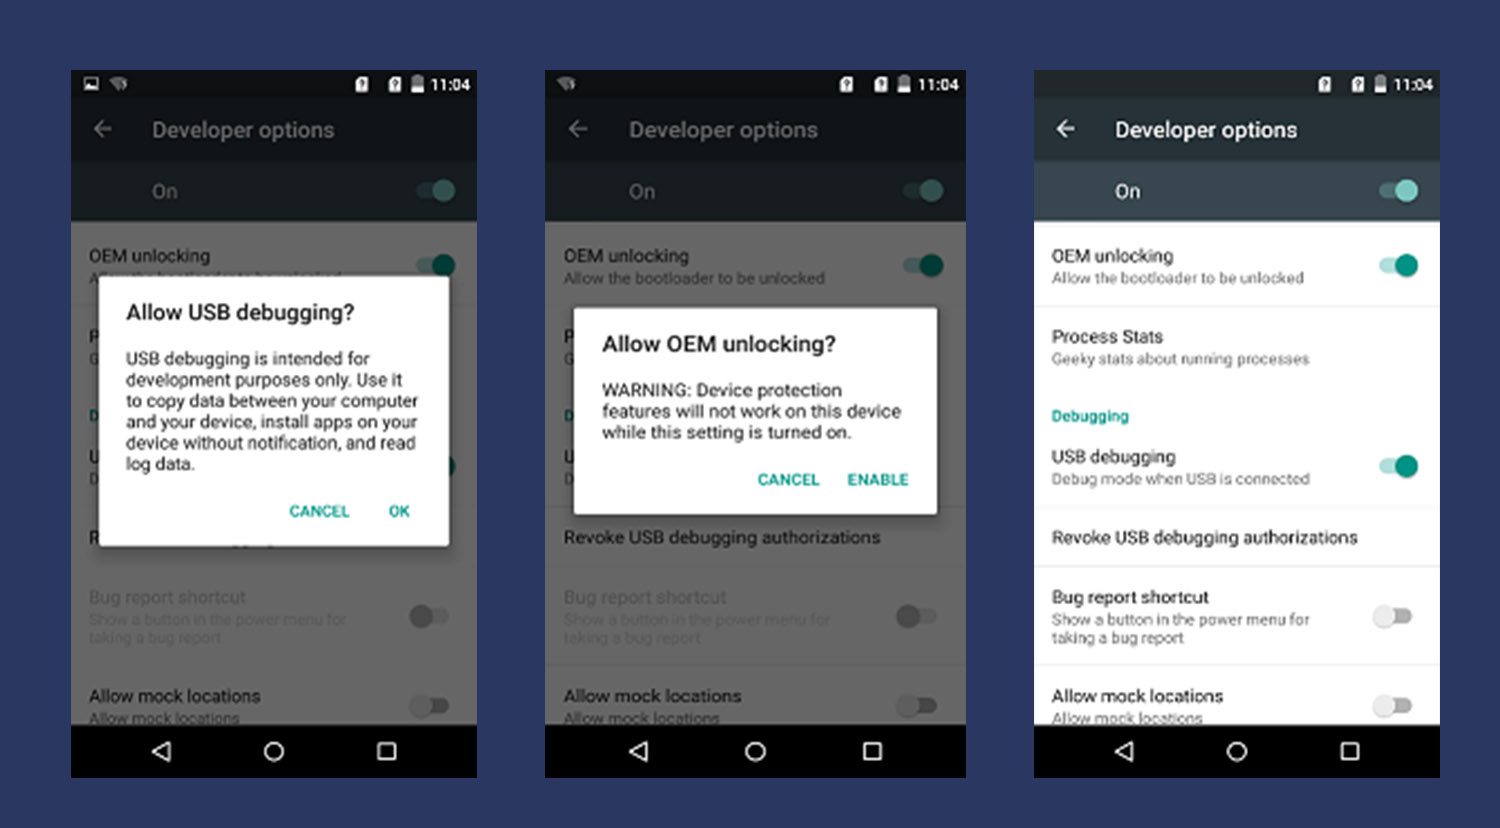
- Now You need to enable the Developer Option on your phone.
- To Enable the Developer Option. – Go to your Settings -> About Phone -> Now Tap on the Build Number 7-8 Times until you see a toast message “Developer option enabled“
- Now go to Developer option in the settings and Enable OEM unlock.

- Download ADB Fastboot tool and Extract the ADB Fastboot Tool somewhere in PC (Link is given above)
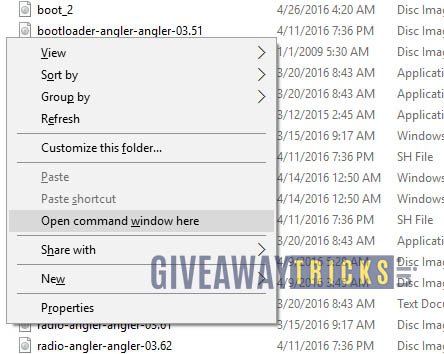
- Now Open the Extractor ADB and Fastboot folder and Open Command Window by pressing Shift Key + Right Mouse Click.

- Now connect the PC to Mobile with USB Cable
- You need to Reboot the phone into Bootloader – Type the Command from below in your Command window that you opened
adb reboot bootloader
- Your device will boot into the bootloader. (If it doesn’t then please check your Cable or ADB Drivers and Install again). Now enter the command with your unlock key after the OEM unlock and replace this character 0x07B7BFEA7AC879F0 with your unlock key
fastboot -i 0x0fce oem unlock 0x07B7BFEA7AC879F0
- That’s it! You have successfully Unlock The Bootloader On Sony Xperia 1.
- You can now reboot your phone.
I hope this guide was helpful to unlock the bootloader on Sony Xperia 1. For more queries, please leave a comment below.
