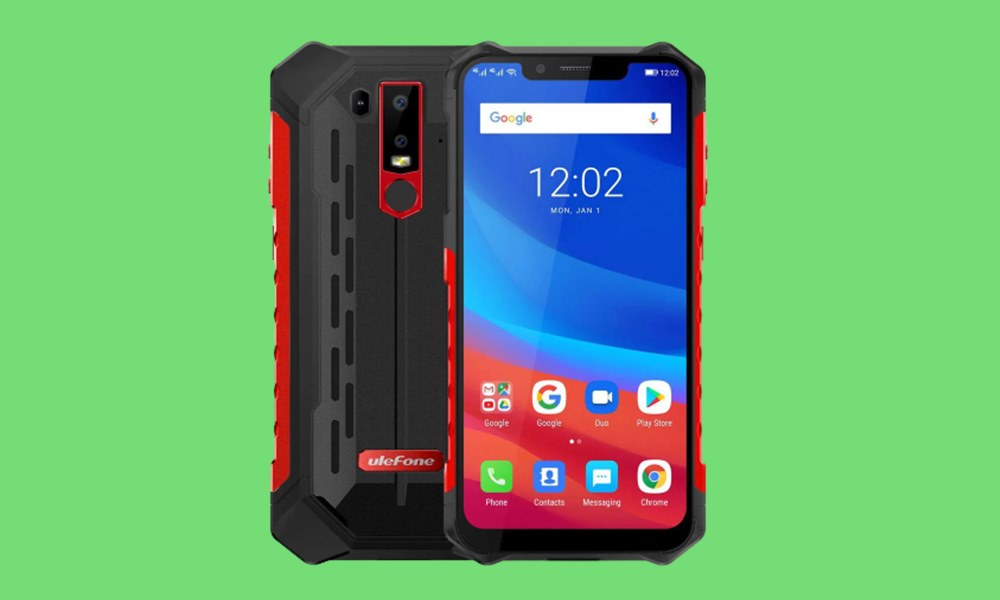
In this tutorial, we will show you how to unlock the bootloader on any Ulefone device. The smartphone industry is currently saturated with tons of offering from various OEMs. However, one reason why Ulefone managed to stand out from the crowds is due to its USP of providing some of the best rugged and heavy-duty smartphones. Its Armor series is the perfect example of the same. With an underlying MediaTek chipset, the devices have managed to create a stronghold in China and surrounding regions.
Furthermore, the device also has decent support in custom development. You could gain administrative privileges, flash custom binaries, and carry out tons of other modifications. There’s just one requirement that needs to be check-marked from your end and that calls for an unlocked bootloader. So in this guide, we will show you to unlock the bootloader on any Ulefone device. But first, let’s make you aware of the risk and perks associated with this process. Follow along for the detailed instruction set.
Page Contents
Advantages/Disadvantages of Unlocked Bootloader
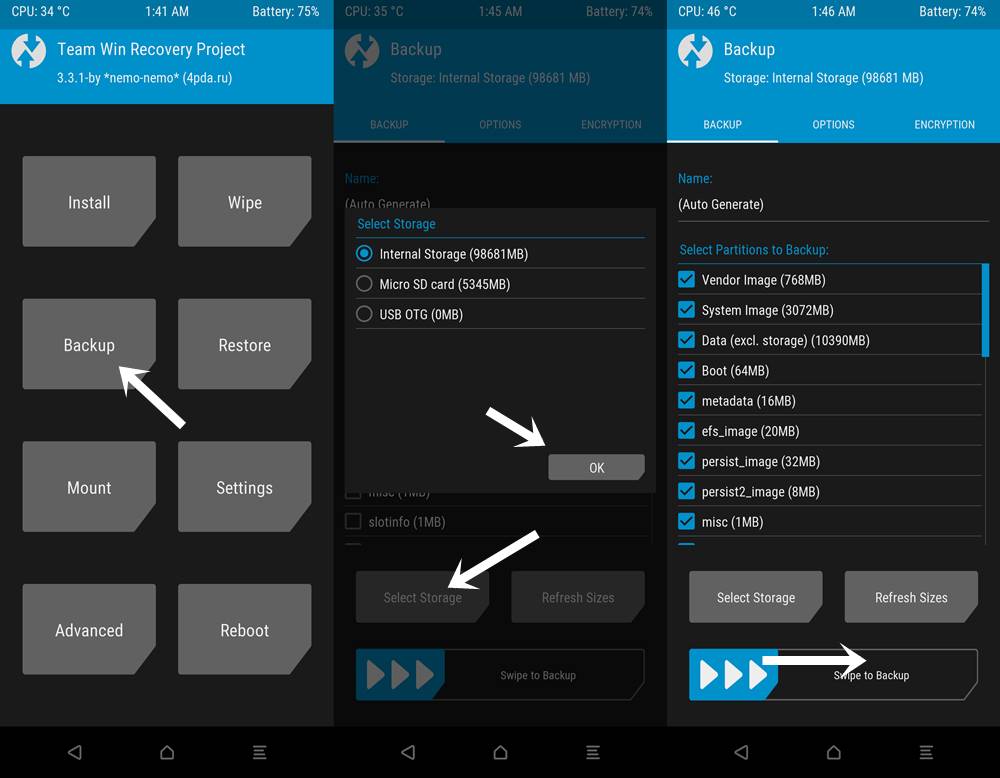
This process in itself brings in quite a few benefits. To begin with, you could flash a custom ROM like LinegageOS, Pixel Experience, and other AOSP based ROMs. Likewise, you could also flash a custom recovery like TWRP. This will then allow you to create and restore Nandroid backup, flash ZIP and IMG filed and wipe various device partitions. Furthermore, you could also root your device via Magiska and gain access to the system partition.
However, this process has a few downsides as well. For example, it will wipe off all the data from your device and might nullify its warranty as well. Along the same lines, apps like Google Pay, Netflix, and Pokemon Go might not function in their full capacity. The entire process is risky and could lead to a few issues if not done correctly. With that said, if you’re ready to proceed ahead, then here are the steps to unlock the bootloader on any Ulefone phone.
How to Unlock Bootloader on Any Ulefone Phones?
Before we list out the instructions, there are a few prerequisites that you need to go through. Make sure to tick all these requirements and only then proceed with the unlocking process.
Prerequisites
- First and foremost, create a complete device backup as the process is going to wipe off the data partition.
- Also, install the Android SDK Platform Tools on your PC.
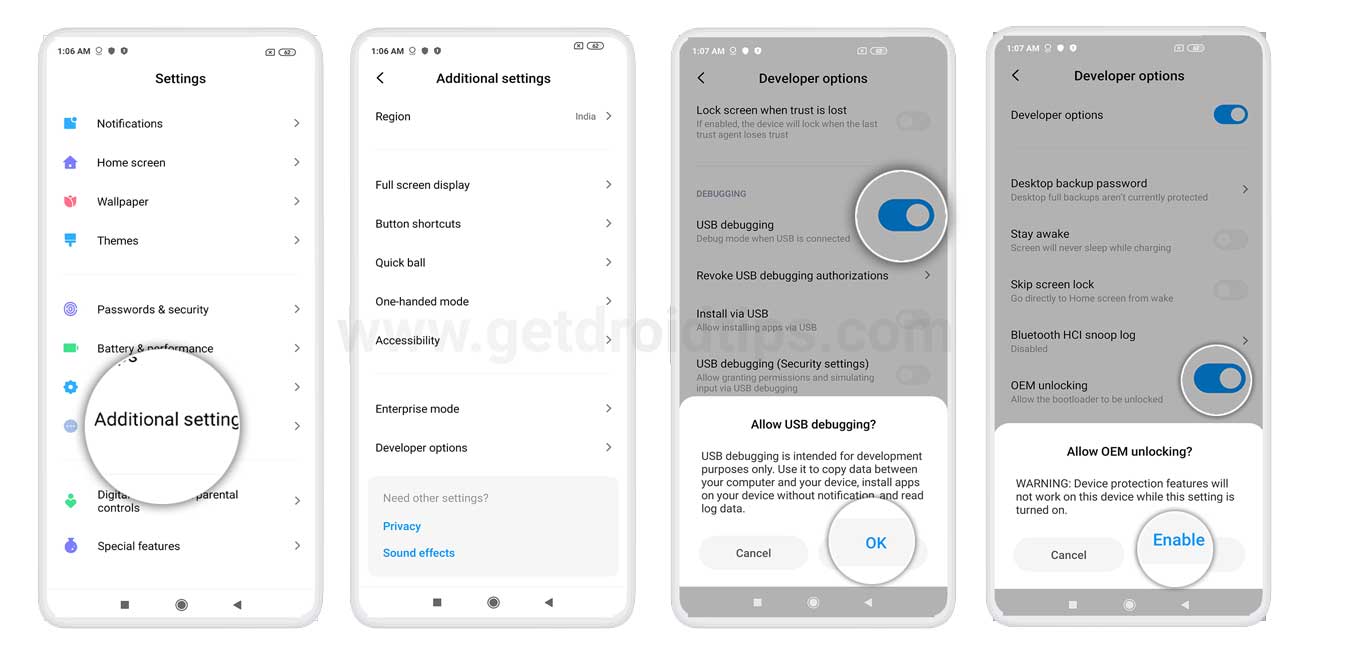
- Next up, enable USB Debugging and OEM Unlocking. The former will make your device recognizable in ADB Mode whereas the latter allows you to carry out the unlocking process. Head over to Settings > About Phone > Tap on Build Number 7 times > Go back to Settings > System > Advanced > Developer Options > Enable USB Debugging as well as OEM Unlocking.
That’s it, these were the required files. You may now proceed with the steps to unlock the bootloader on any Ulefone phone.
Supported Ulefone Device List:
| Device Name | ||
| Ulefone Armor X7 | UleFone Be Paris Lite | UleFone S9 Pro |
| Ulefone Armor 7E | UleFone Be Pro | UleFone S10 Pro |
| Ulefone Armor X7 Pro | UleFone Be Pro 2 | UleFone S11 |
| Ulefone Note 8P | UleFone Be Pure | UleFone T1 |
| Ulefone Armor 9 | UleFone Be Pure Lite | UleFone T2 |
| UleFone Armor | UleFone Be Touch | UleFone T2 Pro |
| Ulefone Armor X | UleFone Be Touch 2 | UleFone Tiger |
| Ulefone Armor Mini | UleFone Be Touch 3 | UleFone U007 |
| UleFone Armor 2 | UleFone Be X | UleFone U007 Pro |
| UleFone Armor 2S | UleFone Future | UleFone U008 Pro |
| UleFone Armor 5 | UleFone Gemini | UleFone U5 |
| UleFone Armor X2 | UleFone Gemini Pro | UleFone U7 |
| UleFone Armor X5 | UleFone GQ3028 | UleFone U45 |
| Ulefone Armor X6 | UleFone Metal | UleFone U650 |
| UleFone Armor 6 | UleFone Metal Lite | UleFone U658 |
| UleFone Armor 6S | UleFone Mix | UleFone U692 |
| UleFone Armor 7 | UleFone Mix S | UleFone U9592 |
| UleFone Armor 3 | UleFone Mix 2 | UleFone Vienna |
| UleFone Armor 3W | UleFone N9189 | UleFone X |
| Ulefone Armor 3WT | UleFone Paris | Ulefone Armor X9 Pro |
| UleFone Armor 3T | UleFone Paris Golden | Ulefone Power Armor 14 |
| UleFone Armor X3 | UleFone Paris X | Ulefone Note 6P |
| UleFone Armor 6E | UleFone Power | Ulefone Note 12P |
| UleFone Note 7 | UleFone Power 2 | Ulefone Armor X9 |
| UleFone Note 7P | UleFone Power 3 | Ulefone Armor 10 5G |
| UleFone Be One | UleFone Power 3S | Ulefone Note 7T |
| Ulefone Note 13P | UleFone Power 3L | Ulefone Armor Mini 2 |
| Ulefone Armor X10 | UleFone Power 5 | Ulefone Note 10 |
| Ulefone Note 10P | UleFone Power 5S | Ulefone Note 9P |
| Ulefone Armor X10 Pro | UleFone Power 6 | Ulefone Armor 8 |
| Ulefone Power Armor 14 Pro | UleFone P92 | Ulefone Note 8 |
| Ulefone Note 6T | UleFone P6000 Plus | Ulefone Armor X5 Pro |
| Ulefone Note 11P | UleFone S1 | Ulefone Armor 9E |
| Ulefone Armor 11 5G | UleFone S1 Pro | Ulefone Armor 8 5G |
| Ulefone Armor 8 Pro | UleFone S8 Pro | Ulefone Armor X8 |
| Ulefone Armor 11T 5G | Ulefone Power Armor 20WT | Ulefone Note 12 |
| Ulefone Tab A7 | Ulefone Armor Pad | Ulefone Power Armor 16 Pro |
| Ulefone Note 6 | Ulefone Armor X6 Pro | Ulefone Armor 17 Pro |
| Ulefone Power Armor 13 | Ulefone Armor 15 | Ulefone Power Armor 18T |
| Ulefone Armor 12 5G | Ulefone Power Armor X11 Pro | Ulefone Tab A8 |
| Ulefone Armor X8i | Ulefone Armor 23 Ultra | Ulefone Power Armor 19 |
| Ulefone Power Armor 18 | Ulefone Armor 20WT | Ulefone Note 14 |
| Ulefone Power Armor 19T | Ulefone Tab 7 | Ulefone Armor 21 |
| Ulefone Note 16 Pro | Ulefone Note 15 | Ulefone Power Armor X11 |
| Ulefone Armor X12 Pro | Ulefone Armor X13 | Ulefone Armor 22 |
| Ulefone Armor Pad Lite | Ulefone Armor X12 | Ulefone Armor 24 |
| Ulefone Armor Pad 2 | Ulefone Power Armor 18 Ultra | Ulefone Power Armor 18T Ultra |
Instruction Steps
- Connect your device to the PC via USB cable. Make sure USB Debugging is enabled.
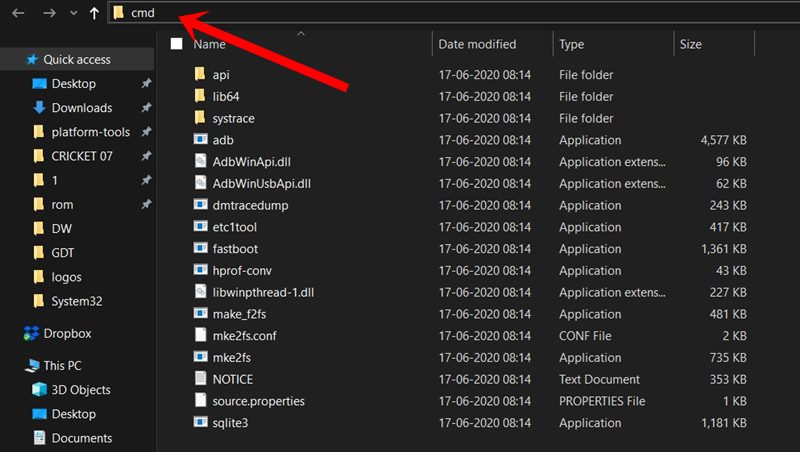
- Then head over to the platform-tools folder, type in CMD in the address bar, and hit Enter. This will launch the Command Prompt.
- Type in the below command in the CMD window to boot your device to Fastboot Mode
adb reboot bootloader
- Now execute the below command and if you get an alphanumeric string followed by the fastboot keyword, it signifies that your device is successfully booted to Fastboot. Otherwise, recheck that you have installed all the necessary drivers.
fastboot devices
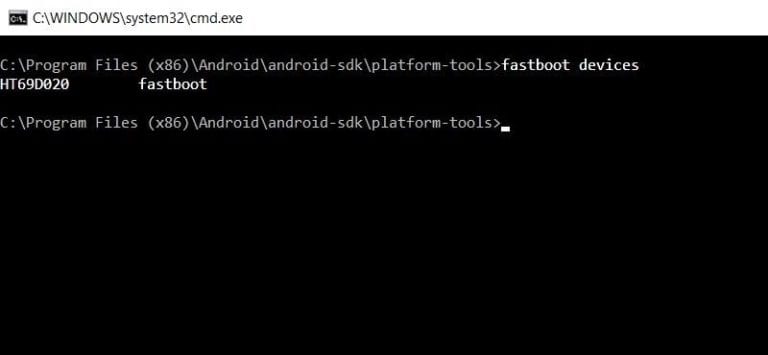
- Now type in the following commands to unlock the bootloader
fastboot oem unlock
- Or, on some newer Ulefone phones, you might have to enter the below command to unlock the bootloader
fastboot flashing unlock
- You may now get a prompt on your device. Select Yes, Unlock the Bootloader, or any other similar message that replies in the affirmative, using the Volume Keys. Then press the Power key to confirm the decision.
- The process will now begin and should take a few seconds. Once done, it should boot to the OS. However, if that doesn’t happen, you may manually do the same via the following fastboot command:
fastboot reboot
That’s it. These were the steps to unlock the bootloader on any Ulefone phone. Do keep in mind that the first boot might take up some time, this is completely normal. Along the same lines, you will have to set up your device from scratch as it has been formatted. Apart from that, if you have any other queries, then do let us know in the comments section below. Rounding off, here are some iPhone Tips and Tricks, PC tips and tricks, and Android Tips and Tricks that you should check out as well.

Is it possible to make google pay work after rooting or unlocking bootload? If yes, is it possible that it crashes after a while because of an update by google etc?