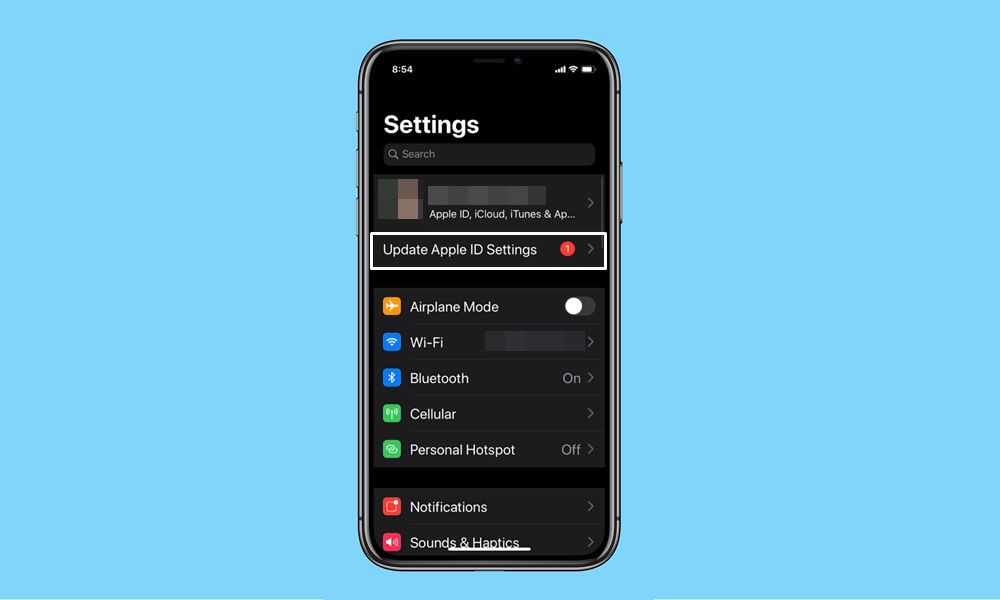
In this guide, we will show you the steps to fix the Update Apple ID Settings issue on iPhone and iPad. There are a lot of new and noteworthy features in the new iteration of Apple devices that manage to grab the attention of the masses. However, as of now, it seems these devices are in a limelight for not necessarily the right reasons. There have been quite a few instances where users have complained that they are continuously getting the aforementioned prompts on their iPhone or iPad devices.
In general cases, this notification appears if you haven’t filled in all the required details or the information entered by you is expired/not updated. But some concerned users are facing this issue even when all their details are up-to-date. If you are also getting bugged with this issue, then this guide is here to help you out. Given here are the detailed instructions to fix the “Update Apple ID Settings” issue on iPhone and iPad. Follow along.
Page Contents
Fix “Update Apple ID Settings” Issue on iPhone and iPad
There isn’t any universal fix as such for this issue. You might have to try all the below-mentioned workarounds until it spells out success in your case. Follow along.
Fix 1: Type in your Apple ID Credentials
Let’s start off with the most basic fixes. In many instances, you only need to verify your credentials (aka password) and the update notification goes away. To try it out, follow the below steps:
- To begin with, tap on the notification prompt and hit Continue.
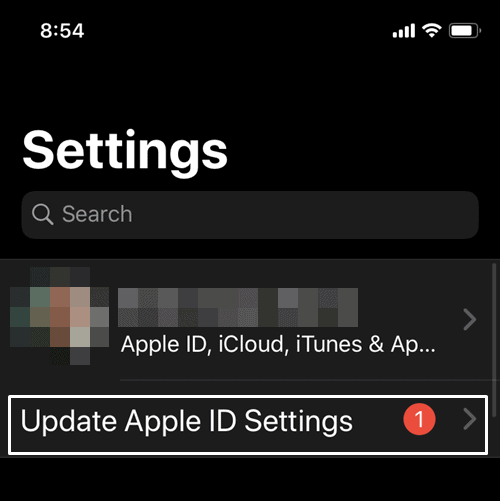
- Then type in your password and once done, close the Settings page.
Check if the Update Apple ID Settings notification has disappeared or not. If it’s still there, then here are a few other workarounds that you could try out.
Fix 2: Re-Sign into your Apple ID
While it may sound like an easy fix on paper, but many users were able to rectify this “issue” after doing a re-sign-in to their account. In other words, you need to log out of your iCloud and then sign in back it. Follow along:
- Head over to the Settings page on your device.
- Then tap on the Sign out option. It would be present right at the end of the page.
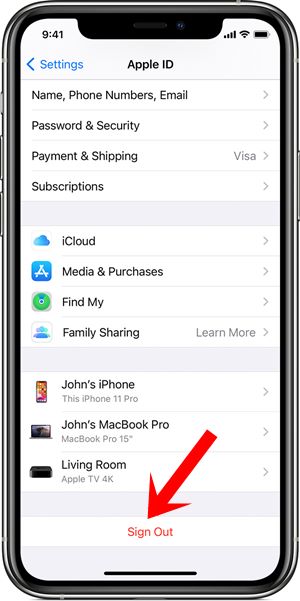
- You may now need to type in your Apple account credentials.
- Do so as instructed and you will be logged out of your account.
- Now sign back in and check if the Update Apple ID Settings prompt is fixed or not.
Fix 3: Re-verify your Payment Details
There’s a high chance that if the payment or shipping details are not entered correctly, then you would get bugged with this notification. Therefore, it is recommended to check and update these details right away.
- To do so, go to Settings on your Apple device.
- Then tap on your avatar situated at the top.
- Go to the Payment and Shipping section and have a look at the Payment Method section.
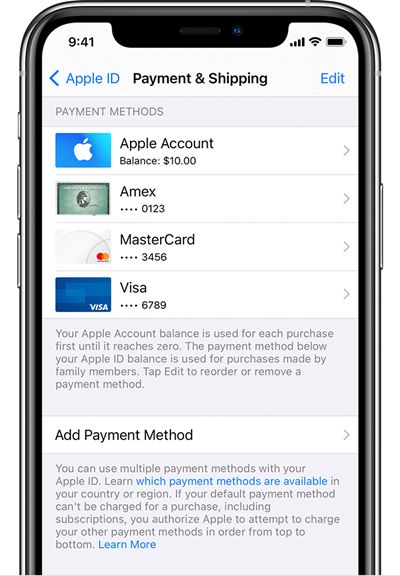
- If it spells out an error, then it’s time to correct/update it.
- For that, you may take the help of the Add Payment Method option as well.
- Likewise, also verify your address via the Add Shipping Address option.
- Now that you are here, we would advise you to go through the Name, Phone Numbers Email section and check that all the details are correct.
- Carry out these tasks and see if it fixes the Update Apple ID Settings notifications.
Fix 4: Perform a Software Update
If there’s a pending iOS update that you have kept aside for days, then now is the perfect time to install it onto your device. In some instances, bugs or underlying issues are known to be fixed with a software upgrade itself.
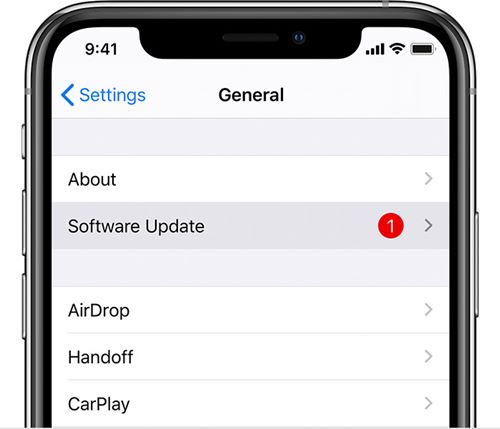
- So go to the Settings page on your device.
- Then head over to General and scroll to Software Update
- If there’s an available update, download and install it right away.
With this, we conclude the guide on how to fix the Update Apple ID Settings notification prompts on your iPhone or iPad devices. As already mentioned, these are the workarounds and not along the official lines. But even then, it has managed to rectify this issue for a lot of users. So on that note, do let us know in the comments which one managed to give out desirable results for you. Rounding off, here are some iPhone Tips and Tricks, PC tips and tricks, and Android Tips and Tricks that deserve your attention as well.
