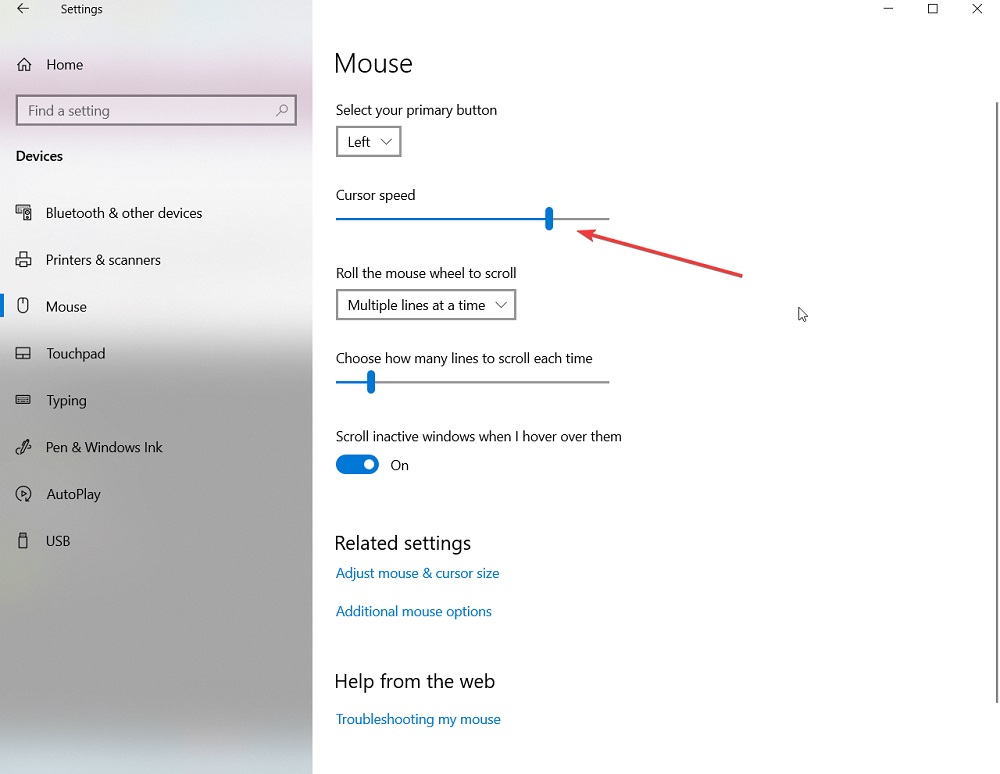
This May, Microsoft Released its latest update for Windows 10 code named 2004. This time, the cursor speed settings went inside the settings option that was earlier present in the control panel.
However, you can jump into mouse settings anytime by just typing mouse in the start search bar. But most of the users are unable to do the same. So this guide is for them.
Also Read
Change Mouse Cursor Speed in Windows
If you want to change the cursor speed in your latest Windows 10 after the May update, follow the steps below.
- Click on the Start button on the taskbar or on your keyboard.
- Now click on the settings button in the left panel.
- After that, in the settings menu, look out for devices and click on that.
- Now you will see Mouse in the left panel, select it.

At the top, you will find adjustment settings of the cursor speed and many other settings as well.
From here you can now easily adjust your cursor speed and save the settings by closing that menu. Moreover, if you want to tinkle with some more settings, just click on “Additional Mouse Options” below the original settings. You will find many settings there, adjust accordingly, and save them.
We hope you find this guide helpful in adjusting your cursor speed settings in Windows 10. If you like, you can go and check out our other guides of iPhone and iPads, PC Troubleshooting, and Android Guides for more info. We want you to participate in the $150 giveaway by subscribing to our YouTube Channel. However, if you have any feedback or queries, comment down below with your name and e-mail ID. Thank You.
