Windows 10 is by far one of the best Windows versions; however, it comes with its own share of errors and glitches. One of the Windows 10 error which we are going to discuss today is the Error Code 0x800f080d. The Error Code 0x800f080d usually occurs while a user tries to install a new Windows update. The said error prevents the installation process.
As discussed, the Error Code 0x800f080d is quite problematic, and a lot of Windows 10 users have been complaining about this. Today, in this article, we have compiled a list of 5 fixes that will easily help you get over the said error. Have a look:
Also Read
Page Contents
How to fix the “Windows 10 Error Code 0x800f080d”?
FIX 1: Perform a Clean Boot:
At times a certain application can interfere with your operating system and thus results in Error Code 0x800f080d. Now for finding which particular application is responsible, we recommend you to perform a clean boot. Clean Boot will disable all startup applications and services so that the user can find out the responsible one. For performing a clean boot, follow the steps given below:
- Firstly, launch the RUN dialogue box by pressing Windows + R altogether.
- Now inside the empty text space, type msconfig and then click on OK. It will launch the System configuration window for you.
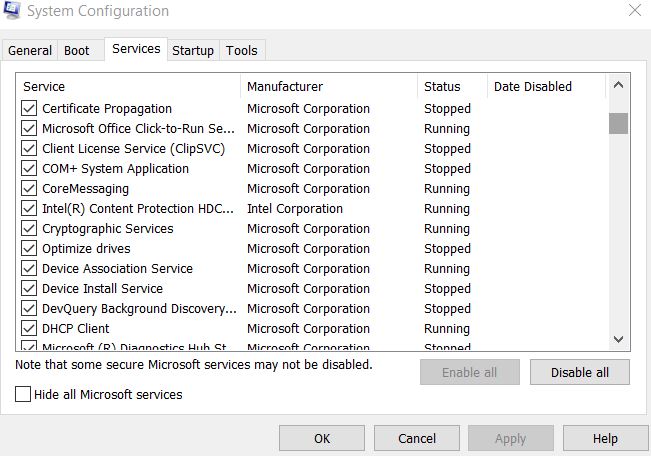
- Inside the System Configuration window, navigate to the Services tab (from the vertical menu) and then tick the checkbox before the option Hide all Microsoft services.
- Further, at the bottom right of the window, click on the Disable all tab, and it will disable all the services given in the list.
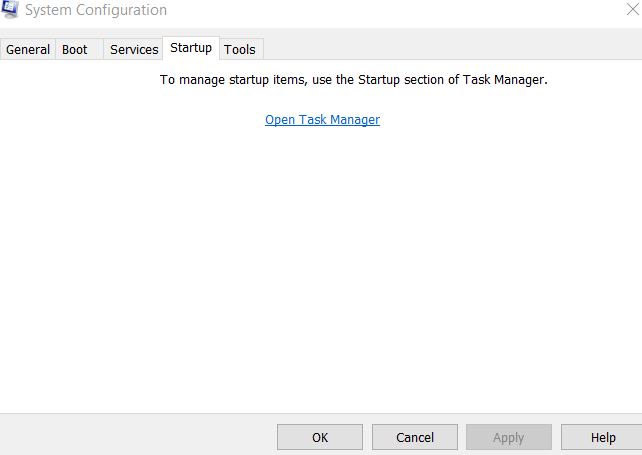
- Next, go to the Startup tab ((from the vertical menu) and then click on Task Manager.
- Now on the next window, from the list of startup applications, right-click over the first entry and select the option Disable from the sub-menu. Make sure you disable all the entries in the list with the same method.
- After you have disabled all the entries, navigate to the System Configuration window and here click on Apply and then OK.
- Now let your computer restart and then check whether the Error Code 0x800f080d got resolved or if it persists.
NOTE: IF the issue got resolved, then it means that one of the startup applications was causing the said error issue. Now to find out which particular application is responsible, enable each application and service one after the other and check which triggers the Error Code 0x800f080d. Once you find the responsible application, consider removing or disabling it.
However, if clean Boot didn’t help in your case, then move to the next fix.
FIX 2: Remove the Problematic application or service:
As explained in FIX 1, several third-party applications can conflict with your system and result in Error Code 0x800f080d. Now, if you find the responsible one after performing FIX 1, we recommend you remove or replace the problematic application/ service as quickly as possible.
Even though you can perform this step manually, but to make sure that files and folders related to that application get removed as well, so we recommend you use a dedicated tool. There are several software uninstallers available online that remove all files, folders, and registry entries related to the application you want to uninstall.
Also, using dedicated tools makes your computer clean and clear, like if that particular application was never installed.
FIX 3: Create a new user account:
A corrupt user account can possibly trigger the Error Code 0x800f080d for a lot of users. Now repairing a corrupt user account isn’t that easy and hassle-free; thus, here we recommend you to create a new user account and check whether it helps or not. For doing so, follow the steps given below:
- Firstly, press Windows + I altogether and launch the Settings window.
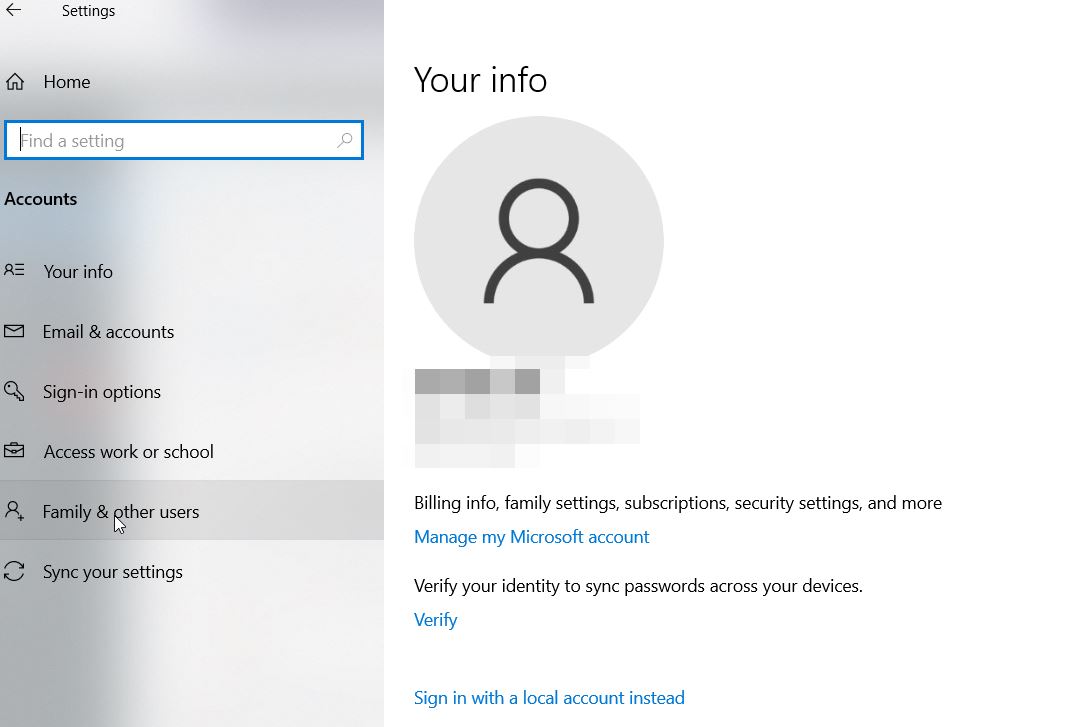
- Now inside the Settings window, navigate to the left-pane menu, select Account, and then click on Family & other people.
- Further on the right-pane menu, click on the plus icon before the option Add someone else to this PC.
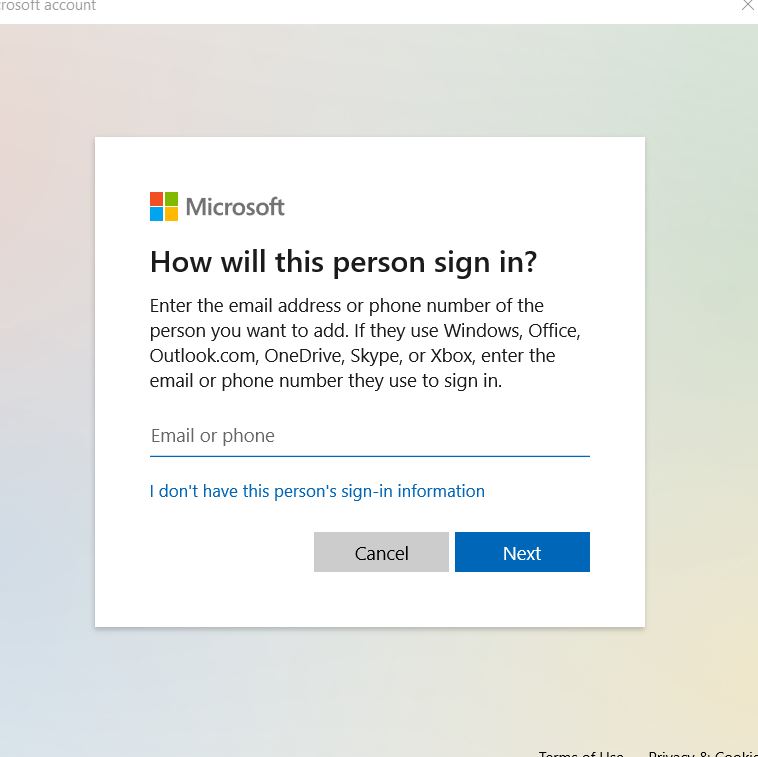
- Now on the next screen, click on I don’t have this person’s sign-in information and then select Add a user without a Microsoft account.
- Now enter a username and details for the new account and then click on Next.
NOTE: After you have created a new user account, now upgrade it to the administrator account. For doing so, follow the steps given below:
- Again, launch the Settings Window and navigate to Accounts and then click on Family & other people.
- Now click on the New user account and then click over the Change account type tab.
- Further, under the Account type section, open the drop-down and select Administrator.
- Now click on OK.
- Lastly, switch to your new administrator account and check whether this resolves the Error Code 0x800f080d. If yes, then you can use this Account and consider moving all your personal files as well.
However, if not, then try the next fix in the list.
FIX 4: Reset Windows Update components:
At times Windows update might have some problems that can eventually lead to the Error Code 0x800f080d. Here the best resort is to reset the Windows Update components and check whether it helps or not. For doing so, follow the steps given below:
- Firstly, launch the RUN dialogue box by pressing Windows + R altogether.
- Now inside the empty text space, type cmd and then click on OK. It will launch the Command Prompt window for you. Make sure you launch it with administrator access.
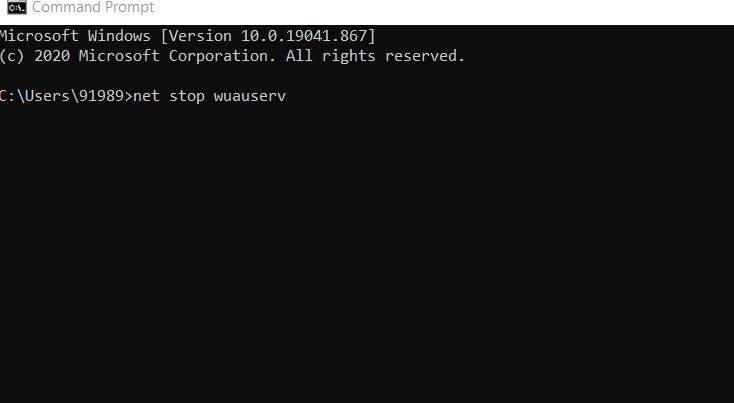
- Now inside the Command Prompt window, run the following commands and make sure you press Enter after each of them,
net stop wuauserv

net stop cryptSvc

net stop bits

net stop msiserver

ren C:WindowsSoftwareDistribution SoftwareDistribution.old

ren C:WindowsSystem32catroot2 catroot2.old

net start wuauserv

net start cryptSvc

net start bits

net start msiserver

pause
- Once all of these commands have been executed successfully, check whether it has resolved the said issue or not. However, if these commands do not work for you, then consider using the following set of commands.
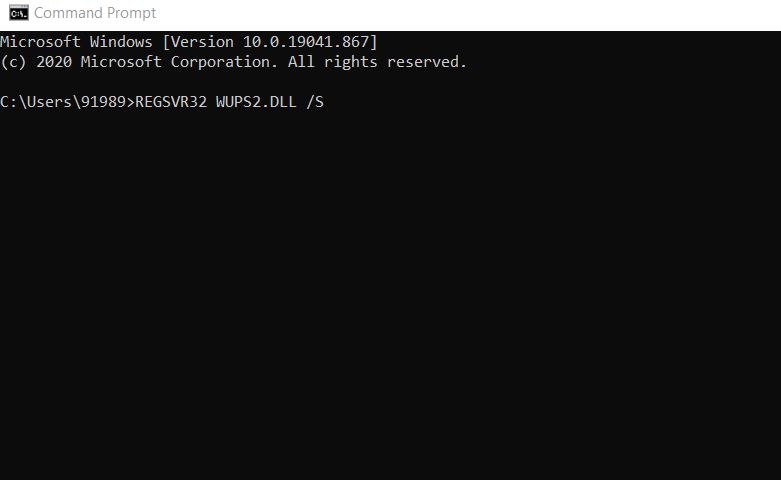
REGSVR32 WUPS2.DLL /S

REGSVR32 WUPS.DLL /S

REGSVR32 WUAUENG.DLL /S

REGSVR32 WUAPI.DLL /S

REGSVR32 WUCLTUX.DLL /S

REGSVR32 WUWEBV.DLL /S

REGSVR32 JSCRIPT.DLL /S

REGSVR32 MSXML3.DLL /S
- Make sure you press Enter after each of them.
FIX 5: Perform a System Restore:
As per a lot of suffered users, performing a System restore helped them in resolving the Error Code 0x800f080d. Here we recommend you to try the same and check whether it helps or not. For doing so, follow the steps given below:
- Firstly, go to the desktop search bar, type System Restore and launch the option Create a restore point from the search results.
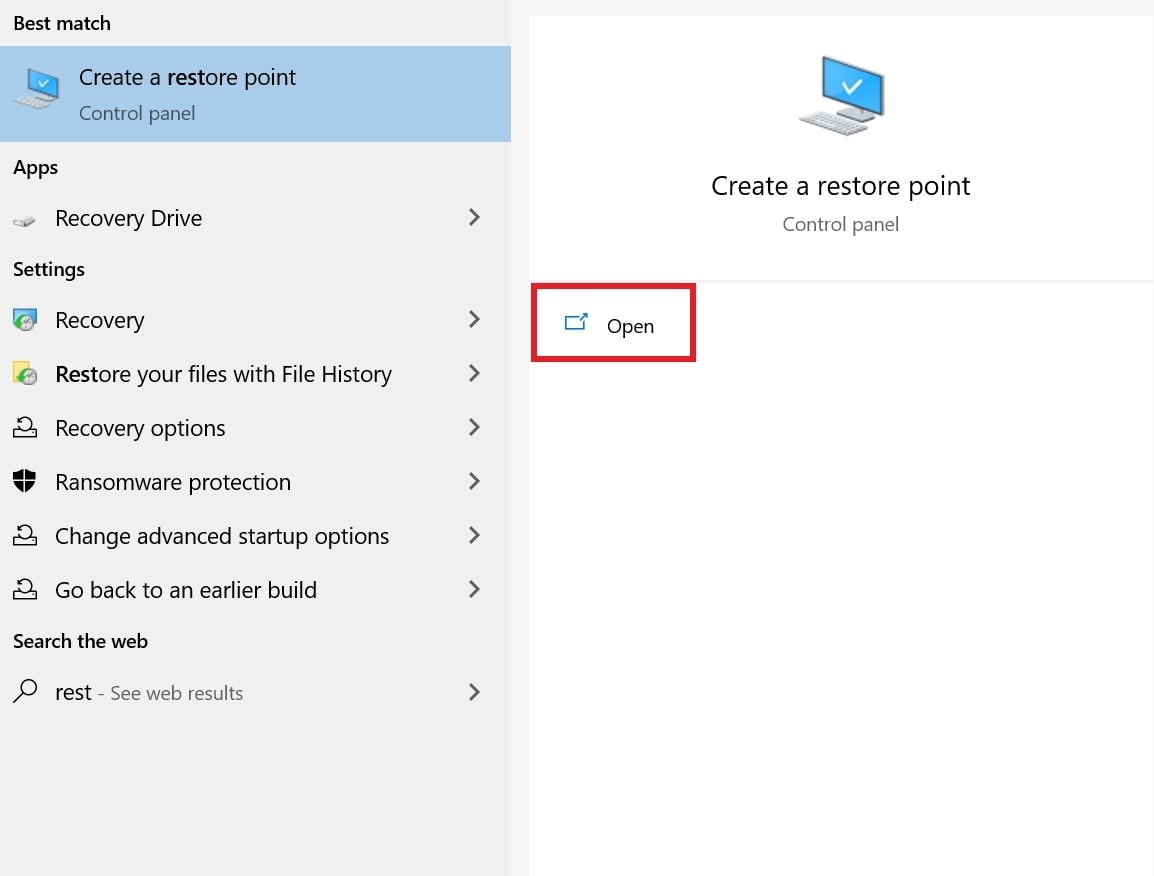
- Now inside the System Properties window, click on the System Restore tab.
- Further on the following window, click on Next.
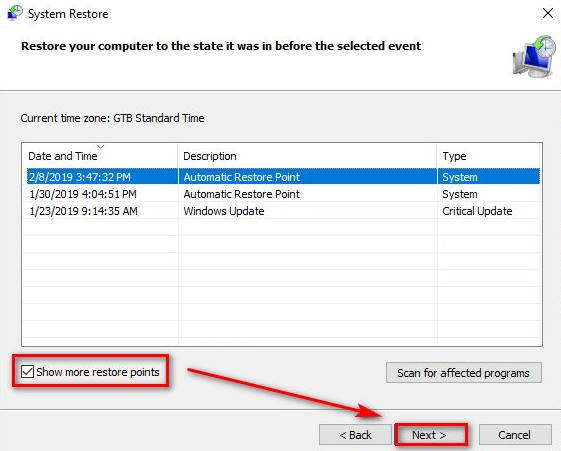
- Now click on the option Show more restore points (if available) and then choose a restore point (date) when the said error issue didn’t exist.
- Lastly, click on Next and then follow the on-screen instructions.
These were some of the tried, tested, and proven fixes for the Windows 10 Error Code 0x800f080d. In case you are also experiencing the same and are not able to install the latest Windows update, then we recommend you try any of the fixes from the list above.
Also, while you remove the problematic applications in FIX 2, we recommend you especially look for third-party antivirus software (s). If you find your antivirus problematic, consider replacing it with another trusted one. If you have any queries or feedback, please write down the comment in the below comment box.
