Have you ever thought about where all your preferences, browser temporary files, logs, and other app bits are saved? Well, those are saved in small files known as Cache. You should be clearing it from time to time for good. Surprisingly a lot of Samsung Galaxy Device users don’t actually know how to wipe cache and it looks like you are one of them.

Don’t worry as GetDroidTips got your back. Today in this post, we would be covering on How to Wipe Cache Partition on any Samsung Galaxy Device. But before getting straight into it, let us take a look at What Cache Partition really is, should we?
Page Contents
What is Cache Partition?

Cache Partition is basically a system directory which contains temporary system data. This data helps in accessing some features and apps faster. But sometimes this cache actually causes some clutters as it gets outdated. So it is recommended that you should periodically clear your Cache, especially when you have just updated the System’s Software.
Clearing Cache won’t ever lead to any loss of personal data or settings. In fact, clearing cache periodically helps in keeping the device’s performance smoother and better. So now when you have got some idea about the Cache Partition, let us take a look at How to Wipe Cache Partition on any Samsung Galaxy Device.
Also Read
How to Wipe Cache Partition on any Samsung Galaxy Device
Here are the 2 ways using which you can use to Wipe Cache Partition on your Samsung Galaxy Device.
Method 1: Clear Cache via Recovery

In order to Wipe Cache Partition on your Samsung Galaxy Device using this method, you need to follow these steps carefully:
- First of all, power off your Samsung Galaxy Device.
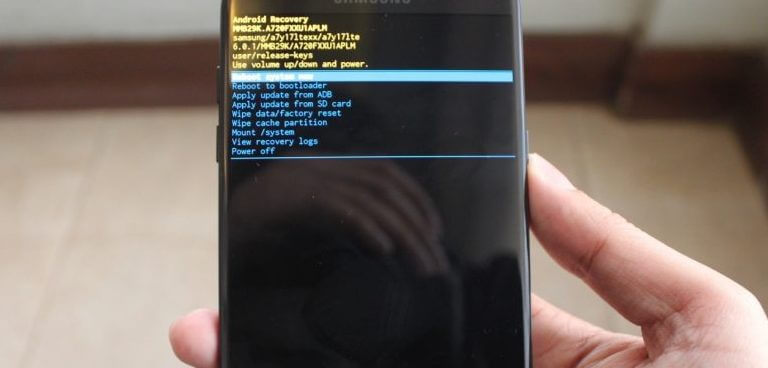
- Now boot into the Recovery Mode by pressing and holding the Home and Volume Up key on your Samsung Galaxy Device.
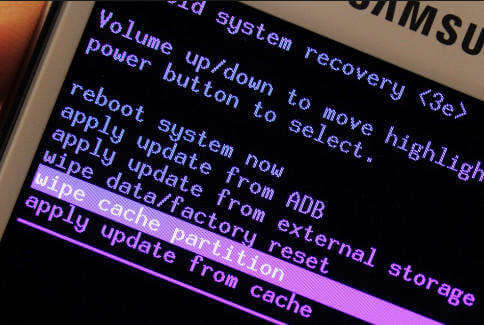
- In the Recovery Mode, use the Volume Keys and navigate to the wipe cache option.
- Press the Power Key once to confirm the clearing of cache.
- Press the Volume Down key once to highlight the Yes – delete cache option.
- Finally, press the Power Key to begin the process.
- Wait till the Process is completed. Once it’s done, highlight the Reboot System Now and press the Power Key to reboot your Samsung Galaxy Device.
That’s it, now you have successfully wiped the Cache on your Samsung Galaxy Smartphone, Now, let us take a look at our next method to clear cache.
Method 2: Clear Cache via Settings

In order to Wipe Cache Partition on your Samsung Galaxy Device using this method, you need to follow these steps carefully:
- First of all, go to the Settings on your Samsung Galaxy Device.
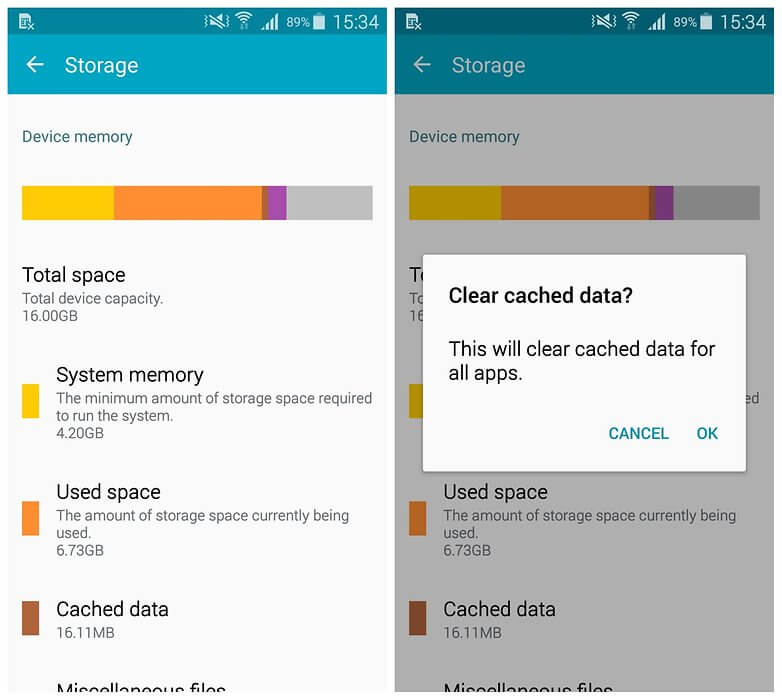
- Here, tap on Storage option.
- You would be able to see the space taken up by apps, movies, misc, photos, audios and cache here.
- Just tap on the Cached Data.
- Now, to clear the Cache, just tap on Okay when a prompt appears on the Screen.
That’s it, you have successfully cleared cache on your Samsung Galaxy Device. Pretty easy, Right?
So, guys, this was our take on How to Wipe Cache Partition on any Samsung Galaxy Device. We hope that you found this guide helpful. Just in case if you have any questions related to the topic, then feel free to leave them in the comments section down below.
