Laptops these days come with fewer storage variants. I mean commonly you see any laptop has 128 GB or 256 GB variant. Some even offer up to 512 or 1 TB storage. Now, as the storage size increases so does the price. Not everyone can afford the top variant. So, most people go for a 128 GB or 256 GB variant. When it comes to Apple Macbook, we know how expensive these machines are. The 128 GB variants normally start over $1200. So, you can do the math for the price of the top variant. For that reason, a number of people buy 128 or 256 GB storage model of Mac.
However, 128 GB and 256 GB may be too small for some users. Usually, people store a lot of photos, media, and document files that result in storage space running out soon. So, they must free up storage space on their Apple Macbook. In this guide, I will tell you how they should do it. There is no requirement of any third-party app or software. It can be done right from the storage management of the Mac.
Also Read

Related | Download All-new Apple Carplay Stock Wallpapers
Page Contents
Free Up Space on your Apple MacBook
Before going ahead, I will suggest that you create a time machine backup that will enable you to have a backup of your data. In case you delete something important to you and you wish to retrieve it, you can get it from the backup.
Check the Storage
First, you need to see how much storage space on your Macbook has been occupied and how much is free.
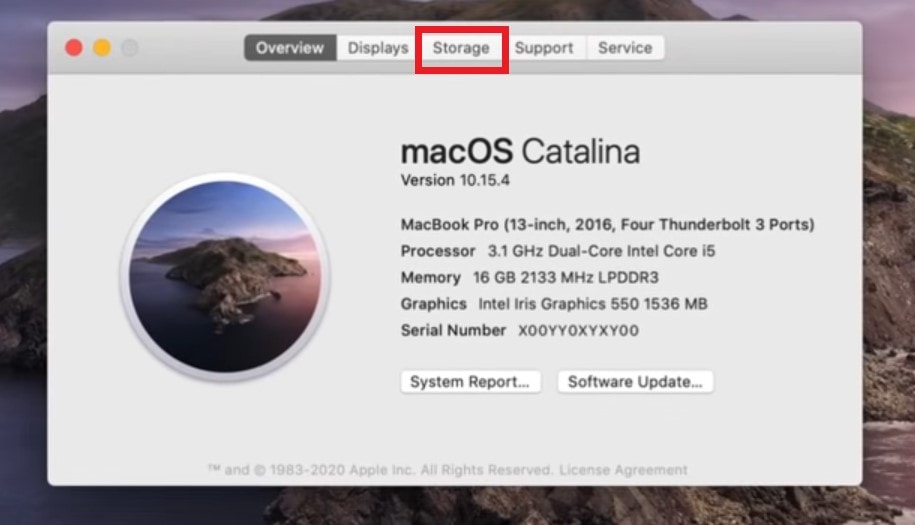
- On the home screen click on the Apple icon,> from the menu select About this Mac
- As the system info dialog box shows up click on the Storage tab.

- Then you will get the info about the usage and availability of storage on your device.
- Now click on Manage to see various options to free up your storage space

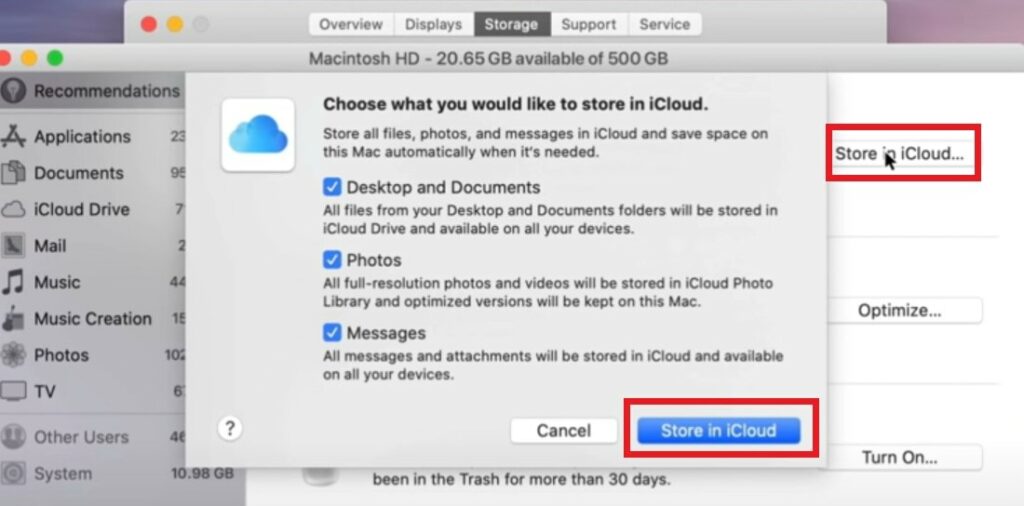
Store in iCloud
The first option to manage storage is by backing up your data to iCloud.
- Click Store in iCloud
- Then select checkboxes for Desktop & Documents, Photos, Messages

- Then again click Store in iCloud to begin the transfer
The iCloud has limited free storage of 5 GB. If you use an iPad or iPhone then backup from that may also be stored to iCloud. Once the 5 GB free space is consumed for backup, you may have to buy extra storage space for the Apple cloud drive. So, do check for that.
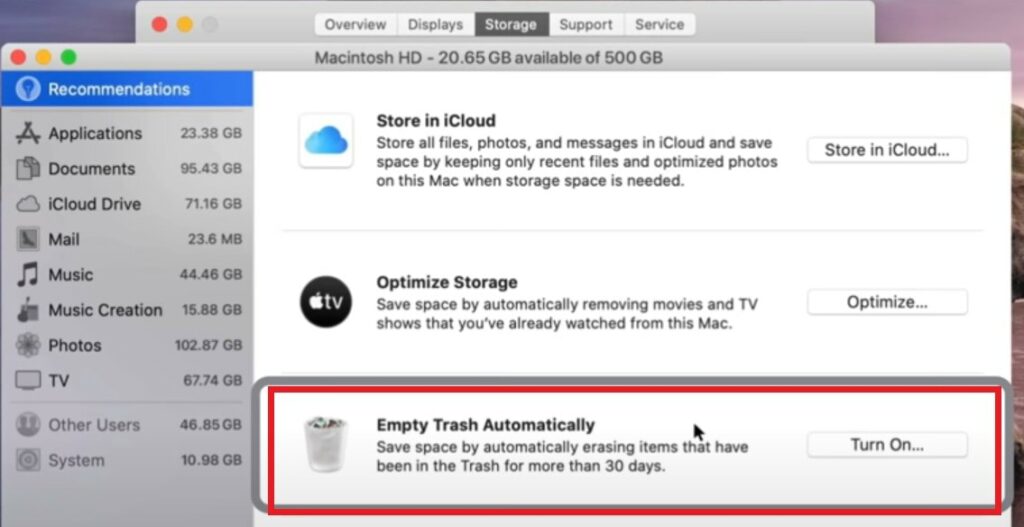
Optimize Storage
This option will delete all those TV shows and movies that you downloaded and watched from Apple’s entertainment portals. I do not see any point in keeping these shows that amount to gigabytes lying around on your Mac once you finish watching them. So, get rid of that and free up the storage on your Apple MacBook.
Empty Trash Automatically
This is something you should regularly do although every 30 days the trash gets emptied on its own. This option will clear the already deleted files that are now lying in the Trash unnecessarily occupying the storage on your MacBook.

Reduce Clutter on Apple MacBook
If you select this option, then you can manually go through the files, folders, and apps that you no longer require and delete them. I strongly suggest this. On my laptop, I do install several apps and programs for testing and reviewing purposes. Later when I’m done, I delete them. The same I do with any document file or other note file I create. In my opinion, if something that does not have any use on your device, you must uninstall or remove them.
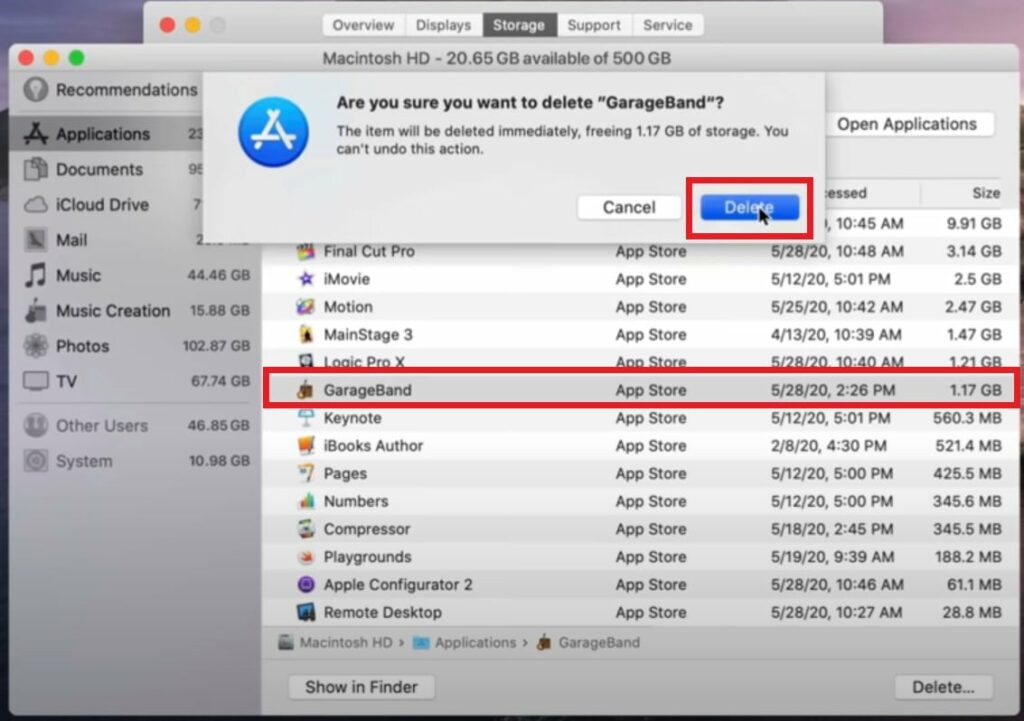
On the left-hand side, you will see the segregation of device storage based on categories such as Applications, documents, iCloud, etc.
- You can click on Applications to see the list of installed apps on your Mac
- Let’s say you do not want Garage Band or you don’t use it, then highlight it with trackpad click

- Click Delete and confirm the action by entering your password or tapping the Touch ID on your Mac.
You can repeat the same for every other category that stores files, information on the cloud drive, mailing app, etc.
So, that’s all about how to deal with storage management on your Apple Macbook. I hope that this was informative to you. Feel free to share this guide with your friends.
Read Next,
- How to Connect Apple Airpods to Windows PC
- How to Add or Customize Smart Stack Widget on Apple iPhone
