The “autorun.dll errors on Windows 10” are the most frequently encountered errors that usually occur whenever a user tries to launch or update a particular program or software. The error prompt delivers the following message, “Autorun.dll not found, and The file autorun.dll is missing.”
Page Contents
How to Fix Autorun.dll Errors on Windows 10?
The Autorun.dll file is a crucial component that contains all the information about how a particular program should execute properly. If the same file goes missing, it can create a great mess and keep the program or software from launching. However, the issue is prevalent and has several fixes available that will quickly resolve it.
Also Read
Download Dolby Audio Driver for Windows 11/10/8.1
How To Fix External Hard Drive I/O Device Error in Windows 11/10
Fix: Win+Shift+S Not Working on Windows 11/10
How to Fix Error 0xc00007b – Application Was Unable to Start Correctly
How to Fix DLL File Missing Error on Windows 11/10
How to Fix Windows 11 Update Error Code: 0x800703ee
How to Fix Msxml4.dll Not Found or Missing Errors
FIX 1: Check the Recycle Bin:
It is possible that the user has accidentally deleted the autorun.dll file from their system, which is further causing the “autorun.dll errors on Windows 10”. Here the first method is to locate and restore the autorun.dll file from Recycle bin. For doing so, follow the steps given below:
- Firstly, open Recycle Bin from your desktop screen.
- Now either manually locate the file or press CTL + F altogether for opening the search bar.
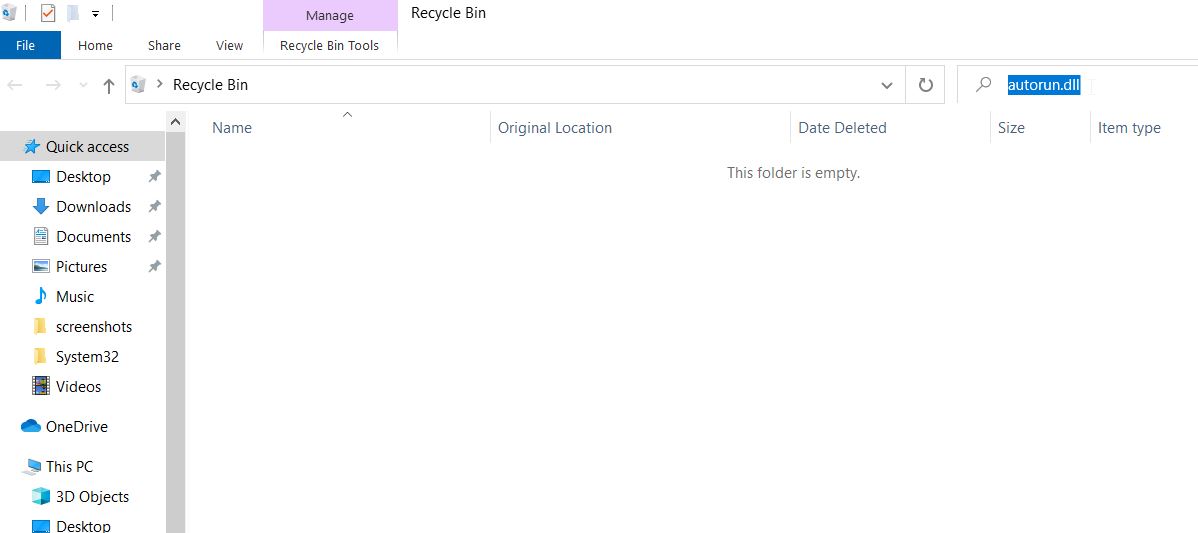
- Here type autorun.dll and then press Enter.
- After you find the file, right-click on it and select the option Restore from the context menu.
- Once you are done, the “autorun.dll errors on Windows 10” error will quickly get resolved.
FIX 2: Run a full system scan:
The “autorun.dll errors on Windows 10” issue can also get triggered due to a virus or malware issue within your system. Here, in this case, it is advisable to run a full system scan for detecting and removing any malicious program that might be responsible for the said error.
You can either use third-party antivirus software for a full system scan or do the same through Windows Defender as well. There are several third-party antivirus software available on online; use a highly trusted one only.
FIX 3: Use the System File Checker tool:
The “autorun.dll errors on Windows 10” issue is likely a result of corrupt system files. In this case, running a System File Checker (SFC) scan can help you in detecting and repairing all the corrupt system files. For doing so, follow the steps given below:
- On the Desktop search bar, type “cmd” and open Command Prompt from the search results. Make sure you open it with the Administrator access.
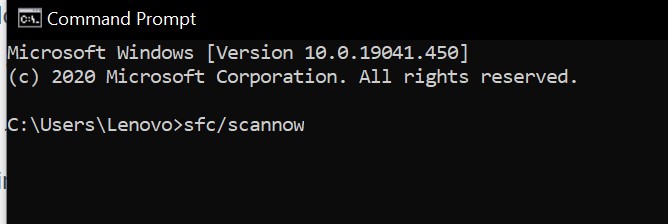
- Now on the Command Prompt window, type SFC /scannow and then press Enter.
- Let the scan process on its own. Once it is done, restart your computer, run the relevant program which was showing the said error, and check whether it got resolved or not.
- If the issue got resolved, it proves that the corrupt system files were responsible for triggering the same.
However, as per some users, either the SFC scan didn’t help them, or they were not even able to run it. In such a case, you can try the DISM scan further.
- On the Desktop search bar, type “cmd” and open Command Prompt from the search results. Make sure you open it with the Administrator access.

- Now on the Command Prompt window, type DISM /Online /Cleanup-Image /RestoreHealth and then press Enter.
- Let the scan process on its own. Once it is done, restart your computer and check whether the issue got resolved or not.
- Further, if you cannot run the SFC scan earlier, you can try to re-run it now.
FIX 4: Perform a system restore:
System restore is a feature in Windows that helps as a savior and let the user go back to the previous state where everything was running fine without any error prompt. In case of the “autorun.dll errors on Windows 10” issue, you can perform a system restore. For doing so, follow the steps given below:
- On the desktop search bar, type” Recovery” and select the relevant search result.
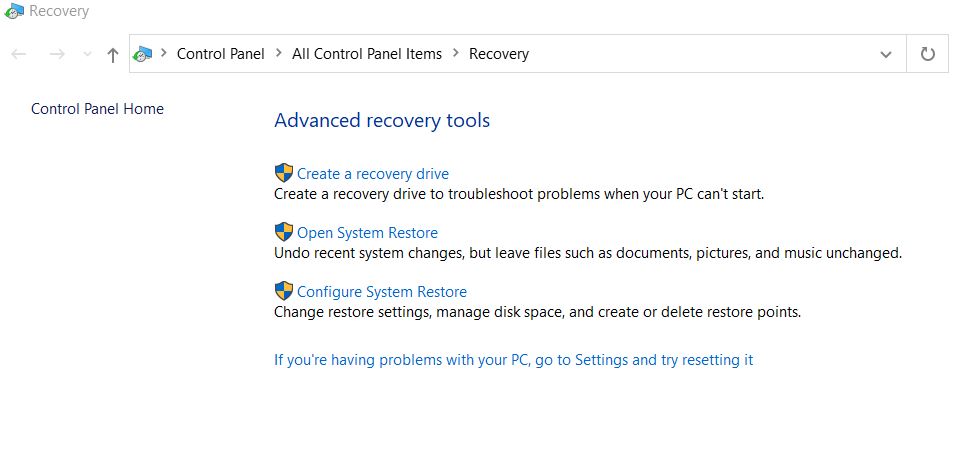
- Now on the Recovery window, click on the option Open System Restore.
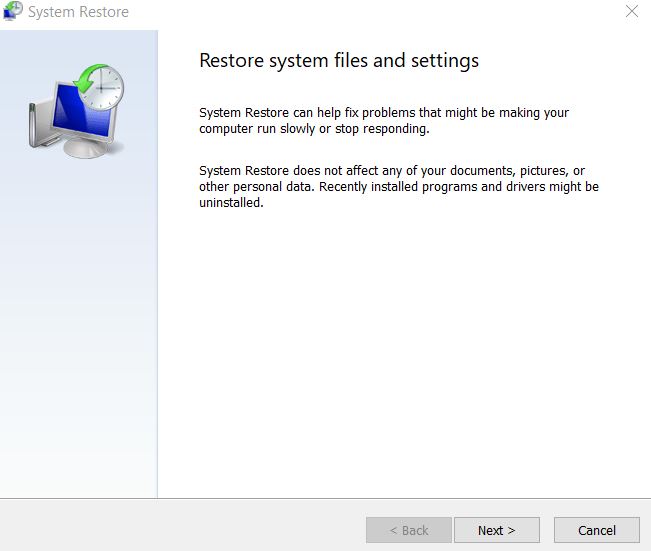
- Further, click on Next and follow the on-screen instructions.
- Choose a recovery point (past date) to which you think your system working fine without the said error.
- Your system will work fine as it was working before the error occurrence.
The system restores several recent changes you have performed within your system. However, your files and folders remain safe even if you restore them to a past date.
FIX 5: Install the available updates:
As per some of the suffered users, installing the latest Windows update helped them in order to get rid of the “autorun.dll errors on Windows 10” issue. Hence, we recommend you to try the same. For doing so, follow the steps given below:
- Open the Settings window by pressing WINDOWS + I altogether.
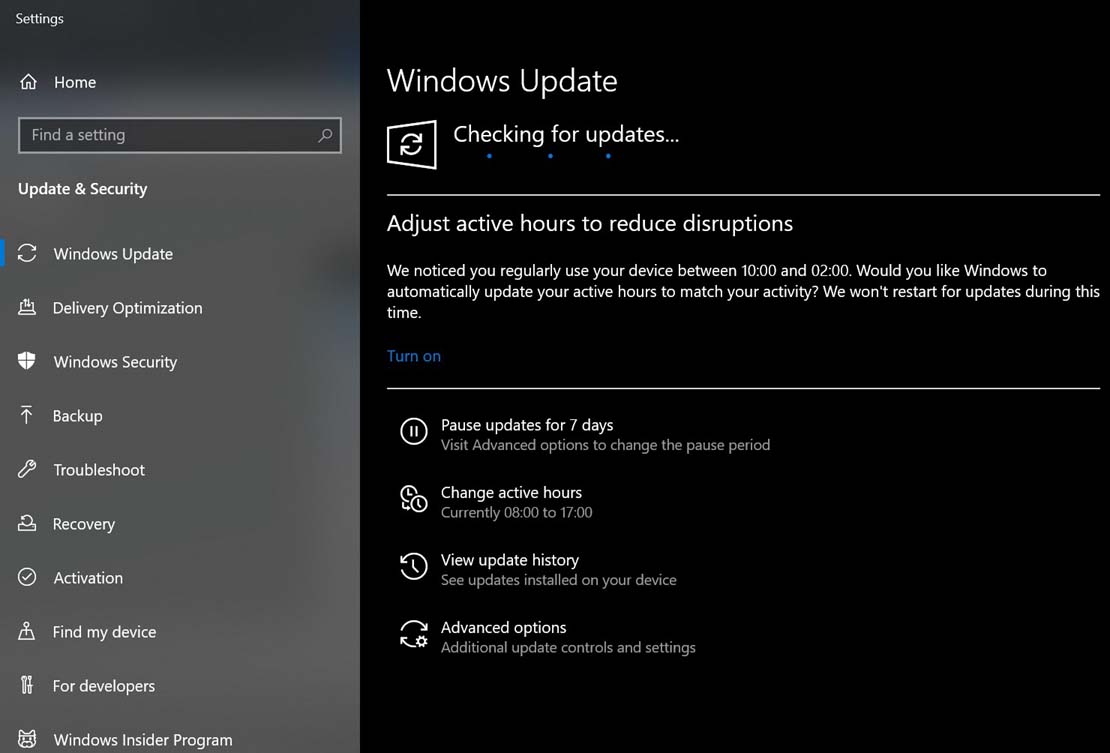
- Now navigate to Update & Security and click on the Check for Updates tab. Your system will now automatically detect and install all the available updates. The process will take some extra time.
- Once all the available updates are downloaded and installed, restart your system and then check whether the said issue got resolved or not.
The “autorun.dll errors on Windows 10” issue can also result from an outdated or corrupt system drivers. Especially if the said error is appearing while you are trying to run a video game, it indicates that the video drivers are outdated.
However, if the problem is occurring due to outdated system drivers, it is recommended to download the latest drivers from the manufacturer’s website.
FIX 6: Check your DVD drive Options:
According to a lot of suffered users, the “autorun.dll errors on Windows 10” issue got simply fixed when turned on the Enable CD recording option in their DVD drive options. We recommend you to try the same and check whether it helps in your case or not.
FIX 7: Check your DVD drive:
As per some of the suffered users, the “autorun.dll errors on Windows 10” issue gets triggered specifically while trying to install Windows from a DVD disk. The issue here might be the faulty DVD drive.
Hence, either run other DVD discs and check whether your DVD drive is working properly or not. If not, you will need to replace the DVD drive. Otherwise, you can also consider installing Windows from a USB flash drive.
FIX 8: Reinstall your DVD drive:
As mentioned in a fix above, the “autorun.dll errors on Windows 10” issue can also be a result of the problem in the drivers. Hence, here we recommend you reinstall your DVD drive and check whether it helps or not. For doing so, follow the steps given below:
- Firstly, press WINDOWS + X altogether and select the option Device Manager from the Context menu.
- Now on the Device Manager window, expand the option DVD/ CD- ROM Drives.
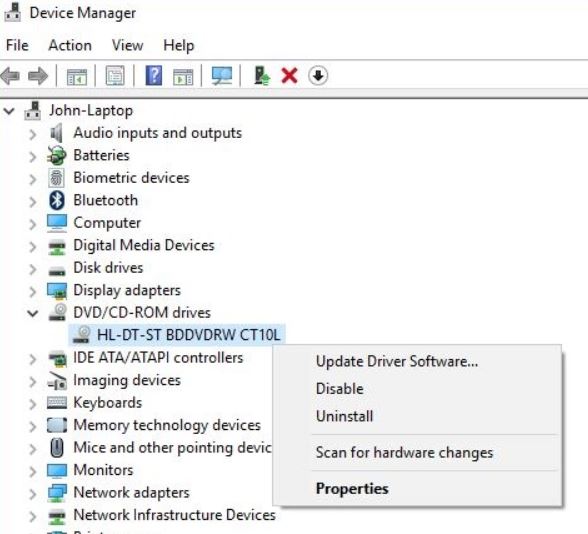
- Here locate your DVD Drive, right-click on it and then select Uninstall.
- Further, click on the Uninstall tab on the confirmation prompt.
- Once done, restart your computer. Your system will automatically reinstall the required drive once it restarts.
Further, check whether the said issue got resolved or not.
These were some of the proven methods that will help you in order to get rid of the “autorun.dll errors on Windows 10” issue. All the fixes are fundamental, and users do not require any advanced computer knowledge in order to perform them.
However, if none of them works for you, consider Repair Autorun.dll registry entries via dedicated registry repair tool available online. Registries are valuable data for any Windows system, and it is advisable not to edit or repair them manually if you are unsure about the process. If you have any queries or feedback, please write down the comment in the below comment box.
