2015’s Call of Duty: Black Ops III is still one of the best-in-class multiplayer zombie action first-person shooter video games by Treyarch and Activision. It’s a sequel to Call of Duty: Black Ops II, which was released in 2012.
To run the game requires enough hardware configuration to run properly, especially for PC, because not everyone may have such a configuration to run the game in full resolution and higher FPS. It’s quite common for most PC titles because they’re performance-hungry. Here we’ve provided steps to fix COD Black Ops 3 Stuttering and Lags issues.
It’s quite unfortunate that some COD Black Ops 3 PC players are experiencing multiple issues like stuttering, lags, crashes, frame drops, etc., while in the gameplay. Depending on the compatibility factor, it can be a severe issue on some PCs. So, it’s always better to fix the issue so that at least you can play the game with a respectable FPS count. There may be several reasons behind such an issue that can be resolved by following this guide.
Also Read
Check System Requirements
Check out the system requirements of the COD Black Ops 3 game below to ensure whether your PC configuration is meeting the game’s system requirements or not.
Minimum Requirements:
- Requires a 64-bit processor and operating system
- OS: Windows 10 64-bit (Version 1909) | For Ray Tracing or VR: Windows 10 64-bit (Version 2004)
- Processor: Intel Core i3-2130 or AMD FX 4300 |For VR: Intel Core i5-9600k or AMD Ryzen 5 2600X
- Memory: 8 GB RAM
- Graphics: NVIDIA GTX 1050 Ti or AMD RX 470 | For Ray Tracing: GeForce RTX 2060 or Radeon RX 6700 XT | For VR: NVIDIA GTX 1660 Ti or AMD RX 590
- DirectX: Version 12
- Network: Broadband Internet connection
- Storage: 80 GB of available space
- Sound Card: DirectX Compatible
- Requires a 64-bit processor and operating system
- OS: Windows 10 64-bit (Version 1909) | For Ray Tracing or VR: Windows 10 64-bit (Version 2004)
- Processor: Intel Core i5 9600K or AMD Ryzen 5 2600X
- Memory: 16 GB RAM
- Graphics: NVIDIA GTX 1660 Ti or AMD RX 590 | For Ray Tracing: GeForce RTX 3070 or Radeon RX 6800 | For VR: NVIDIA RTX 2070 or AMD RX 6700 XT
- DirectX: Version 12
- Network: Broadband Internet connection
- Storage: 80 GB of available space
- Sound Card: DirectX Compatible
Fix: COD Black Ops 3 Stuttering and Lags Badly
Fixing in-game lags or frame drop issues isn’t easy because it depends on multiple factors, such as PC hardware, the display resolution of the game, maximum FPS limit count, conflicting third-party apps, and more. So, we recommend you try following all the methods one by one until the problem gets fixed or reduced. Changing the in-game graphics-related settings or keeping them low can fix several problems in a jiffy.
It may include the Screen Resolution of the game, in-game Texture Resolution, Shadow Resolution, Maximum Frame rate, number of Characters Displayed, or other visual effects that require higher graphics or memory. So, you can follow the steps below to try reducing the lags or frame drops up to some extent depending on which resolution and quality you’re playing the game apart from FPS count.
1. Use Launch Options
- Open your Steam client > Go to Library > Right-click on COD Black Ops 3.
- Select Properties > On the General tab, you’ll find Launch Options.
- Enter the launch options -fullscreen = Forces the engine to start in fullscreen mode.
2. Update Graphics Drivers
- Right-click on the Start Menu to open up the Quick Access Menu.
- Click on Device Manager from the list.
- Now, double-click on the Display adapters category to expand the list.
- Then right-click on the dedicated graphics card name.
- Select Update driver > Choose Search automatically for drivers.
- If there is an update available, it’ll automatically download and install the latest version.
- Once done, make sure to reboot your computer to change the effects.
3. Run the game as an administrator
Make sure to run the game exe file as an administrator to avoid user account control regarding privilege issues. You should also run the Steam client as an administrator on your PC. To do this:
- Right-click on the COD Black Ops 3 exe shortcut file on your PC.
- Now, select Properties > Click on the Compatibility tab.
- Make sure to click on the Run this program as an administrator checkbox to checkmark it.
- Click on Apply and select OK to save changes.
Also Read
4. Set High Priority in Task Manager
Make your game priority in the higher segment via the Task Manager to tell your Windows system to run the game properly. To do this:
- Right-click on the Start Menu > Select Task Manager.
- Click on the Processes tab > Right-click on the COD Black Ops 3 game task.
- Select Set Priority to High.
- Close Task Manager.
- Finally, run the COD Black Ops 3 game to check for the issue.
5. Verify Integrity of Game Files
If in case there is an issue with the game files and somehow it gets corrupted or missing, then make sure to perform this method to easily check for the issue. To do so:
Verify Game Files on Steam:
- Launch Steam > Click on Library.
- Right-click on COD Black Ops 3 from the list of installed games.
- Now, click on Properties > Go to Local Files.
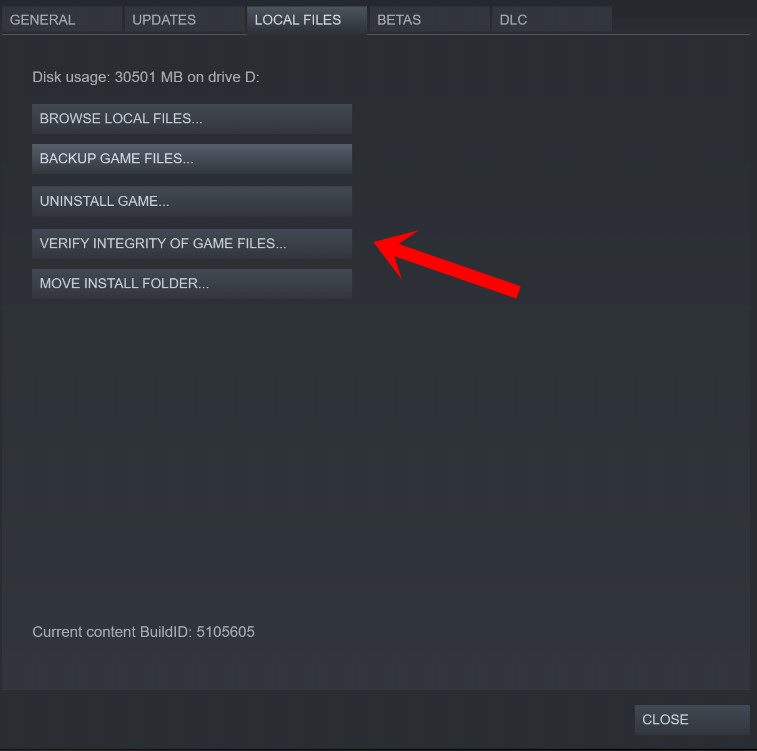
- Click on Verify Integrity of Game Files.
- You’ll have to wait for the process until it gets completed.
- Once done, just restart your computer.
Battle.net:
- Open the Battle.net client on your computer > Head to the library and click on COD Black Ops 3.
- Click on Options > Select Scan and Repair > Choose to Start Scan.
- Wait for the process to complete, and then you’ll be able to play the game properly. Make sure to reboot the client to apply changes immediately.
6. Change GPU Settings
Make sure to change the graphics card settings on the PC by following the steps below to check if the problem has been fixed or not.
For Nvidia:
- Open up Nvidia’s Control Panel > Right-click on the desktop screen.
- Click on Nvidia Control Panel > Click on Manage 3D Settings.
- Select Program Settings > Find ‘COD Black Ops 3’ and manually add the game if it’s not in the list:
- Monitor Tech: G-Sync (If available)
- Maximum Pre-rendered frames: 2
- Threaded optimization: On
- Power Management: Prefer Maximum Performance
- Texture Filtering – Quality: Performance
For AMD:
- Monitor Tech: G-Sync (If available)
- Maximum Pre-rendered frames: 2
- Threaded optimization: On
- Power Management: Prefer Maximum Performance
- Texture Filtering – Quality: Performance
7. Disable Fullscreen Optimizations
Full-screen optimization and DPI settings are the default ones on Windows. You should try disabling it by following the steps below:
- Locate COD Black Ops 3 game directory.
- Find and right-click on the COD Black Ops 3.exe file.
- Select Properties > Click on the Compatibility tab.
- Checkmark the ‘Disable Full-Screen Optimizations’ box.
- Now, click on the ‘Change high DPI setting button.
- Checkmark the ‘Override high DPI scaling behavior’ > Select ‘Application’ from the drop-down menu.
- Click on Apply and then OK to save changes.
8. Update COD Black Ops 3
If in case, you haven’t updated your COD Black Ops 3 game for a while then make sure to follow the steps below to check for updates and install the latest patch (if available). To do this:
Steam Users:
- Open the Steam client > Go to Library > Click on COD Black Ops 3 from the left pane.
- It’ll automatically search for the available update. If there is an update available, make sure to click on Update.
- It may take some time to install the update > Once done, make sure to close the Steam client.
- Finally, reboot your PC to apply changes, and then try launching the game again.
Battlenet Users:
- Open the Battlenet client > Go to All Games > Click Installed > Click on Call of Duty Black Ops 3 from the left pane.
- Now tap on the Settings icon.
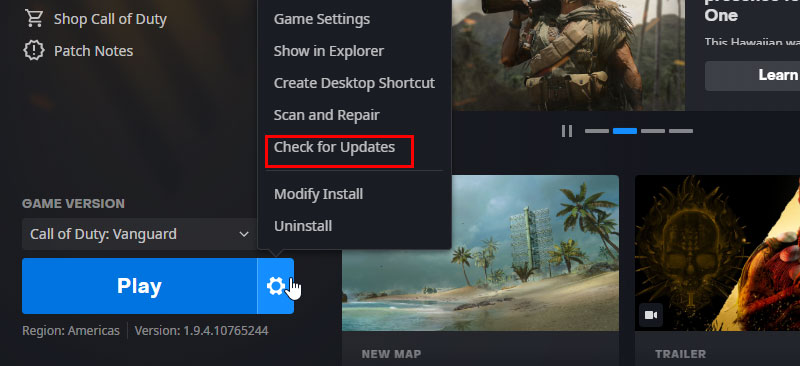
- Tap on check for updates. If there is any update, click on update.
- Once done, make sure to close the Battlenet client.
- Finally, reboot your PC to apply changes, and then try launching the game again
9. Delete Battle.Net Cache Data
It’s needless to say that corrupted cache data files can eventually cause several issues whatsoever. To do that:
- Close all the games first and then quit the Battle.net client too.
- Now, press Windows + R keys to open the Run dialog box.
- Type %programdata% and hit Enter to open the Program Data folder.
- Open the Blizzard Entertainment folder > Head over to Battle.net.
- Click on Cache > Select all files and delete them.
- Once all is deleted, just reboot your computer to apply changes.
That’s it, guys. We assume this guide is useful to you. For further queries, you can comment below.