Apple’s iOS devices, like iPhones, are the most popular smartphones used by people today. Apple devices like MacBook recommends to backup everything via iTunes. Since not every people use MacOS, Apple supports iTunes in Windows as well. So you can back up your files. However, Apple is deadly serious about its backup location, and it won’t allow us to change the iTunes backup location directory in Windows 10. For most people, it doesn’t matter where iTunes is keeping your iPhone Backup. However, if you are not satisfied with the current location for some reason. You can change it using a symbolic link.
A symbolic is like a directory shortcut, but it isn’t a normal shortcut. The shortcut links to another directory. It means you can send the backup into the shortcut folder, and then the backup files will be transferred to the directory of your choice. The trick to fool iTunes into using the symbolic link is to find the folder where iTunes keeps its backup and create a shortcut folder there with the same name as the iTunes backup folder has. If you wish to change your iTunes Backup Location, then the steps are mentioned elaborately below.

How To Change The iTunes Backup Location In Windows 10
Step 1) First, you will have to find the location of the directory where your iTunes keeps your iPhone’s backup. Those who are using iTunes installed from the Microsoft Windows store, the location will be C:\Usesrs\(your username)\Apple\MobileSync. And fr people who are using the Desktop version of iTunes the Backup location will be %appdata%\Aplpe Computer\MobileSync.
You only have to open up your Windows File Explorer or the Run Dialog box. enter the location on the address bar and hit enter.
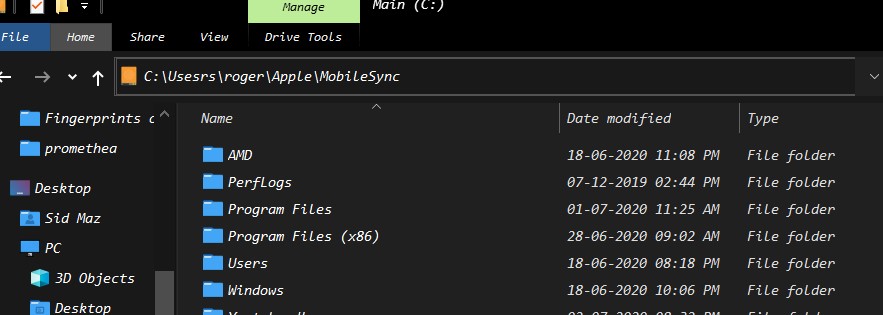
Step 2) Now, you have opened the backup location, you will see a Backup folder in the directory. You will have to rename it, right-click on it ad select rename. Name it as Backup.old.
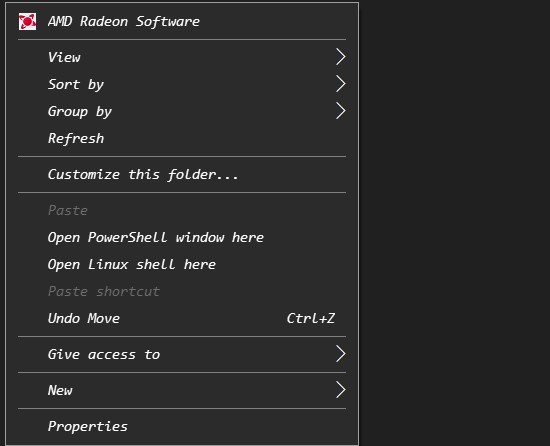
After that, you will have to use Windows Powershell or cmd to create a symbolic link. To open PowerShell in the folder, press Shift and right-click on the empty area, select Windows Powershell from the menu.
Step 3) Create the folder where you would like to have the iTunes Backup, for Example, D:\iTunesBackup.
Those who are using desktop version of iTunes, type the following command in Powershell and hit enter.
cmd /c mklink /J “%APPDATA%\Apple Computer\MobileSync\Backup” “D:\iTunesBackup”
For Windows store version, users type the command in the PowerShell and hit enter to create a symbolic link.
cmd /c mklink /J “C:\Users\(your username)\Apple\MobileSync\Backup” “D:\iTunesBackup”
Note: To change the directory by writing the path instead of D:\itunesBackup in the upper semi column.
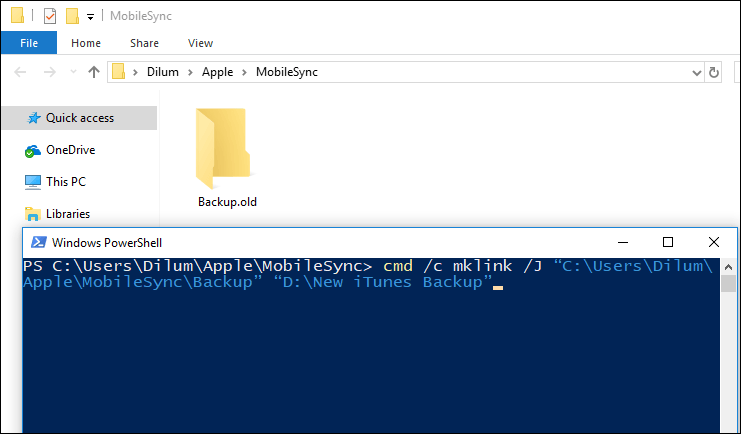
Step 4) After the command is executed, a new folder shortcut will be created as Backup. You can access your preferred directory via a folder shortcut. Select the backup folder and presses Ctrl + X to cut the folder. Click on the Backup shortcut and paste the iTunes Backups to the custom location.
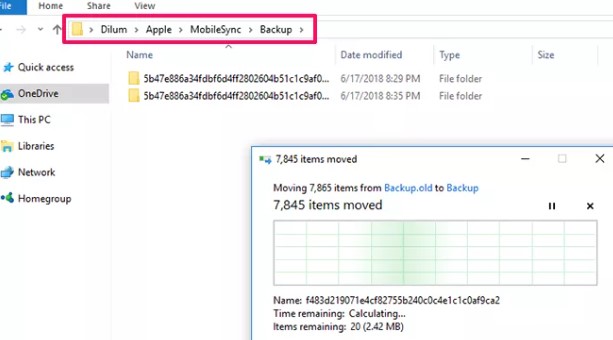
Step 5) You are all set now. Go to the custom location, and you will notice the dates of the folders have been updated.
Conclusion
To change the iTunes default, go to the backup folder of the iTunes, rename the backup folder into something else. Open a command prompt or Windows Powershell and type the command to create a symbolic link. It is a folder shortcut that will give you direct access to your desired location. Make sure that you have created the custom backup folder beforehand and to mention the folder path in the code.
After that, you will have to copy the backup folders from the old folder and move it to the custom backup directory. Now just perform a backup and check the date of the backup folders in the custom location to verify.
- How to Fix iTunes Error 5105: Your Request Cannot Be Processed
- iTunes Error 0xE80000A while Connecting iPhone to Windows 10: How to Fix?
- How to Bring Back Full-Screen Incoming Call Alerts for All Calling Apps in iOS 14
- Facetime Forcing to Use LTE instead of WiFi network: How to Fix?
- iTunes Store Error Code 0x80092013: How to Fix?
