In this tutorial, we will the steps to use the Data Validation feature to restrict data in Google Sheets. This spreadsheet program, part of Google’s web-based office suite is being used across a diverse set of users. One of its major benefits is the ease of collaborative features that it offers. If you share these sheets with your team members and give them editing rights, they could carry on from the very same spot in the same file itself. And all the changes will be saved at that very instance, for all the users having a copy of this file. If you’re the owner of this file and have shared it with one or two friends, then you could easily keep a tab on the data being entered and rectify any issues, if found.
But the thing is usually these sheets are used pan-organization and are being used by tons of people to populate data. In those cases, it is virtually impossible to manually keep a tab on the data being entered. This is where the Data Validation feature will come in handy. Using this, you could keep control of the type of data that should be entered in any particular cell. At the same time, you could also restrict any values from being entered that don’t meet your pre-defined parameters. On that note, let’s check out how to use this Data Validation feature to restrict data in Google Sheets.
Also Read
Page Contents
How to Use Data Validation in Google Sheets
Let us take a hypothetical example to understand it more clearly. Suppose you have created a spreadsheet and shared it with your employees who need to enter their year of joining. Let’s say, you started the company in 2005. So it is anything but obvious that the data in the year of joining should be between 2005 and 2020. Any date before or after this should throw a warning. And this is what we will be doing in this guide. So let us check out the steps to restrict data in Google Sheets using Data Validation.
- Head over to the Google Spreadsheet website on your PC. Open the file that needs to be acted upon.
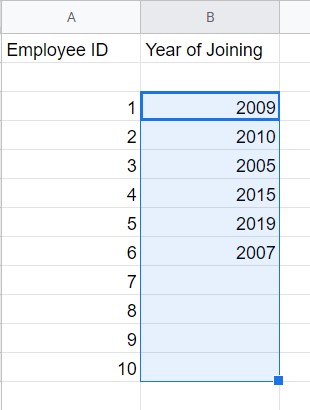
- Select the cell that needs to be restricted. In our example, it will be the entire Year of Joining column.
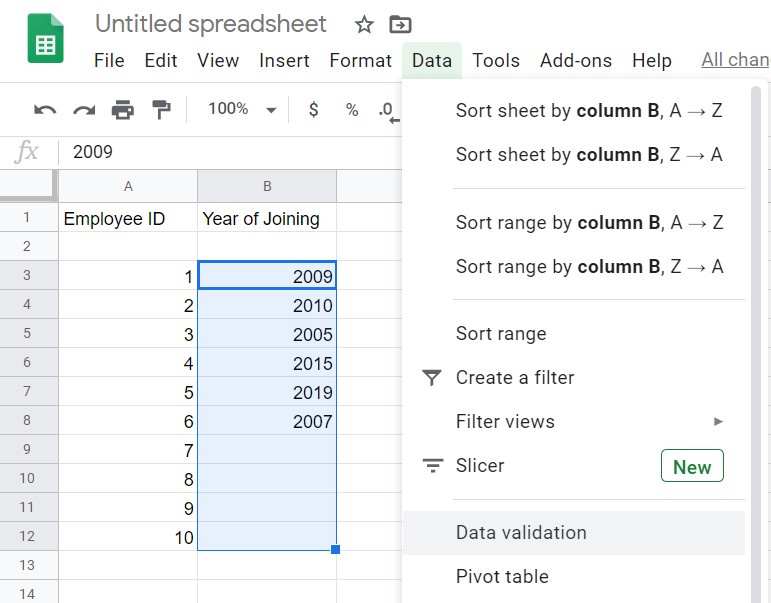
- Now click on Data from the top menu bar and select Data Validation.
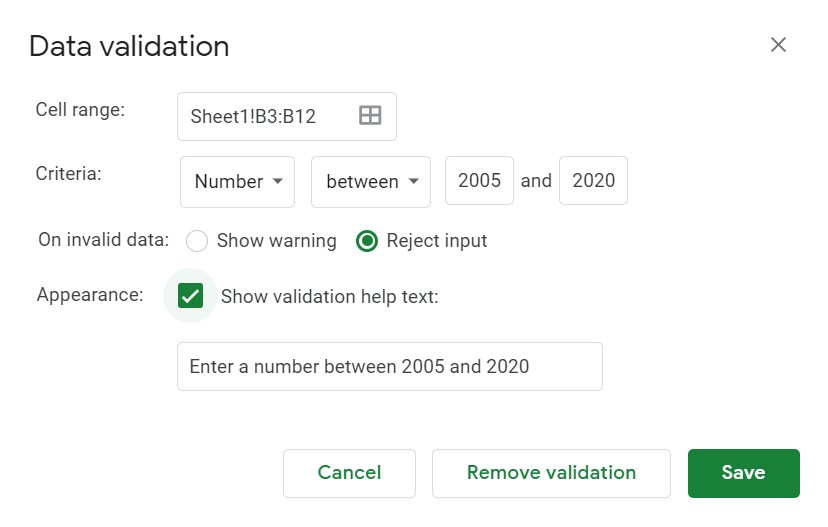
- Now in the dialog box that appears, click on Criteria and select the one that suits your needs. In our example, since we are dealing with the Year data, we would want the criteria to be Numbers.
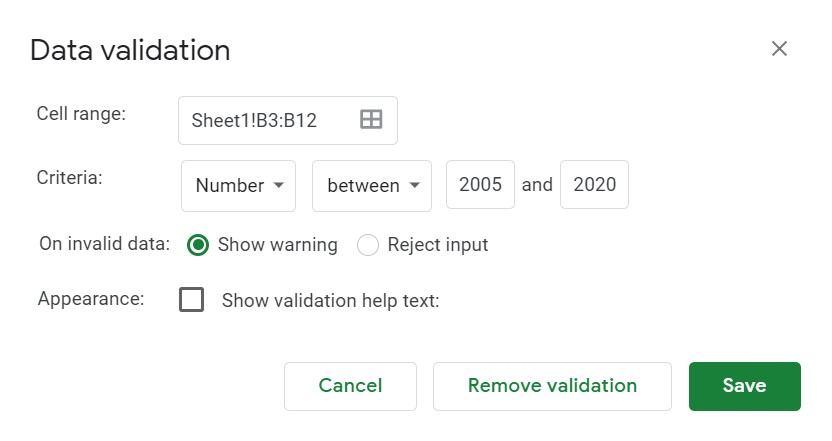
- In doing so, you should now see the between option. Specify it as per your needs. In our case, it will be 2005 to 2020, as mentioned before.
- Next up, you have to decide what should happen in entering invalid data. You have to options, either use the Show Warning option or simply make Sheets reject invalid data being typed and display an error message.
- If you choose the Show Warning message, the incorrect data will still be typed in the cell, but with a Warning Message, as seen in the below screenshot.
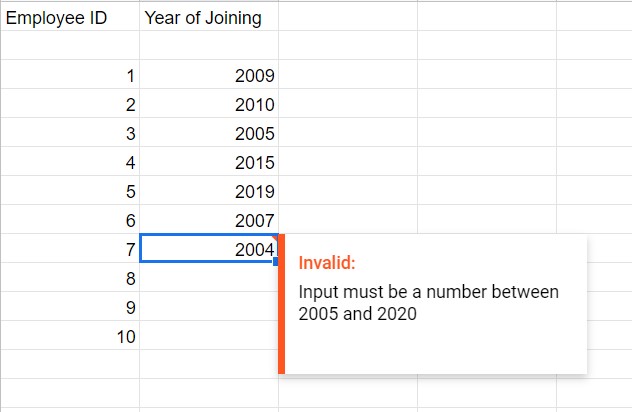
- On the other hand, if you choose the Reject Input option, type in an invalid data and hit enter, the data wouldn’t be entered and you will get the following message: “The Data that you have entered in cell xx violates the Data Validation rule set on this rule”.

- This error message doesn’t let the user know what are the Data Validation rules that he is violating. So it’s better to make him know the same, in case you are going with the Reject Input option. The same could be by heading to the Data Validation option and tick mark the Show Validation help text and click OK.
- Now if someone enters any incorrect data, the error message will also accompany the data validation rule that he needs to follow, as shown below:

How to Lock a Cell in Google Sheets
So till now, we shared the steps to use the Data Validation feature to restrict data in Google Sheets. But what if you wish to lock a cell from editing in the first place. This is also very much possible. For example, in our above example, we wouldn’t want any employees to modify their employee ID, so we would be locking this cell from being edited. This could be done as follows:
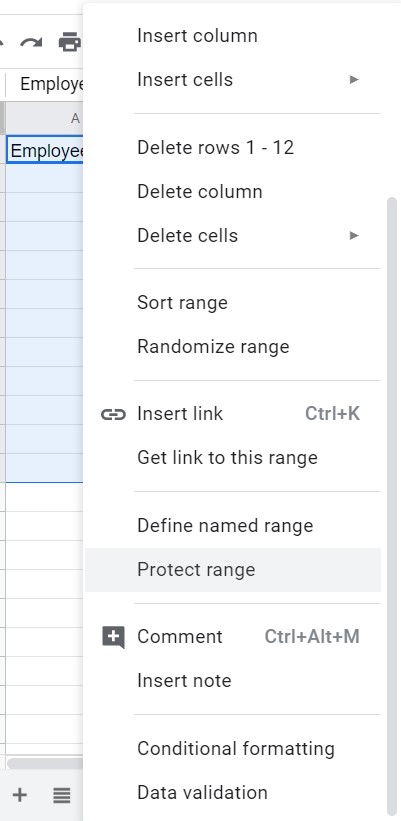
- Select the cells, row, or column that needs to be prevented from editing.
- Right-click on it and click on Protect Range.
- Enter the warning message and click on Set permission.
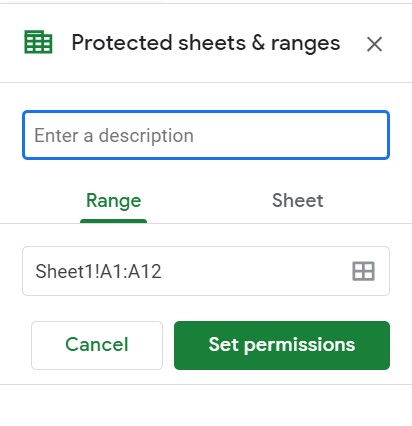
- In the range editing permissions dialog box, modify the rules, if needed and click Done.
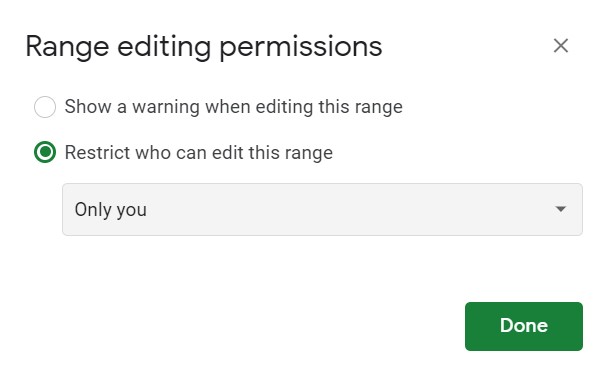
- That’s it. You have successfully blocked a cell, row or column from being edited. if anyone decided to alter the same, the would get the error message that you specified.

Conclusion
So with that, we conclude this guide on how to use the Data Validation feature to restrict data in Google Sheets. We hope that this tip might definitely have helped you out. On that note, don’t forget to check out our other iPhone Tips and Tricks, PC tips and tricks, and Android Tips and Tricks.
