As technology keeps evolving, mobile operating systems like iOS always change and get smarter. They offer cool new features and better performance. Recently, Apple has recently announced iOS 17 at WWDC 23. The update to iOS 17 brings several unique features and enhancements to many upgradable devices. However, with each new iteration, some users may face compatibility issues or encountering bugs that hinder their device’s performance. As ioS 17 beta is still in the development phase, it is obvious that bugs and issues will plague it. In that case, it is a wise idea to Downgrade from iOS 17 to 16 Without Losing Data.
IOS 17 is in the public beta stage and available for public beta testers enrolled in Apple’s beta program. For testing out features and utilities, it is a great thing to update, but when it comes to using it as your daily driver, you might want to roll back to the stable update, which is iOS 16. Suppose any user faces a major bug after updating to iOS 17 beta. In that case, it is advised to roll back to the previous stable update while retaining all their valuable data intact.
If you are also on iOS 17 public beta and want to roll back to iOS 16 without losing data, then you have come to the right place. We have everything covered for you. In this guide, we will explain how you can downgrade or roll back from iOS 17 to iOS 16 without losing data. This guide aims to provide every step in detail, so you can follow it flawlessly.
Page Contents
Things to make sure before downgrading
Losing your data can be a great headache, be it personal or not. Before starting the process of downgrading, you must take care of a few things.
- You must have a backup on iOS 16 so you do not lose any sort of data.
- However, if you forgot to make any backups on iOS 16 and upgraded to the iOS 17 public beta, Do not worry; you can still create a backup before downgrading to iOS 16.
- You need a Mac or PC with a proper internet connection so that you can install the required tool for downgrading the iOS version.
Note: Please keep in mind that backups created on iOS 17 can only be restored when the iOS 17 stable upgrade is rolled out for public users to install. You will not be able to restore that backup on your iOS 16 with the iOS 17 backup. However, if you fail to create a backup also at this stage, you will ultimately lose your useful data.
Tip: When you upgrade your devices to something other than a stable upgrade, always make sure to create a backup to be on the safe side.
How to Downgrade from iOS 17 to 16 Without Losing Data
There are multiple methods for downgrading iOS 17 to iOS 16 without losing data. The first one is using a third-party downgrade tool, and the second is using iTunes or Finder. Both methods work flawlessly when downgrading from iOS 17 to iOS 16. You can try any of them to see which best suits you.
Method 1: By removing iOS 17 beta profile
Since iOS 17 is not launched for the public yet, so you can easily delete the beta profile from your settings menu and easily downgrade to iOS 16 without the need for iTunes or iCloud. Once you delete the iOS 17 beta profile, your iPhone will update with iOS 16 latest version only.
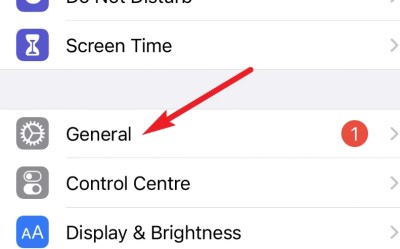
- First, open the Settings app, and navigate to general settings.
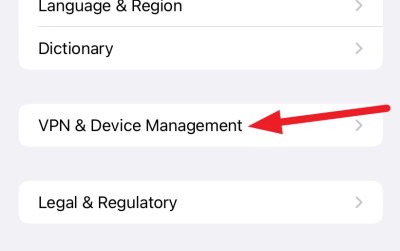
- Here go to VPN & device management option.
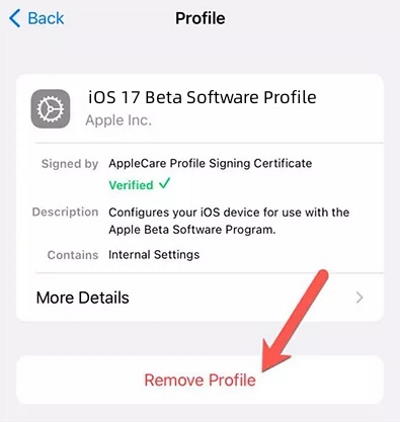
- Click on iOS 17 beta software profile.
- Remove the beta profile. your iPhone might prompt for your screen passcode to confirm the deletion.
- Now go back to the settings main page and navigate to the software update section. After deleting the profile, restart your iPhone.
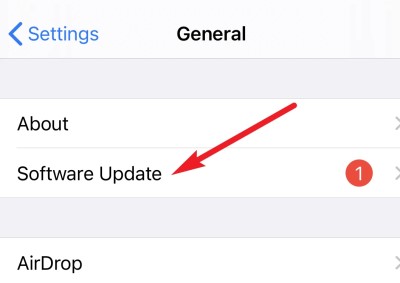
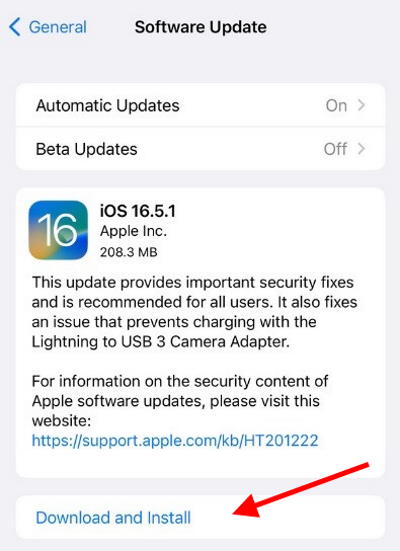
- You will be able to see that an iOS 16 update is available. Click on the download and install option below and follow the onscreen instructions to downgrade your iPhone.
Note: This method will only work until iOS 17 is launched under beta tester. Once it is launched for public release, then you have to use the below methods to downgrade.
Method 2: Using third-party downgrade tool
Although both methods work flawlessly, using any third party iOS downgrade tool is more on the safe side and is quick. It simplifies the process of downgrading your iOS version. The main thing is that it can perform downgrading without the need to jailbreak your iOS device.
- Download any iOS downgrade tool and install it on your PC or Mac.
- Launch the tool and connect your iOS device to the lightning cable.
- On the screen, select Downgrade system. This will automatically detect which iOS version is best suited for your device.
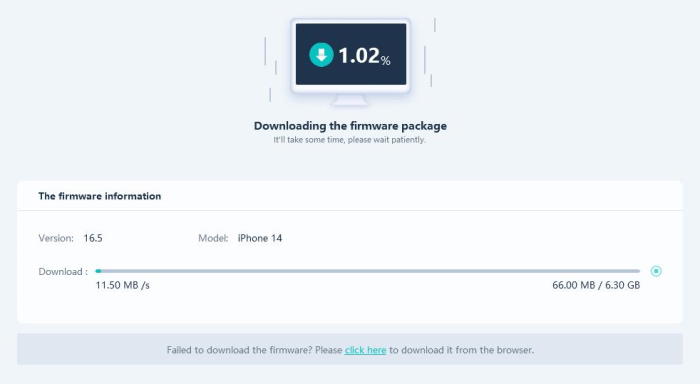
- Once the detection is complete, click on download to start the download of the preferred iOS version.
- When the download is fully completed, click on Initiate Downgrade to start the process.
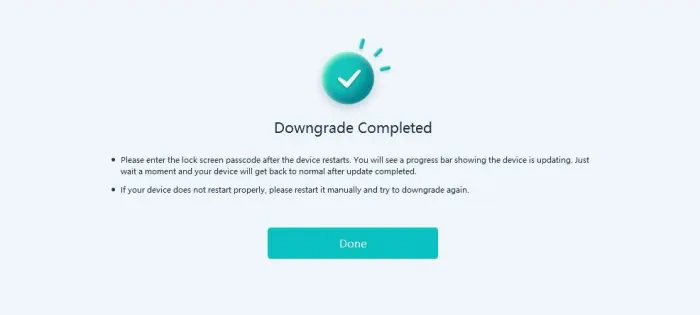
This might take several minutes, so keep patience and do not unplug your iOS device from your PC or Mac. Once the downgrading is complete, a message will be shown on the screen saying “Downgrade completed”.
Also Read
Method 3: Downgrade via iCloud backup
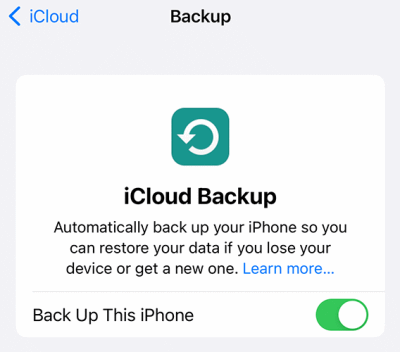
Usually, iCloud takes a complete backup of your iPhone and saves it in the cloud for future needs. If you recently upgraded to iOS 17, then you can restore this iCloud backup to downgrade to the iOS 16 version. To do this, follow the steps below:
- Open iPhone settings and disable the “Find my iPhone” feature.
- Now connect your iPhone to iTunes and navigate to device settings.
- Here click on Summary > Backups > Restore backup option.
iTunes will prompt you whether you wish to restore from archive or local backup – choose the archive option here.
iTunes will download your iCloud backup and then restore it on your phone without any data loss. Your iPhone will be automatically downgraded from iOS 17 to the iOS 16 version which was in your iCloud backup.
Method 4: Using iTunes or Finder
If you are using a Mac device, then use the Finder tool; on the other hand, if you are using Windows, use the iTunes tool. Make sure to connect your device to the PC or Mac to start the whole process.
First, all you have to do is boot your iPhone into recovery mode. To do this, press the volume down button and release quickly. Do the same for the top or volume-up button. Now press the side button until your iPhone has booted into recovery mode. These all have to be done very quickly indoors to boot into recovery mode.
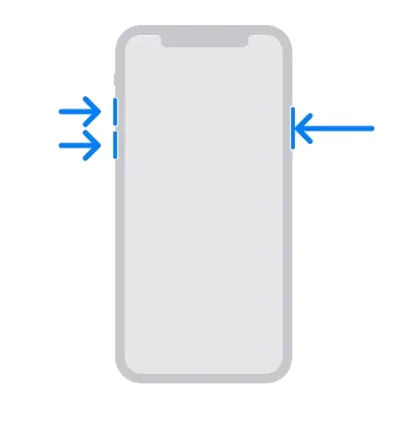
When you have entered recovery mode successfully, you will get a pop-up on your computer to restore your iPhone. On selecting Restore, your phone will be totally wiped, and the latest stable iOS version will be installed. This might take several minutes.
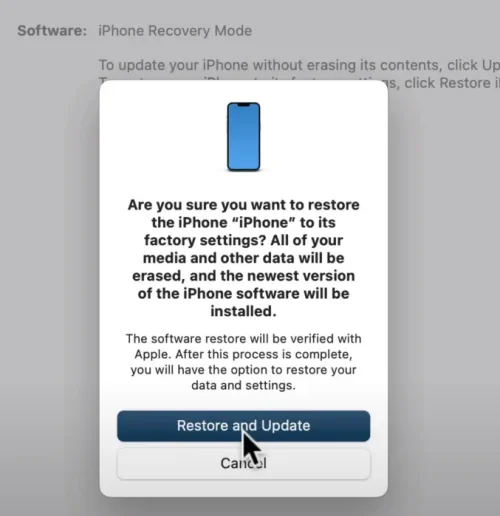
Once iOS is successfully installed, you can restore the backup on your device if you have created one. This depends on whether you have created a backup on your computer or on iCloud. Restoring a backup is independent of any of the methods used while downgrading iOS.
Conclusion
This brings us to the end of this guide on How to Downgrade from iOS 17 to 16 Without Losing Data. We have shared the best methods for downgrading from iOS 17 to iOS 16 without compromising your personal data. It’s crucial to note that downgrading an iOS version is an advanced procedure, and it should only be attempted by experienced users who understand the risks involved.
