Normally, we make use of MS Word or Google Slides to create images and documents. The primary reason is, these apps offer much flexibility in using multiple images and more features for editing. On the other hand, on platforms like Google Doc, people often think that they cannot add an image on top of another image. They even think that they cannot overlap a text or edit it over a picture in Google Doc.
But in this guide, I will tell you a few tweaks that will help you to overlap and add one image over another. These features are available in Google Docs. Most people only use the online repository to share or store their content. However, if you want to modify your word files (GDOC) then these methods will be helpful to you. We will learn how to use Drawing in Google Docs and text wrapping feature.
Also Read

Page Contents
How to Add Image on Top of Another Image in Google Doc
First, let’s check out the Drawing feature.
Drawing
- Open your document on Google Doc
- In the menu bar click Insert > then click Drawing > New
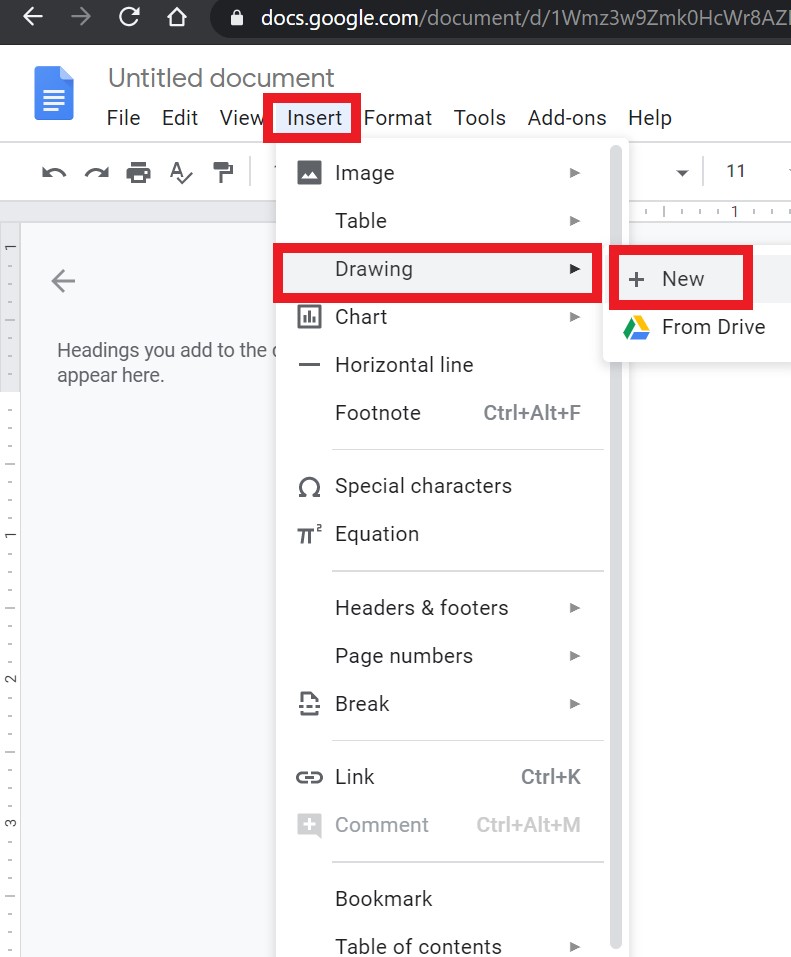
- The drawing panel will open up.
- To add an initial image click on the image icon you see above the draw section.
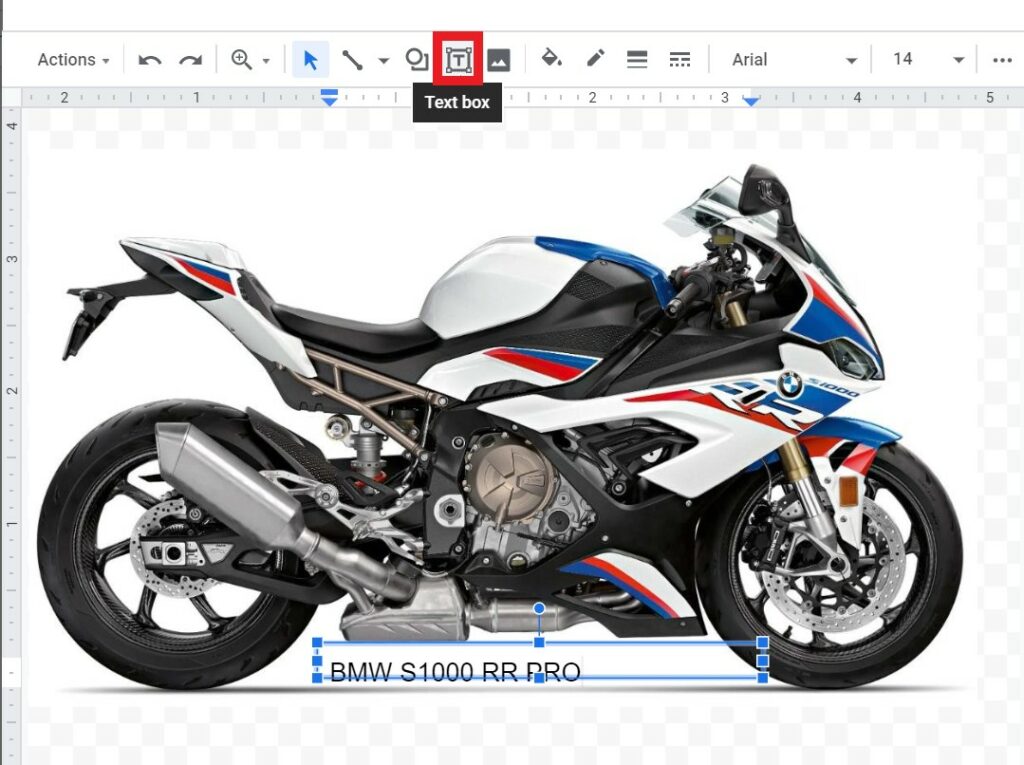
- If you wish to add text on the first image you can click on the Text icon with T written on it.
- Here I have uploaded the initial image and used the text feature to add text over it. I have also changed the font style and size.
- Otherwise, if you wish to overlap a new picture over the first picture, then again click on the image icon
- Add the second picture by browsing from your PC and then adjust it. See the screenshot below.
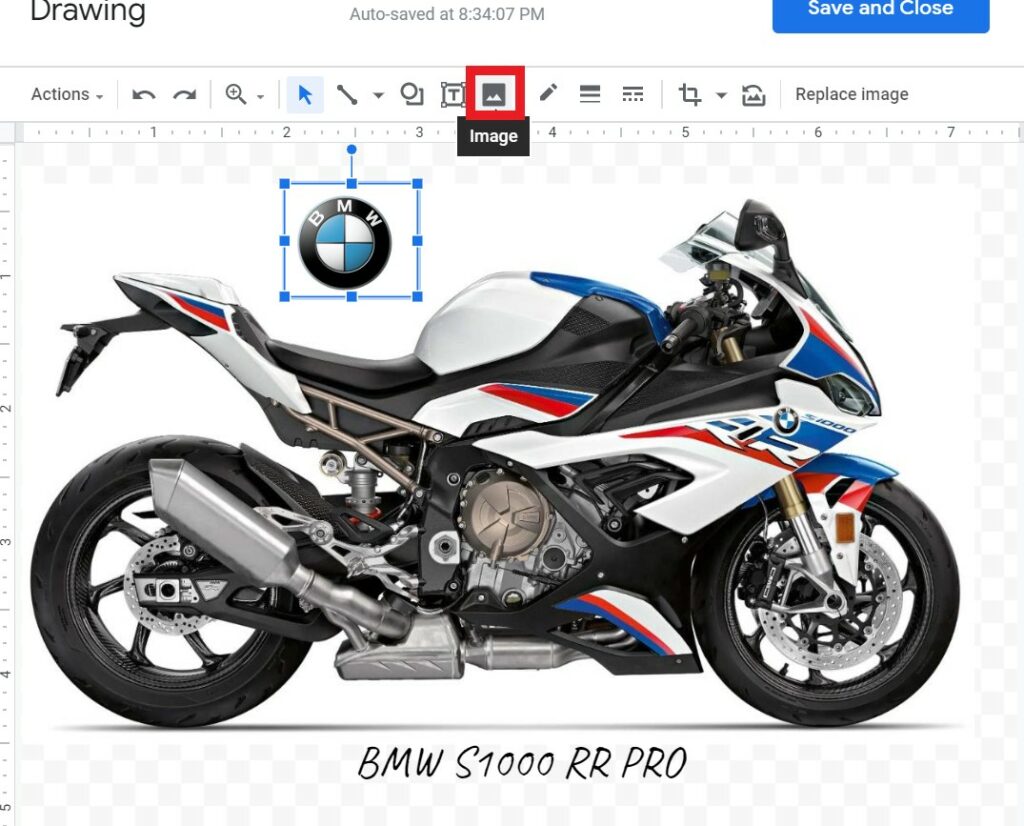
- Once you finish your edits, you can click Save and Close.
Overlapping Images with Text Wrapping
Here is another method that is quite easy to do like the previous one. Here we will be overlapping the images only. We will keep one primary picture upon which we will place the second picture.
- Open a new Google Docs file
- On the menu bar go to Insert and directly insert the first picture. Repeat the step once again and add the second picture.
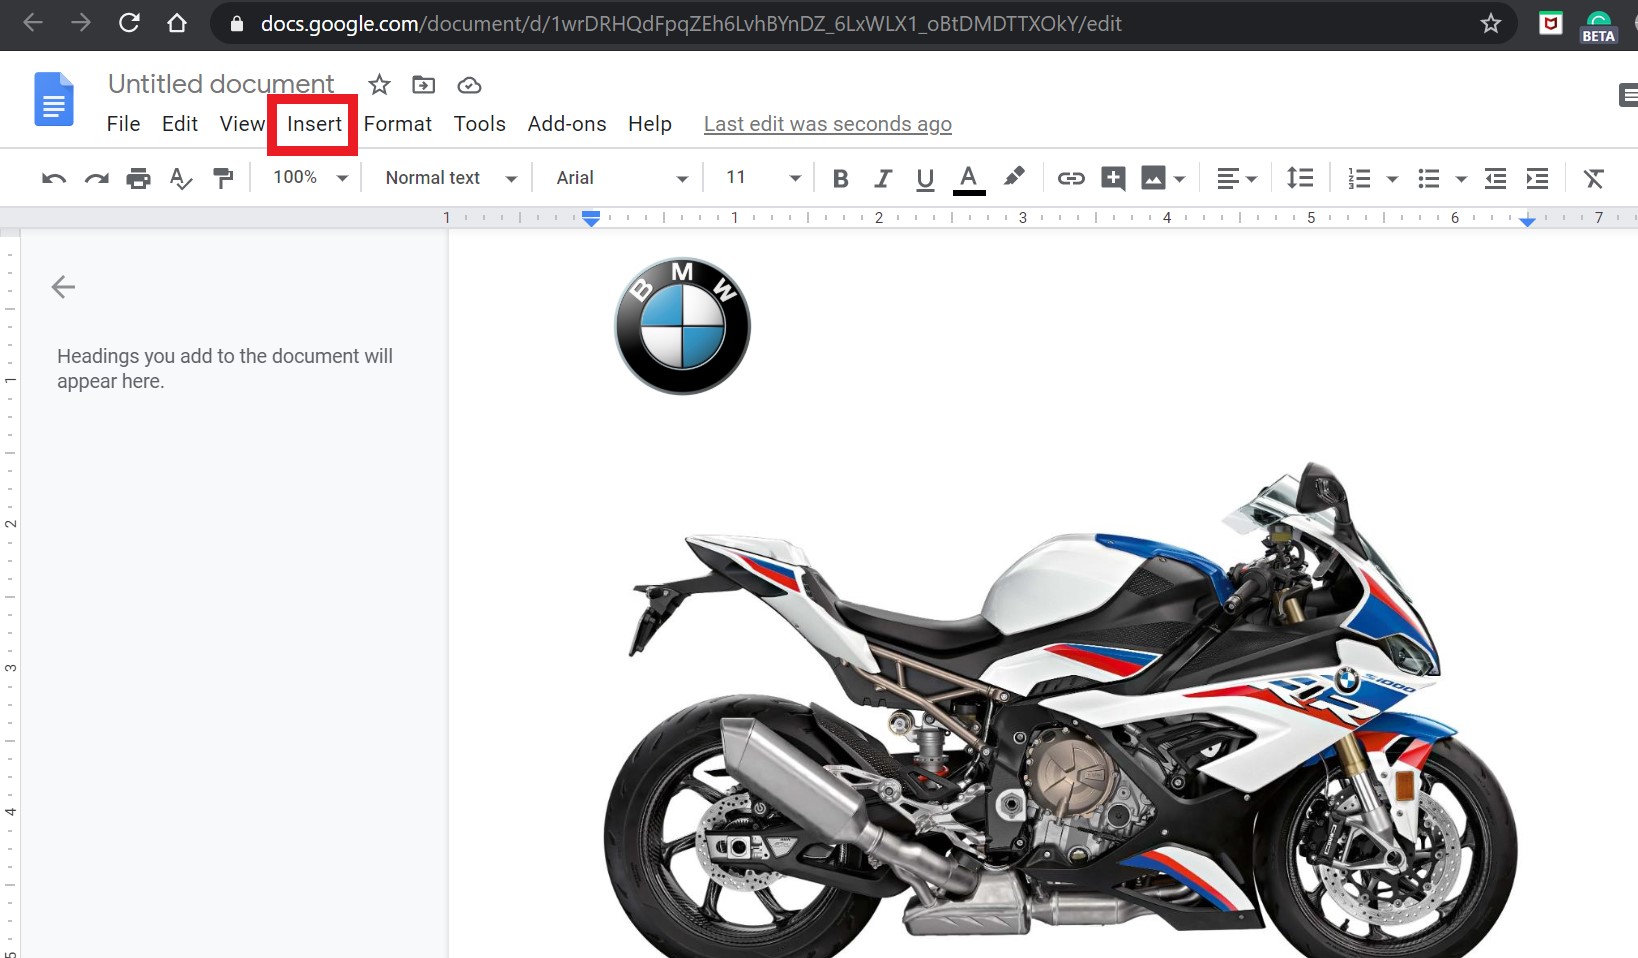
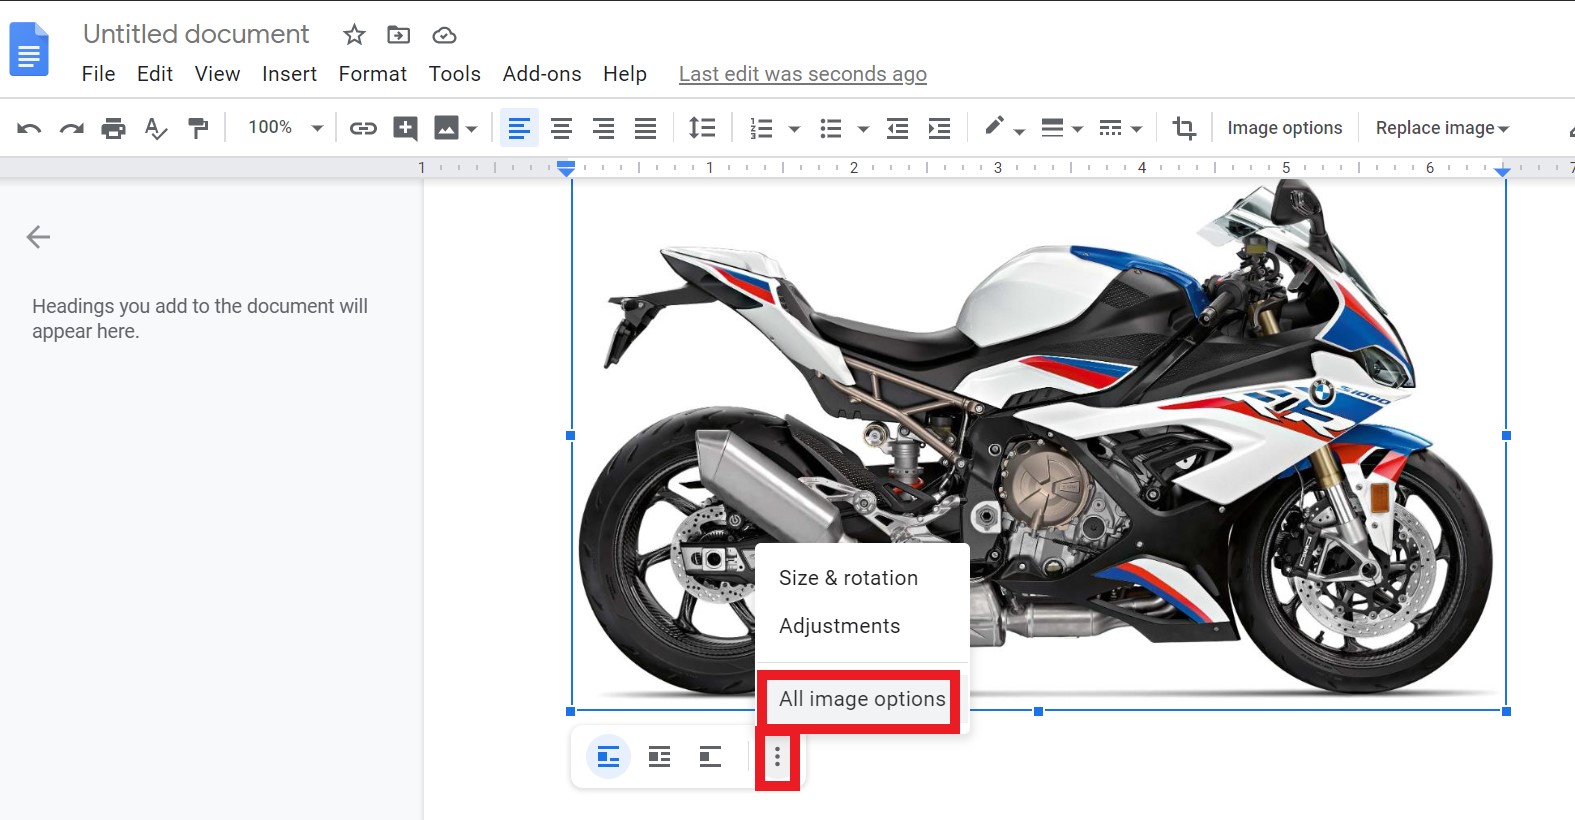
- Select the first picture. Then as it becomes highlighted, a small panel will be available below it.
- From that panel click on the 3-dot icon > select All Image Options
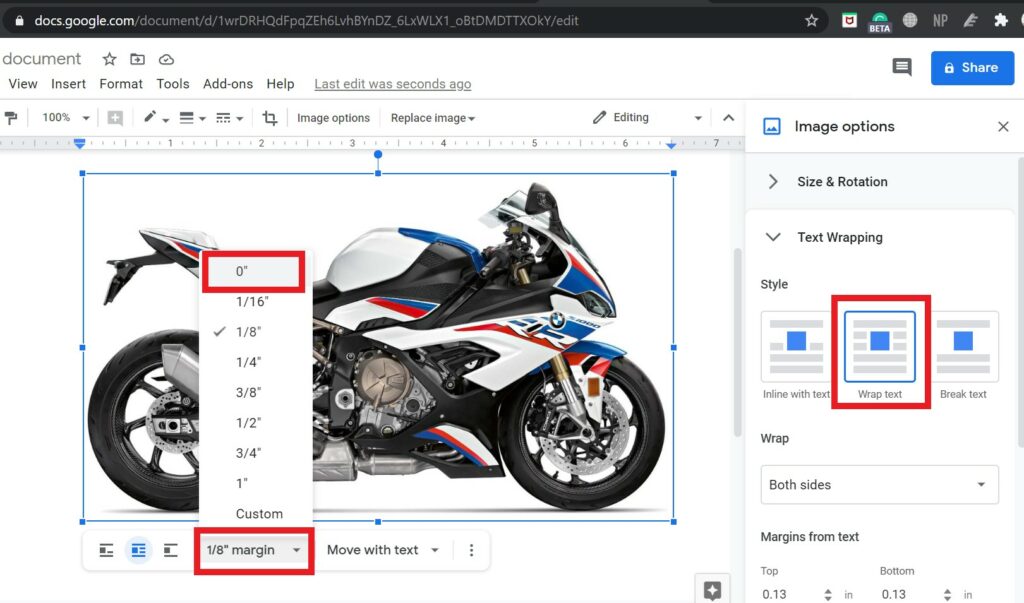
- Under that select Wrap text
- Now, you should see the margin menu below the picture. Select and set it to 0(zero).
- Now select and highlight the second picture and repeat the above three steps for it.
- Now, to overlap and add the second picture to the first one, simply drag it over the first one.
So, that’s it, guys. These are the two easiest ways to add image over another image or add any text in Google Docs. Try it out and in the comments section, let me know if you have any queries.
Read Next,
- How to Convert A DOCX File to GDOC Format
- Various Methods to Disable Weather Notification Alert on any Android Device
