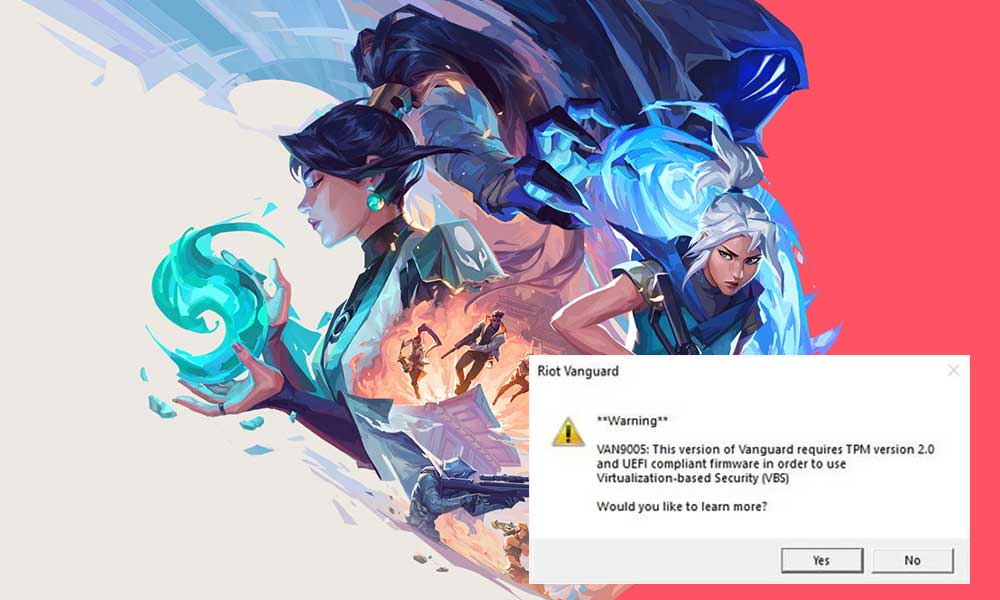
Valorant is still one of the free-to-play first-person tactical hero shooter titles by Riot Games that has been available for Windows only. Initially, it was teased under the codename Project A and then the closed beta program started. It offers a 5v5 character-based gameplay where precise gunplay takes a huge role with unique agent abilities. Recently, Riot Games has done some changes in system requirements to run Valorant which eventually causes Valorant VAN9005 Error on the PC.
Well, the issue isn’t older and started on 10th July 2023, where your Windows 10 system won’t be able to run Valorant if the VBS (Virtualization-based Security) setting doesn’t meet the requirements. This specific issue mostly happens in Windows 10 machines. Now, if you’re also facing the same kind of issue on your Win10 computer due to the lack of settings with VBS then don’t worry. Here we’ve shared with you possible workarounds to easily resolve this error.
Page Contents
How to Fix Valorant VAN9005 Error
Though Riot Games did mention that TPM 2.0 and UEFI Secure Boot are only required for Windows 11, it looks like that Windows 10 (Build 17134 or higher) will also require the same. The first step is to access your BIOS settings to check the UEFI mode and enable TPM 2.0 in it. However, we’ll recommend you check the full guide to ensure even if TPM 2.0 isn’t available then what’ll be the next solution? So, without further ado, let’s jump into it.
1. Check the System Requirements
First, you’ll need to check if the system requirements of Valorant are compatible with your computer or not. If the specification isn’t compatible then upgrade the necessary hardware or software segment.
RECOMMENDED REQUIREMENTS:
- OS: Windows 10 (Build 17134+) or Windows 11 64-bit
- CPU: Intel i3-4150 or AMD Ryzen 3 1200
- GPU: GeForce GT 730 or Radeon R7 240
- RAM: 4 GB
- VRAM: 1 GB
2. Verify the UEFI BIOS Mode
You should now check and verify whether your system has UEFI mode in BIOS or not by following the steps below.
- Press the Windows key on your computer.
- Type msinfo32 and press Enter to open System Information.
- Click on System Summary in the left panel.
- Scroll down and verify the BIOS Mode.
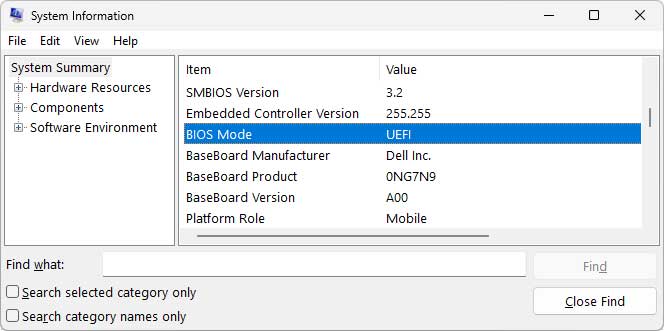
- Make sure to set it to UEFI.
3. Check the TPM 2.0 Support
Now, you’ll have to check the TPM 2.0 Support by following the steps below.
- Press the Windows key on your computer.
- Type tpm.msc and press Enter to open TPM Management on Local Computer.
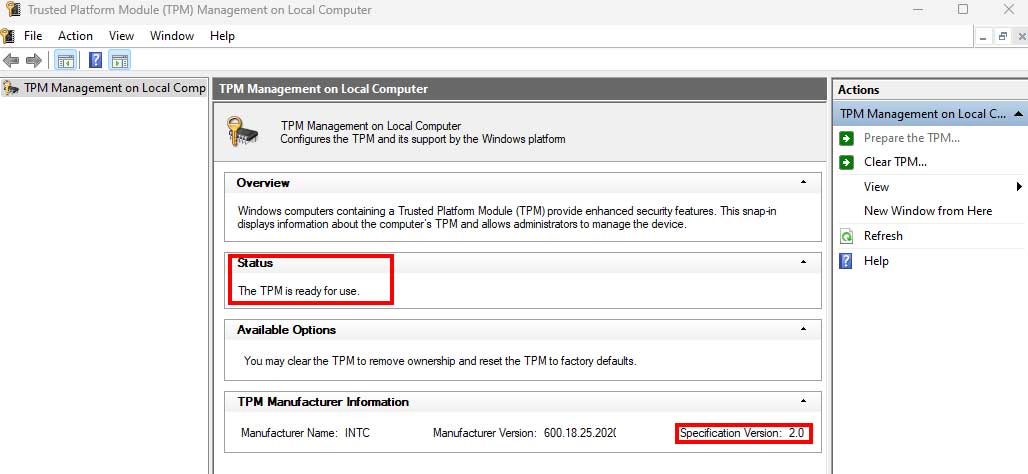
- If TPM 2.0 is supported then you’ll see the “The TPM is ready to use.” and Specification Version: 2.0 status.
4. Enable UEFI Secure Boot and TPM 2.0
Once both TPM 2.0 and UEFI BIOS Mode supported your system, you’ll have to enable them to run Valorant smoothly. Do keep in mind that the BIOS version and interface can be different on each machine. So, don’t panic. To do so:
- Open the Start menu > Click on the Power menu.
- Click on Restart and once the screen goes off, keep pressing the F2/Del key multiple times until the BIOS screen appears. [Some machines might have F1, F10, F12, Esc key to open BIOS]
- After entering into the BIOS menu, head over to the Advanced option.
- Select TPM 2.0 (Security Chip) to Enable it.
Please Note: Even if TPM 2.0 isn’t available on your machine then make sure to select TPM 2.0 from the BIOS screen by checking all options.
You can visit the respective motherboard manufacturer’s website to get further details and in-depth steps below:
Microsoft also has covered a guide to enable TPM 2.0 that you can check here.
5. Disable Virtualization-Based Security (VBS)
You’ll have to disable virtualization-based security (VBS) if the above methods didn’t help. To do so:
- Open the Start menu by pressing the Windows key.
- Type msinfo32 and hit Enter to open System Information.
- Now, scroll down to the right panel > If Virtualization-based Security is running that means VBS is enabled.

In that case, you’ll need to disable VBS manually on your machine by following the steps below:
- Open the Start menu and search for CMD.
- Right-click on Command Prompt > Select Run as Administrator.
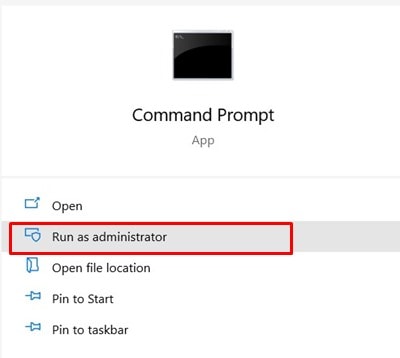
- If prompted by UAC, click on Yes to proceed.
- Now, copy-paste the following command line into the command window:
bcdedit /set hypervisorlaunchtype off
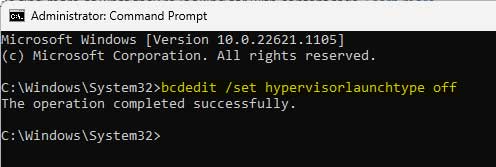
- Once done, close the command window, and restart your PC to apply changes.
- Finally, you can open System Information again to check Virtualization-based Security. It should be stopped now.
6. Turn Off Memory Integrity
However, if the problem still persists and Valorant VAN9005 Error appears again then make sure to disable Memory Integrity on your Windows machine manually by following the steps below.
- Press the Win+I keys to open Windows Settings.
- Click on Privacy & Security from the left pane.
- Click on Windows Security from the right window.
- Now, go to Device Security > Click on Core isolation details.
- Then Turn Off the Memory integrity toggle.
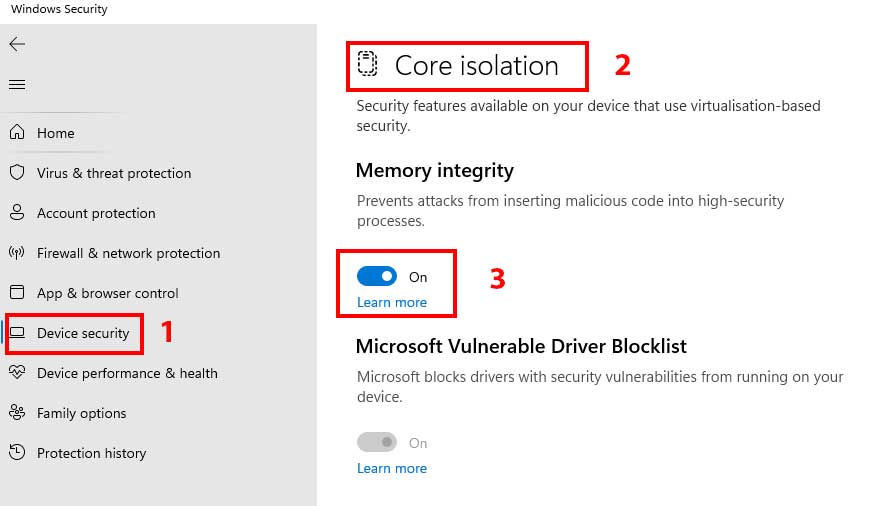
- It may ask you to confirm the changes. Click on Yes to allow.
- Reboot the PC and check for the issue again.
So, after enabling either TPM 2.0 or disabling VBS, you shouldn’t have VBS settings issue on Windows 10. Then try relaunching VALORANT to check if the error notice is bothering you or not.
7. Contact Riot Support
If none of the workarounds did come in handy then make sure to Contact Riot Support for further assistance regarding the same issue. Creating a support ticket will help in fixing the VAN9005 Error or help the developers to investigate it deeply.
That’s it, guys. We hope this guide was helpful to you. For further queries, you can comment below.
Credit: Riot Games
