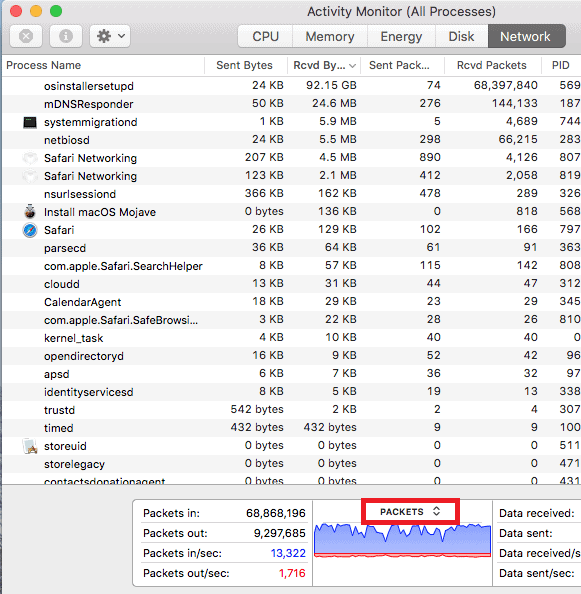
Activity Monitor is one of the handy tools that would help you manage or view your network usage on the monitor in your Mac’s dock. It gives you a glance at all the important information related to network like Packets in, Packets Out, Packets in/sec. Packets out/sec, etc. This gives you the information which can let you know if your network is experiencing any issues or not. If you also happen you use a Macbook or macOS desktop then this post is for you.
In this post, we will give you all the steps that you will need to monitor network activity usage via the Activity Monitor on your Mac’s dock. Well, for those who are wondering and are new to using macOS, then let me tell you that this Activity Monitor is a macOS counterpart for the Windows Task Manager. Just as you would manage the tasks on the Task Manager in Windows, you can do the same via the Activity Monitor. So, with that being said, let us take a look at the article itself:
Also Read
FIX: Crunchyroll Black Screen When Streaming
Fix: macOS Ventura WiFi Not Working Issue
Fix: macOS Monterey Not Connecting to WiFi
Continuity Camera Not Working After macOS update, How to Fix?
Fix: Cannot Change Folder Background Color in Mac (macOS Ventura)
Fix: SanDisk Extreme Pro SSD Not Recognized or Detected on macOS

How to Access Activity Monitor
Let us take a look first at how you can access the Activity Monitor on your macOS.
- Press Command + Space or the magnifying glass button in the menu bar and search activity monitor.
- Hit the Return key to open.
How to Add Activity Monitor To Your Mac’s Dock
- Now right click on the Activity Monitor app icon.
- In the menu that appears, click on the Dock Icon option and select Show Network Usage.
- Once you have done that, the Activity Monitor app icon will change into an animated display.
- The animation will show the graphs of the network activity.
- This graph will update every 5 seconds.
- You can change the update frequency by going to View > Update Frequency in the menu bar at the top of the screen.
Once you have done all the above, the packets will be shown in green while the packets out will be shown in red. You can also change the settings and show these data in bytes in/out. Click on the main activity monitor window and select the Monitor tab. There is a button located at the tiny graph in the monitor with a title called Packets. Click on it and change it to Data to show packets in/out in bytes.

The change will immediately show up on the mac’s dock icon, where “data read per second” will be shown in blue, while “bytes of data written per second” will be shown in red. You can close the main window of the Activity monitor and see the changes in the mac’s dock icon itself.
Wrap Up!
That’s it from my side in this post. I hope you were able to place and show the network activity usage on the mac’s dock with the help of the guide mentioned here. Let us know in the comments below if you come across any issues while following the above-mentioned steps.
For more such awesome coverage, you can head over to our check out our Windows Guides, Gaming Guides, Social Media Guides, iPhone, and Android Guides to read more. Make sure to subscribe to our YouTube Channel for awesome videos related to Android, iOS, and Gaming. Until the next post…Cheers!
