WiFi is one of the most crucial elements in macOS experience today. Therefore, connection issues can potentially lead to serious problems. Whether your WiFi is not working, your Mac is not connecting to WiFi, or there is an issue with your macOS software, we will help you look into it and rectify it. Basically, there are three reasons why your WiFi does not work:
- Your internet service provider’s network is down.
- Your own WiFi network is down.
- There is an issue with your Router.
We will help you sort out all of these issues in this all-new guide.

Page Contents
- macOS WiFi Connection Issues and Their Fixes
- Check if you need to update Apple’s Software
- Confirm whether the problem is at your internet service provider’s end
- Try restarting your Router
- Try restarting your Mac
- Try to disconnect Bluetooth
- Force your device to forget the network
- Make sure your Router is not Overheated
- Have a look at your Router’s location
- Check if there is any object blocking the WiFi Signal
- Make use of Apple’s wireless Diagnostics
- Check for other potentially competing Networks
- Change your network name to something Unique
- Select a different WiFi channel
- Utilize the 5 GHz band
- Have a look at your security settings
- Use Apple Diagnostics to check for WiFi/network Issues
- Try resetting your SMC, PRAM or NVRAM
- Change your network’s DNS Settings
macOS WiFi Connection Issues and Their Fixes
Here are the potential solutions that will help you fix your macOS WiFi connection issues. We recommend following them accordingly
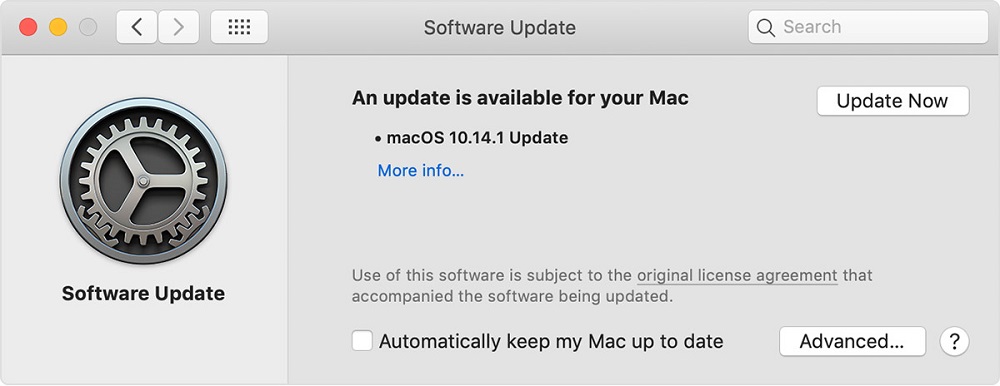
Check if you need to update Apple’s Software

There have been reports of Mac users facing WiFi issues on updating their macOS. This was prominently seen in the case of the original version of El Capitan (macOS 10.11).
In that case, a number of people had to download the new update released by Apple using their mobile internet. You might be required to do the same if you need a software update. Make sure you are vigilant regarding your data allowance in that case, though. If you are using a beta version of macOS, you can possibly face issues with WiFi as well.
Confirm whether the problem is at your internet service provider’s end
In case the issue lies with your internet service provider, you need to report it to them and wait for them to fix it. Even if the network seems to be working fine, there could be problems with the cables due to stormy weather or waterlogging. When these get fixed, you should be able to connect to WiFi. Additionally, you can try running a Ping test to check if there’s an issue with the connection to a particular website you are attempting to open.
Try restarting your Router
You also need to check whether it is your Router that is at fault; turn it off and back on to see if it works. In order to power-cycle your Router, you must remove it from the power source for around 30 seconds. After that, reconnect it to the same and switch it on. Check if your Mac is able to connect to WiFi now.
Try restarting your Mac
Similarly, you can try rebooting your Mac and then check if the issue has been resolved. In case it persists, turn off your WiFi by clicking on the WiFi logo on the top right of your screen, and choosing “Turn WiFi Off.” Hold on for a few seconds before you switch it back on, and wait a bit as it scans for available networks.
Try to disconnect Bluetooth
Surprisingly, this technique has worked for quite a few users. Select the Bluetooth icon on the top right of the screen and then choose “Turn Bluetooth Off.”
Force your device to forget the network
This is another solution that could possibly help you resolve the connection issue. Switch off Airport, navigate to System Preferences -> Network and choose WiFi in the list you see on the left side. Click on “Advanced,” choose the network you have to forget, and then press the (-) key. Confirm to remove when asked.
Following this, your Mac and other devices associated with your iCloud Keychain won’t be joining the network you just forgot. Attempt to connect to the network again and enter the password when asked.
Make sure your Router is not Overheated
Overheating can be a serious problem and lead to your Router getting damaged. You need to keep it at a cool or moderate temperature by providing sufficient ventilation. If that is not possible, at least make sure that it is not covered up. If it gets overheated, it will not be able to work properly.
Have a look at your Router’s location
It is important to note that you will receive a better signal if there aren’t any large metal surfaces near or in contact with your Router. Try moving your laptop close to the Router and see if the signal strength improves. If it does, then it is possible that some object in your office or house had been interfering with the signal.
Check if there is any object blocking the WiFi Signal
The signal strength could possibly be weaker in certain places because of factors like thick walls and metal objects. You can try using the paid app NetSpot to produce a pretty accurate map of the WiFi signal in your place. Then move your Mac around your building and try to determine where the signal is strong and weak.
In case there are other devices like motors, fans, or microwaves interfering with the WiFi signal, try to place your Router away from them. If you can confirm that you are dealing with a signal strength issue, you can get a WiFi extender to sort it out for you. Set up the WiFi extender to have the same SSID (WiFi name) and password as your router and modem. This will help your Mac automatically select whichever device is producing a better connection.
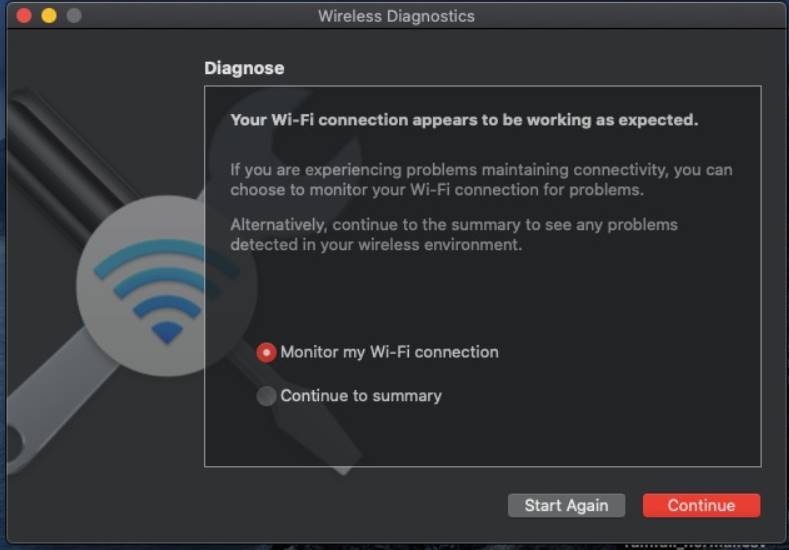
Make use of Apple’s wireless Diagnostics

This will also help you determine whether other devices are interfering with your WiFi signal. To do this, simply follow the steps given below:
Go to Wireless Diagnostics by holding down Option + Alt, clicking on the WiFi icon on the top right of your screen, and then selecting “Open Wireless Diagnostics.”
Open up the menu and select Window -> Performance.
Doing this will generate three graphs that will give you information about the rate of transmission, signal quality, and signal and noise levels, respectively. By going through these graphs for a few hours, you will be able to find out if there is an issue.
Check for other potentially competing Networks
It is possible that your WiFi connection is being hindered by other networks sharing the same radio waves with you. This is especially true if you are in an urban, developed area. You can try using the WiFi Explorer app to determine what other networks are present in your area.
Change your network name to something Unique
By configuring your WiFi with a special and unique name, you can prevent it from clashing with the names of other networks in the vicinity.
Select a different WiFi channel
There are a total of 13 WiFi channels, and all of them except the 1st, 6th, and 11th overlap with each other. By choosing a WiFi channel as far as possible from your neighbors’ WiFi network, you could counter the competition offered by the latter. Although routers tend to automatically select channels based on those functioning nearby, you can do it manually as well. Simply open the Scan tool in the Windows Menu in Wireless Diagnostics, and change the channel if you discover that it is the same as another router in the vicinity.
In order to change the channel, type in your Router’s IP address into your browser’s address bar and press enter. Your Router’s software will now turn up. Now look for the channel information, log into your Router, and move it at least five to seven channels away from the present one. As you do this, you should also notice an improvement in signal quality from the graphs in Wireless Diagnostics. You can also consider configuring your WiFi channel to “Automatic.” It will then select the best channel to operate on by itself henceforth.
Utilize the 5 GHz band
The channels we discussed above utilize the 2.4 GHz band. If you switch to the 5 GHz band, you will receive more bandwidth and be less vulnerable to interference. This is because other commonly used household devices do not operate on that frequency. In order to do this, you will first have to separate the 2.4 GHz and 5 GHz networks on your Router and label them differently. Then proceed to give the 5 GHz network higher preference in your Mac and iOS devices. You can do this by going to System Preferences -> Network -> WiFi -> Advanced in macOS and dragging the 5 GHz network to the top of the list.
For your iOS device, go to Settings -> WiFi and then click on the “i” beside the 2.4 GHz network. Switch the Auto-Join Option to off.
Have a look at your security settings
If your network is hidden, it can actually cause reliability issues instead of protecting it. Therefore, it is better to avoid doing that. Instead, you can try using WPA2 Personal Security to protect your network.
Use Apple Diagnostics to check for WiFi/network Issues
You can do this by following the steps given below:
- Disconnect all external devices except your screen and keyboard.
- Close down your Mac, hold down D and then proceed to restart it.
- Choose your language when asked, and then wait for your Mac to be assessed.
Apple Diagnostics will offer solutions for any detected issues, which you can then implement.
Try resetting your SMC, PRAM or NVRAM
This is advanced, but a viable solution that can help you overcome some otherwise enigmatic issues. You can reset both your NVRAM and PRAM using similar procedures. The basic outline of the same has been given below.
- Close down your Mac.
- Press the power button and then hold down the Command + Option + P + R keys for 20 seconds.
- Release the keys and allow your Max to boot up as usual.
- Check the Date, Display, and Startup Disk sections in System Preferences to make sure they are configured the way you need them to be.
Similarly, you can reset the SMC to factory defaults. After this, proceed to check if the WiFi connection issues have been resolved.
Change your network’s DNS Settings
This is another advanced method, but a potentially helpful one. First of all, back up your WiFi preference files and then proceed to delete them by the steps given below:
Bring up the Finder and navigate to Go –> Go To Folder and then type this: /Library/Preferences/SystemConfiguration/
In the Window that opens up, find the files given below and move them to a safe backup folder in your computer:
com.apple.airport.preferences.plist
com.apple.network.identification.plist
com.apple.wifi.message-tracer.plist
NetworkInterfaces.plist
preferences.plist
Restart your Mac and switch on your WiFi to check if the issue has been resolved.
If the connectivity problem persists, you will have to create a new WiFi network location. This includes the addition of custom MTU and DNS information.
Make sure there are no apps running in the background that can potentially interfere with your WiFi or network. Then navigate to System Preferences -> Network and select WiFi.

- Open up the menu next to the location and select “Edit Locations.”
- Click the + button to form a new location. Give it a proper label and then click on “Done.”
- Login to the WiFi network via your normal router password.
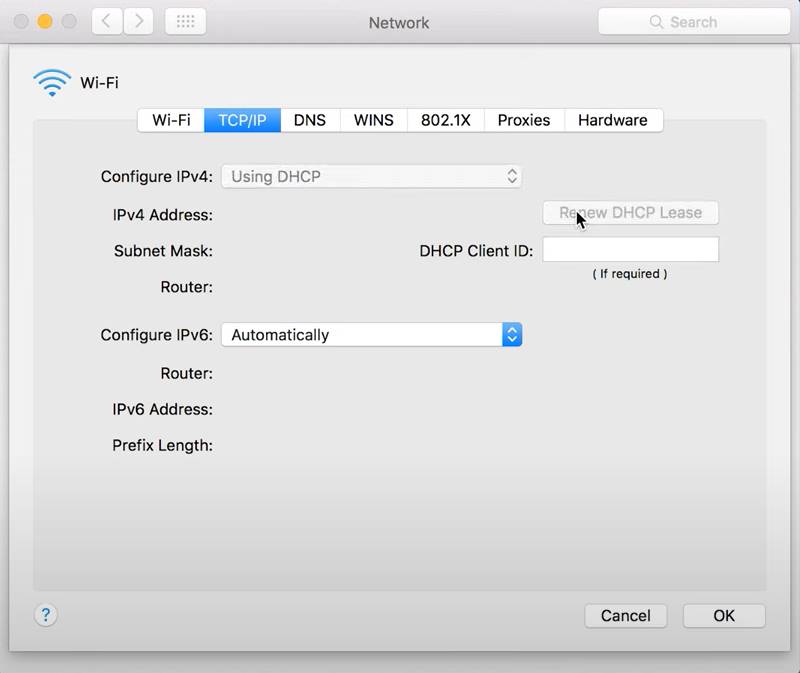
- Select “Advanced,” and in the TCP/IP tab, select “Renew DHCP Lease.”
- Switch over to the DNS tab and add 8.8.8.8 and 8.8.4.4 to the list of DNS servers.
- Select Hardware and Configure Manually.
Proceed to change MTU to “Custom” and configure it to 1453. Select OK and Apply.
Hopefully, this should fix your WiFi connectivity issue. If the problem still persists, you might have to consider purchasing a new router.
That is it for now. We hope our guide proves helpful to you in overcoming WiFi connection issues on your macOS. If you liked this, do remember to check our other Windows Guides, Gaming Guides, Social Media, iPhone Guides, and Android Guides to read more. If you have any doubts or feedback, comment down with your name along with the email ID, and we will reply shortly. Also, subscribe to our YouTube Channel for awesome videos related to Android and Gaming. Thank you.
Also Read
FIX: Crunchyroll Black Screen When Streaming
Fix: macOS Ventura WiFi Not Working Issue
Fix: macOS Monterey Not Connecting to WiFi
Continuity Camera Not Working After macOS update, How to Fix?
Fix: Cannot Change Folder Background Color in Mac (macOS Ventura)
Fix: SanDisk Extreme Pro SSD Not Recognized or Detected on macOS
