A content maker is always concerned about his work being stolen or unethically modified by someone. This applies to any kind of content one can make on any platform. If you have to submit any project using Microsoft Powerpoint, then someone may try to modify it. Or someone may hack the PC or steal the flash drive that stores the project. The people who will get access to your presentation file may try to edit it. So, to stop anyone from tweaking or removing your hard work, you can make the PowerPoint presentation read-only or secure it with a password.
In this guide, I will show you how to do this. You can also mark your presentation as the final version of your work. This means whoever receives or sees your file will know that it requires no more editing. I think making the presentation file read-only or marking it final is a great way to secure its content. The editing option will still be available but as an option. In case your file is in hands of some unethical person, then they may edit or remove your work.
Page Contents
Make a Microsoft PowerPoint Presentation Read-Only
Here are the steps
- Open your PowerPoint presentation
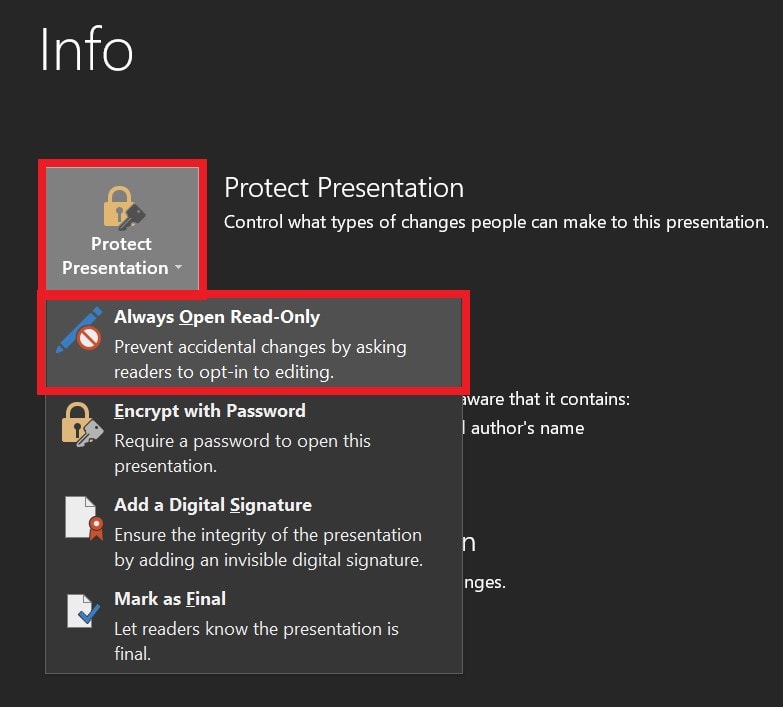
- Click on File > click on Info

- Then click on Protect presentation
- Select Always Open Read-Only

- Now save your file by doing Ctrl + S
- When you open your presentation above the presentation you will see it is marked as Read Only.

- As I said, the presentation is still editable by the person viewing it. They can click Edit Anyway to edit the presentation.
Marking Your Presentation as the Final Draft
As per my previous mention, you can add a mark that your project is the final version of your work. It requires no editing or modifying of any sort.
- Click File > go to Info
- Select Protect Presentation
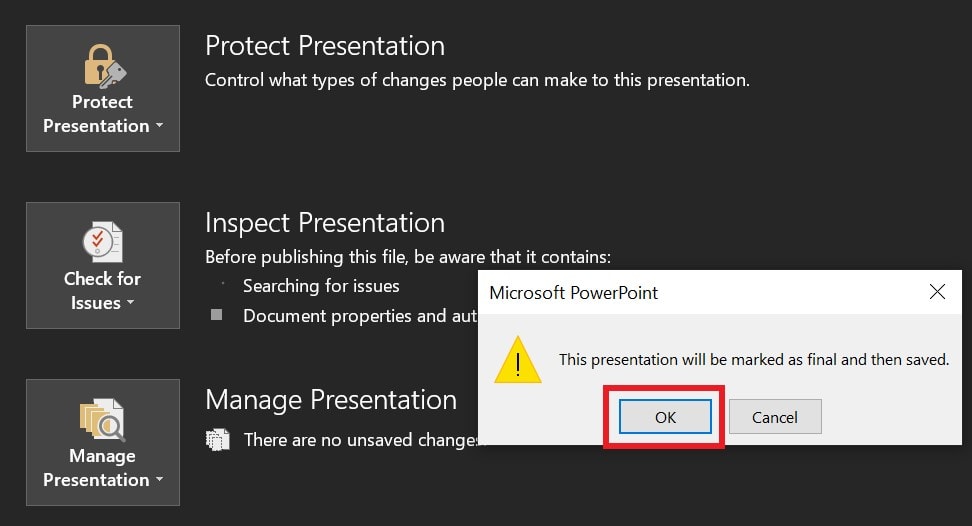
- Then click on Mark As Final

- Click on OK

- You will see another dialog box that mentions that editing, typing commands, or putting proofing marks will be prohibited for this file marked as final.
- Click on OK again to confirm
Password Protect Your Presentation
If your select Encrypt with a password, then you have to set a password for your file. Then no one won’t be able to access or edit the file without putting in the password. You may convey the password only to the person who will check your project and who has no authorization to edit your project.
So, these are the various ways by which you can make your Microsoft PowerPoint presentation read-only and prevent it from any unnecessary and unauthorized modification. I hope that this guide was useful to you.
