If you are storing some confidential or sensitive information in your Word Document, then it is highly recommended to password protect it. And it becomes all the more important to do so when that file is stored in PC that is shared by many members of your organization.
Furthermore, it also acts as an extra security measure in case you wish that the file should only be accessed by the intended recipient. Fortunately, Microsoft has incorporated a baked in Password Protection mechanism for all its Office apps, and Word is no different. So with that in mind, here are the concerned steps to carry out the aforementioned task.

How to Password Protect a Word Document
The steps are slightly different for Windows and Mac users. So we have shared them under different sections. Furthermore, you cannot encrypt or decrypt a Word file online, i.e. using its Web version. If you are dealing with the latter, then click on Open in Word and then carry out the desired task from the Word application on your PC.
On Windows
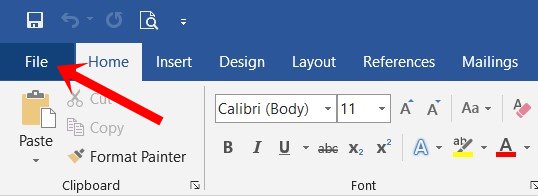
- Open the desired Word document and click on File. It will be situated at the top left in the menu bar.
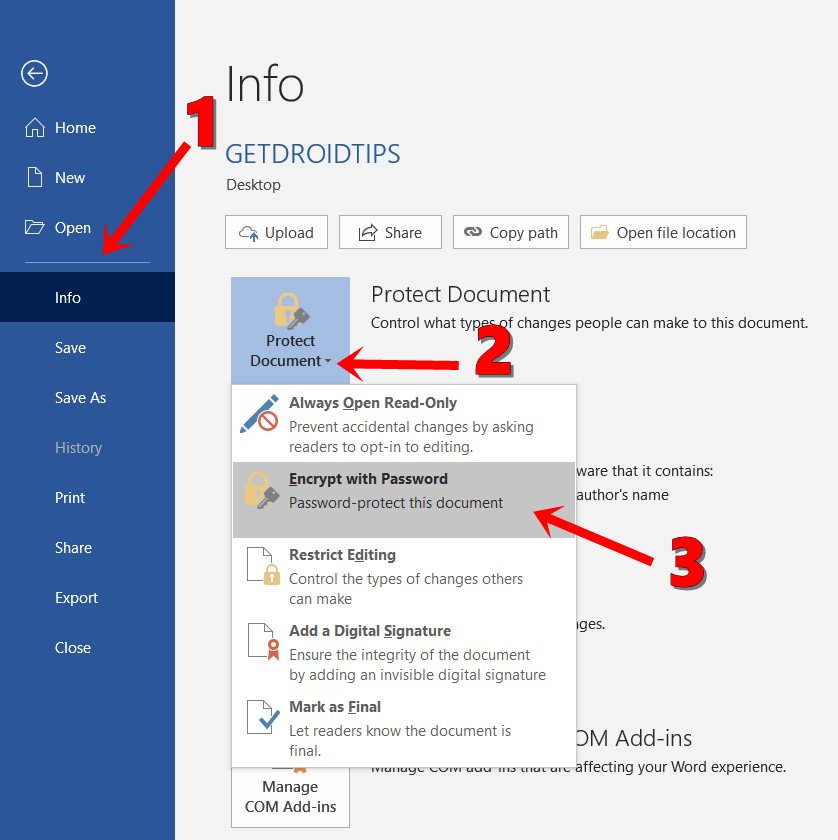
- Then go to the Info section from the left menu bar. Click on the Protect Document option.
- From the drop-down menu, select Encrypt with Password.
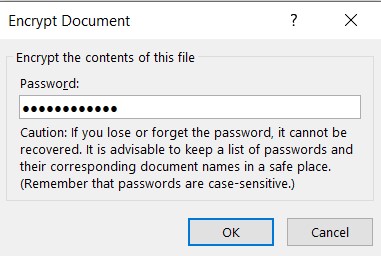
- Then in the Encrypt Document dialog box, type in the desired password and hit OK. Make sure to note down this password in a safer place, because if you end up forgetting it, there might be no other way to access this file.
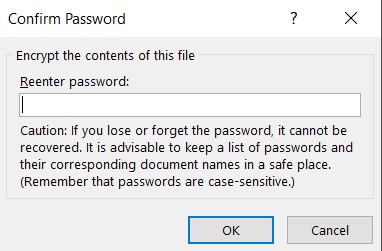
- Again enter the same password in the confirm password dialog box and hit Enter.
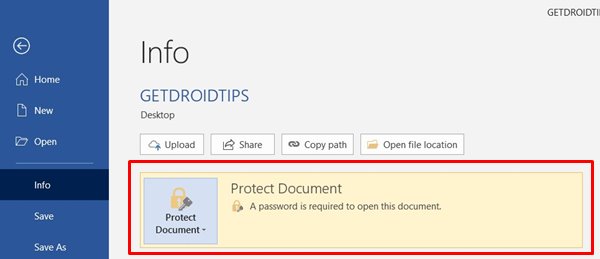
- As soon as you do so, you should see the Protect Document section being highlighted. This signifies that the password has been set for this file.
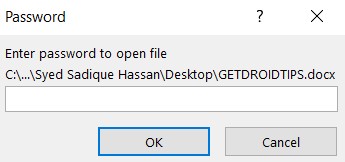
- The next time you open this file, you will be greeted with the password dialog box. Enter the required password and proceed ahead with your task.
These were the steps to password protect a Word Document on Windows. Let’s turn our attention to the Apple ecosystem.
On macOS
- Open the desired Word document and click on the Review option from the top menu bar.
- Then select the Protect Document option.

- Now under the Security section, you can either set a password to open the document, to modify the document, or both.
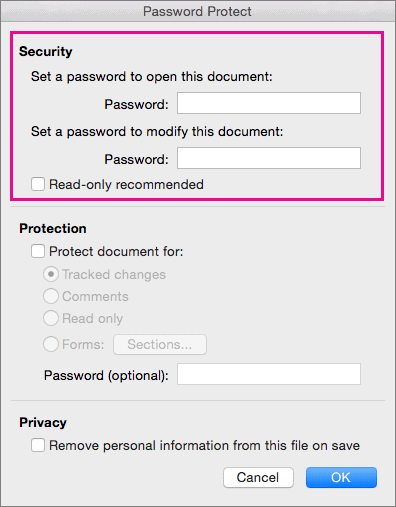
- Enter the password in the desired field and click OK. Again type in the password to confirm it and click OK.
- That’s it. With this, you have protected the Word file on your Mac.
With this, we conclude the guide on how to password protect a Word Document. We have shared the steps for both the platform, Windows as well as macOS. If you still have any queries, do let us know in the comments section. Rounding off, here are some iPhone Tips and Tricks, PC tips and tricks, and Android Tips and Trick that you should check out as well.
