The Pixel 7 and Pixel 7 Pro are the most recent additions to the Google Pixel lineup. The smartphones ship with Android 13 out of the box and a fair bit of customization. Google Pixel phones have always been among the favorite Android devices for custom developments. This could include installing custom ROMs, kernels, CPU overclocking, or rooting the device to gain administrator privileges.
There’s a lot you can do on an Android phone. But things may not go your way sometimes. While carrying out such things, there’s always a risk that your phone might end up in a boot loop or bricked state. Thankfully, there are easy ways to fix it. This guide discussed a step-by-step process for unbricking a Google Pixel 7 or Pixel 7 Pro via the Fastboot method.
Also Read
![]()
Here’s How to Unbrick Google Pixel 7 and 7 Pro via Fastboot
If you follow this step-by-step guide, unbricking your Google Pixel should not be difficult. Without further ado, let’s jump onto the working steps.
Disclaimer:
We at GetDroidTips won’t be responsible for any damage/error to your handset while/after following the guide. Please take a complete backup of your phone to avoid any unforeseen situations.
Step 1: Backup Your Google Pixel
To avoid data loss, back up your Google Pixel phone. You can do this even when it is bricked or in a boot loop state. Simply boot your Google Pixel into TWRP recovery and use the Backup option to back up.
Step 2: Install Android SDK
Download and extract the Android SDK Platform Tools on your computer. Then, extract the file at a convenient location. You must run the Fastboot commands. Once you extract the downloaded file, you’ll get the platform tools folder. Please remember this folder’s location, as we’ll use it throughout the process.
Step 3: Download Required Firmware File
Next, download your Google Pixel device’s stock firmware file (factory image) on your computer. Use the links below to go to the download page directly:
- Google Pixel 7 [panther] – Download Page
- Google Pixel 7 Pro [cheetah] – Download Page
Once you’ve grabbed the firmware file, extract it inside the platform-tools folder.
Step 3: Boot Your Google Pixel to Fastboot Mode
To execute the Fastboot commands, we have to boot the Google Pixel into Fastboot mode. It has been observed that when an Android phone is soft-bricked, it automatically boots into the Fastboot mode. If that’s not the case with your Google Pixel, let the battery drain so the device gets powered off. Now, connect the charger and quickly press and hold the power button and volume down button to boot the device to the Fastboot mode.
Also Read
Step 4: Flash Firmware via Fastboot Commands
1. Extract the firmware inside the platform-tools folder. Skip if done already in step 3.
2. Rename the bootloader file, radio file, and image file as mentioned below to make the process easier:
- Rename bootloader-[device_codename]-codename-x.x-xxxxxxx.img to bootloader.img.
- Rename image-[device_codename]-xxxx.xxxxxx.xxx.xx.zip to image.zip.
- Rename radio-[device_codename]-xxxxxx-xxxxx-xxxxxx-x-xxxxxxx to radio.img.
3. Connect your Google Pixel 7 or7 Pro to the computer via a USB cable. Make sure that the phone is booted to the Fastboot mode.
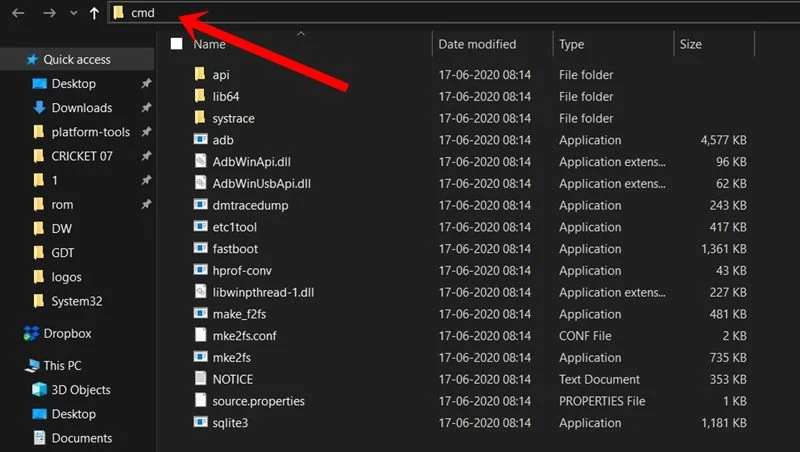
4. Go to the platform-tools folder on your PC, type CMD in the address bar, and hit the Enter button to open Command Prompt.
5. Run the following command to flash the bootloader file:
fastboot flash bootloader bootloader.img
6. Now, run the following command to boot your device back to the Fastboot mode:
fastboot reboot-bootloader
7. Flash the radio file by running the following command:
fastboot flash radio radio.img
8. Again, you have to boot your Google Pixel to the Fastboot mode, so run the following command:
fastboot reboot-bootloader
9. Run the following command to flash all other partition files that are present inside the image.zip file:
fastboot update image.zip
10. To boot your Google Pixel to the system, run the following command:
fastboot reboot
Once you’ve executed the above command, wait a few minutes to allow the device to boot to the system.
Try These Steps if the Problem Persists
After following the steps, I hope you can unbrick your Google Pixel 7 or Pixel 7 Pro. However, if the problem persists, we need to format the device.
1. Go to the platform-tools folder on your PC, type CMD in the address bar, and hit the Enter button to open Command Prompt.
2. Run the following command to flash the bootloader file:
fastboot flash bootloader bootloader.img
3. Now, run the following command to boot your device back to the Fastboot mode:
fastboot reboot-bootloader
4. Flash the radio file by running the following command:
fastboot flash radio radio.img
5. Again, you have to boot your Google Pixel to the Fastboot mode, so run the following command:
fastboot reboot-bootloader
6. Now, you’ll have to format the device and flash the image.zip file. Both these tasks can be done by running the following command:
fastboot -w update image.zip
7. Finally, run the following command to boot your phone to the system:
fastboot reboot
That’s how you can unbrick your Google Pixel 7 or Pixel 7 Pro via the Fastboot method. I hope this guide was useful to you. Have any questions or doubts? Write them in the comments section below and I’ll try to respond as soon as possible.
Discussion
1 Commentbonjour
pixel 7 pro flash root mal passe , écran noir, pas d’affichage ni fastboot ni recovery telephone bloquai ?
cordialement