Windows 10 is the most popular OS that is used out there. Windows 10 has tight security features and all available features to access the full potential of the hardware. Thus, it enables you to run games and applications on your system. Windows 10 comes with DirectX 12, which is a set of tools to access the full potential of your device GPU. This will give you better performance of your Windows 10 and better compatibility for games and applications. Therefore it is a core component in Windows 10, which also means you cannot uninstall it. But you can uninstall and reinstall DirectX using some intelligent techniques. Moreover, you are also not permitted to downgrade your DirectX.
However, if your device GPU is functioning abnormally, you can suspect if your DirectX files have been corrupted. Due to this issue, you might be having other problems like apps and games compatibility error. However, there is still a way to fix the issue. You will have to manually delete the DirectX files, and then you can install Direct again, it will fix the problem.

How to Uninstall or Reinstall DirectX 12 in Windows 10
There are several ways to troubleshoot the issue. You can run Windows Update to check for the latest packages. If there is the latest version available or if it is not installed on your device. It will download and install it on your device within the windows update. Moreover, it will also fix the missing DirectX 12 files, overwritten files. But if you don’t wanna run the Windows update and you wanna fix it manually. Follow the steps mentioned below to do so.
To uninstall and reinstall DirectX 12, you need to first delete the residue files. These files contain data of old installation and can tamper with new DirectX 12 fresh installation.
Also Read: How to Enable DirectX 12 for Any Game in Windows 10
Step 1) Firstly, open up your file explorer.
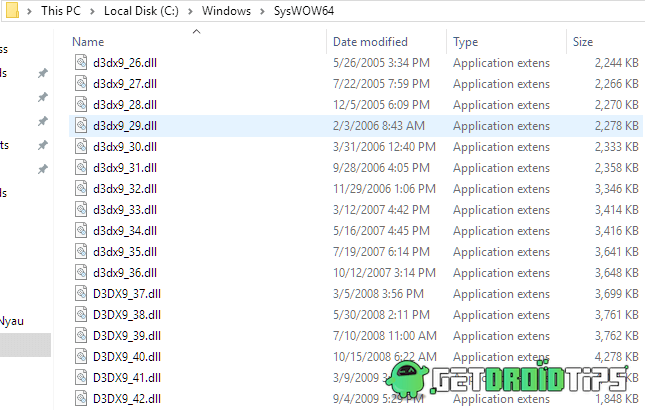
Step 2) Navigate to the following directory. C:\Windows\System32 or C:\Windows\SysWOW64

Step 3) After you have located the directory mentioned above, delete the following files in the directory. Right-click on it and select the Delete option.
- D3dx9_24.dll to 43
- D3dx10_33.dll to 43
- D3dx11_42.dll to 43
- D3d9.dll, d3d10.dll and d3d11.dll
- D3DCompiler_33.dll to 47
- D3d12.dll
Step 4) After you have deleted the DirectX graphic related files. Then you will have to run the DirectX-Runtime installer. Run it as an administrator and install the latest version of DirectX 12.
Download DirectX 12Step 5) Run the installer and make sure to connect with high-speed internet. Follow the on-screen instruction to install the program.
Note: After successful installation, make sure to reboot your PC
Conclusion
The installation of DirectX 12 is pretty simple and straightforward. But it is crucial to fully remove or uninstall the previous version of DirectX for easy installation. You can follow the steps above to clean install Direct X on your Windows 10 PC. For more such tutorials, follow our PC tips and tricks section for more info.

This shit really worked 🤯
It said additional components of 42mb needs to be downloaded and got reinstalled again , though some components above cant be deleted still not a problem it worked