Fortnite is one of the most popular online battle royale games that you will be able to play on Windows, PlayStation 4, Xbox One, Nintendo Switch, Android, iOS, Macintosh platforms. After the recent patch, the Fortnite game became quite buggy and most of the PC players are literally facing issues either while running matchmaking or Operation Payload mode. Now, some of the players are getting Fortnite PC Error DX11 Feature Level 10.0 required to run the engine. Are you one of them? Check this guide.
To be specific, the specified error has some issues with the DirectX 11 (DX11) feature level 10.0 or above. In a simple way, your PC system may be outdated or the DirectX version is outdated that’s why it’s unable to run the graphics-intensive game properly. It mostly occurs when your system doesn’t have enough Direct3D Hardware Feature Level version which is required by the game engine.
Also Read
Fix: Fortnite Stuck on loading screen on PC
Fortnite Chapter 4 Season 1 Guardian Shield locations
What is Denial Reason Code 20 in Fortnite, How to Fix?
Fix: Fortnite Installation Failed Error
Complete Encrypted Cipher Quest Fortnite 19.11.2.20.22.5.20.8.4 and 22.13.1.4.19 – Dig at the Top of
Fix: Fortnite Unable to Sprint Bug
Free Fortnite Wildcat Skin Codes (Updated Daily)
Fix: Fortnite Spring Breakout Quests bug
How to Play the Fortnite Geoguessr Unblocked
Fix: Epic Games Verification Email Not Sending

Page Contents
How to Fix DX11 Feature Level 10.0 required to run the engine Error
So, it’s very clear that you will need to check for the Windows version update and the graphics driver update at first. Once done, you have to check whether the DirectX 11 Feature Level 10.0 is installed or not. Here we’ve provided all the possible workarounds that you should check out for once.
Also Read
Fix: Fortnite Audio Lagging/Not Working | Sound Cutting Issue
Fix: Fortnite Stuck on Connecting Screen
Fortnite Unused Redeem Codes 2023 | FREE VBucks Code Today July 3, 2023
Fix: Epic Games Store stuck on ‘Please wait while we install partner application’
Fix: Fortnite Successfully Logged Out Error
1. Check Graphics Driver Update
- Click on the Start menu > Type Device Manager and click on it from the search result.
- Go to Display adapters > Click on the arrow icon to expand the drop-down list.
- Right-click on the dedicated graphics card > Click on Update driver.
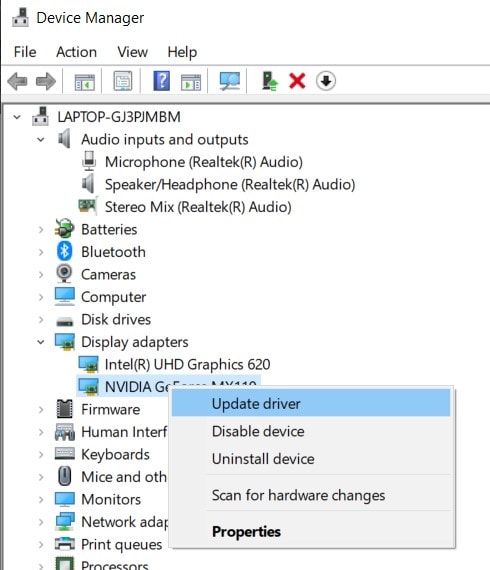
- Next, click on Search automatically for updated driver software.
- Make sure that the internet connection is active. It will check for updated drivers online.
- If available, it will automatically download and install drivers.
- If not, it will inform you that the graphics driver is up-to-date.
- Once done, restart your PC and check for the issue again.
2. Check Windows Update
- Click on Start > Click on Settings menu (gear icon).
- Select Update & Security > Click on Check for updates under the Windows Update section.
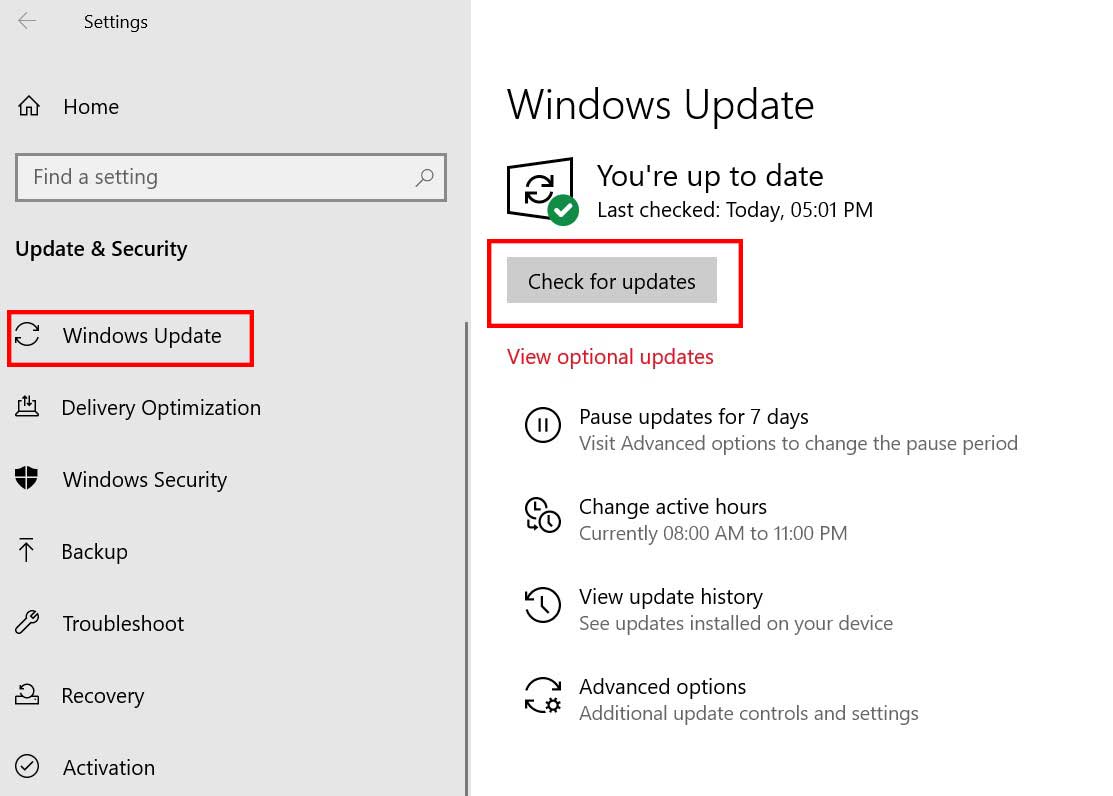
- If there is a new update available, you should download and install it.
- Most importantly, Windows 10 cumulative updates are quite necessary. Because these updates include DirectX update as well. There is no other way to update your DirectX version.
- Once installed, it will ask you to restart your PC.
- Just reboot it and wait for the boot to complete.
- Finally, run the game and check whether the game is running or not.
3. Check Recommended System Requirements
It can also happen that the Fortnite game is unable to run on your PC due to the incompatibility issue. So, it’s always better to check the recommended system requirements of the game so that you can compare or understand properly.
- Memory: 8 GB
- Graphics Card: NVIDIA GeForce GTX 660
- Fortnite CPU: Intel Core i5-2300
- File Size: 15 GB
- OS: Windows 7/8/10 64-bit
Now, check whether your PC configuration is higher than these requirements or not. If not, then you should consider upgrading your PC hardware specifications.
Also Read: All Punch Cards in Fortnite Chapter 2
4. Update Fortnite and Epic Games Launcher
It’s always recommended to check for the Fortnite game patch as well as the Epic Games Launcher update manually. Mostly after launching the Epic Games launcher, it automatically detects a new update and notifies or asks you to update the launcher.
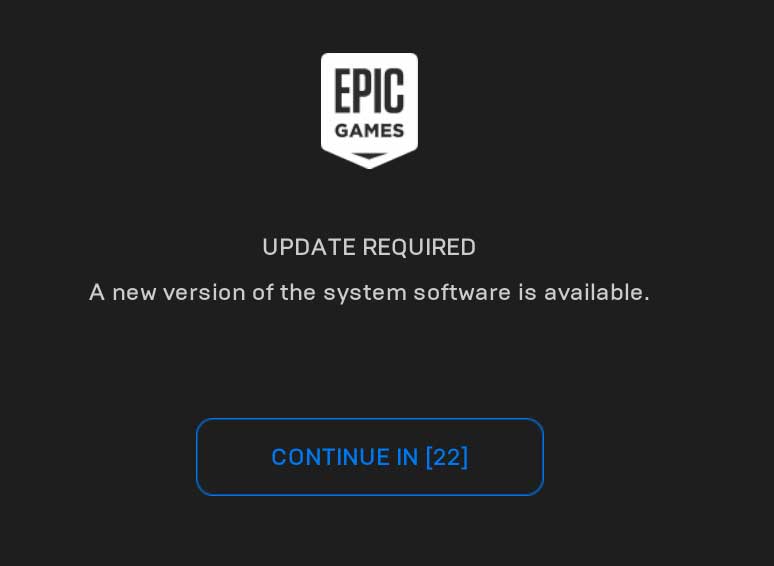
However, if the launcher doesn’t notify you for a new update then go to Epic Games Launcher > Head over to Settings > Scroll below and click on Allow Auto-Updates to enable the checkbox under MANAGE GAMES.
Now, close and restart the Epic Games Launcher and it will definitely fetch auto updates, if available.
Then head over to the Library section > Click on the menu (three-dot icon) beside the Fortnite game and click to enable Auto Update toggle.
5. Check DirectX Version and Feature Level
- Press Windows + R keys on your computer to open a Run Dialog box.
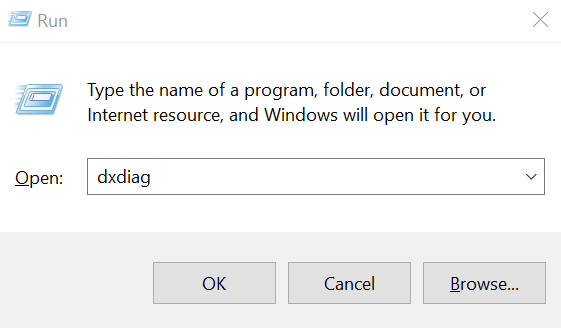
- Type dxdiag and press Enter.
- Under the System tab, you can see the DirectX Version.
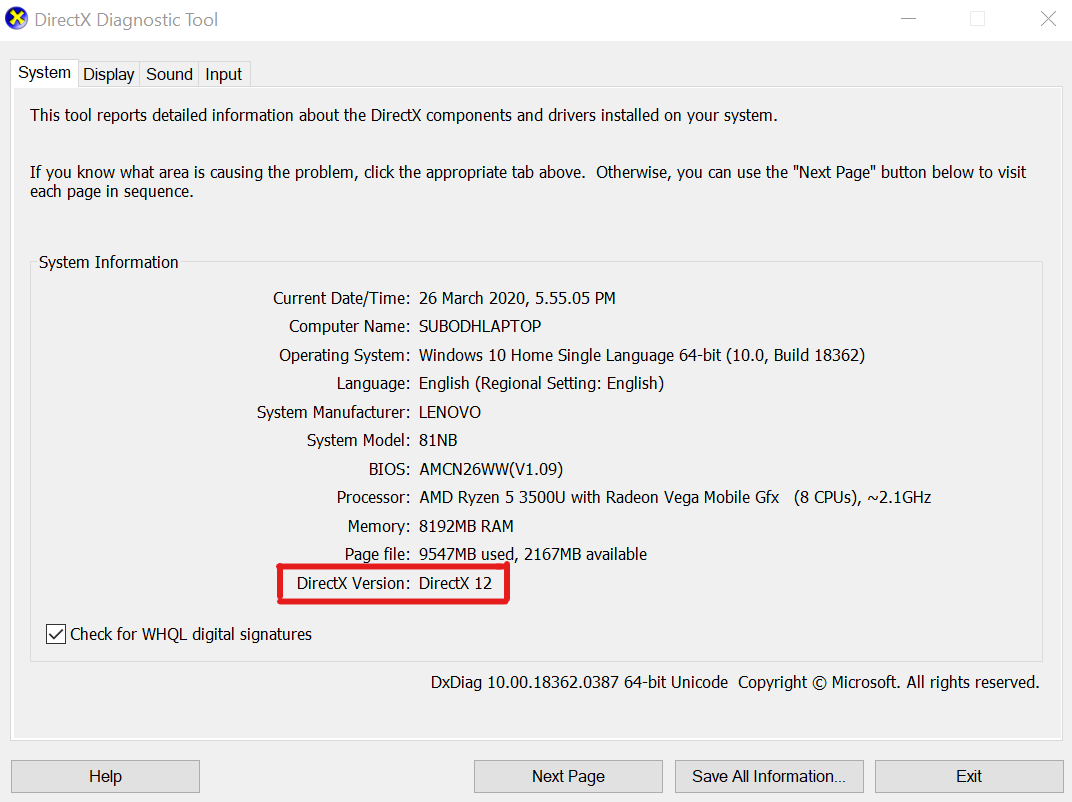
- After checking the DirectX version, you can click on the Display tab.
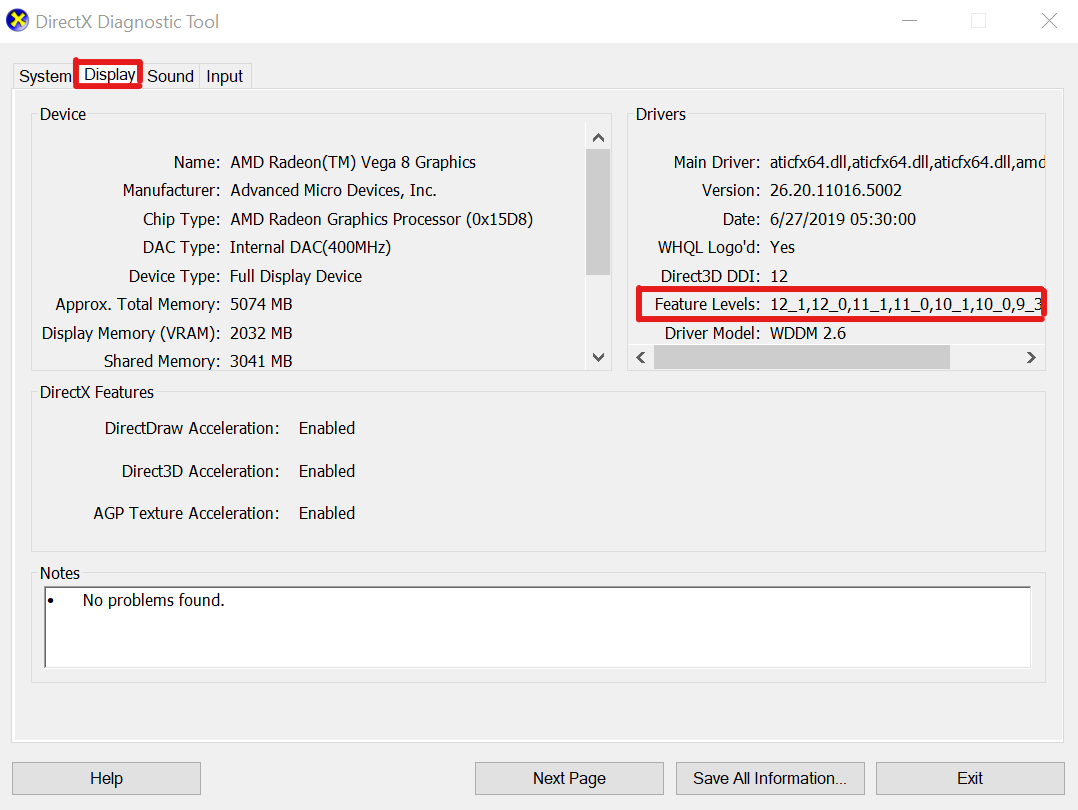
- Then under the Drivers section, you can check Feature Levels details. Make sure that it should be 10.0 or higher.
Also Read: All Fortnite Chapter 2 Battle Pass Rewards
6. Repair DirectX Runtime
Sometimes, the DirectX Runtime package may also break due to incompatibility or corrupted file issues. So, you can repair the DirectX Runtime on your PC by following the below steps:
- Visit the official Microsoft DirectX End-User Runtime Web Installer page.
- Click on Download > Click on the executable installer to open the installation wizard.
- You will need to Accept the agreement > Select Next > Follow the on-screen instructions to complete the installation process.
- Once done, restart your computer and run the Fortnite game to check for the issue.
Also Read: Top 10 Best Pickaxe Skins in Fortnite
That’s it, guys. We assume that this guide was helpful to you. Feel free to ask in the comment below for any queries.
