In this tutorial, we will show you how to unlock the bootloader, install TWRP Recovery, and then root the Galaxy Z Fold 2. Samsung’s initial entry into this unchartered territory was met with a few skeptics. However, its second-generation offering has near about rectified most of the glaring issues that existed in the first build. The better folding mechanism, a larger front screen, and improved camera were just some of the noteworthy features.
With the latest Snapdragon 865+ chipset, Adreno 650, and 512GB 12GB RAM, there hasn’t been any compromise on the performance front as well. Plus an early release of the device’s kernel source code from Samsung opened the doors to a plethora of customizations. And in this guide, we will be making use of three such tweaks. Today, we will show you how to unlock the bootloader, install TWRP Recovery, and then root the Galaxy Z Fold 2.

Page Contents
Risks/Benefits of Bootloader Unlock and Root
Once you have unlocked the device’s bootloader, you could then flash a custom ROM or even replace the device’s stock recovery with a custom one like TWRP. This in turn will allow you to flash ZIP and IMG files, create and restore Nandrod backups, wipe various device partitions, etc. Then you could also gain access to the system partition of your device by rooting it with Magisk. This will in turn allow you to flash Magisk Modules, Xposed Frameworks, and tons of other mods.
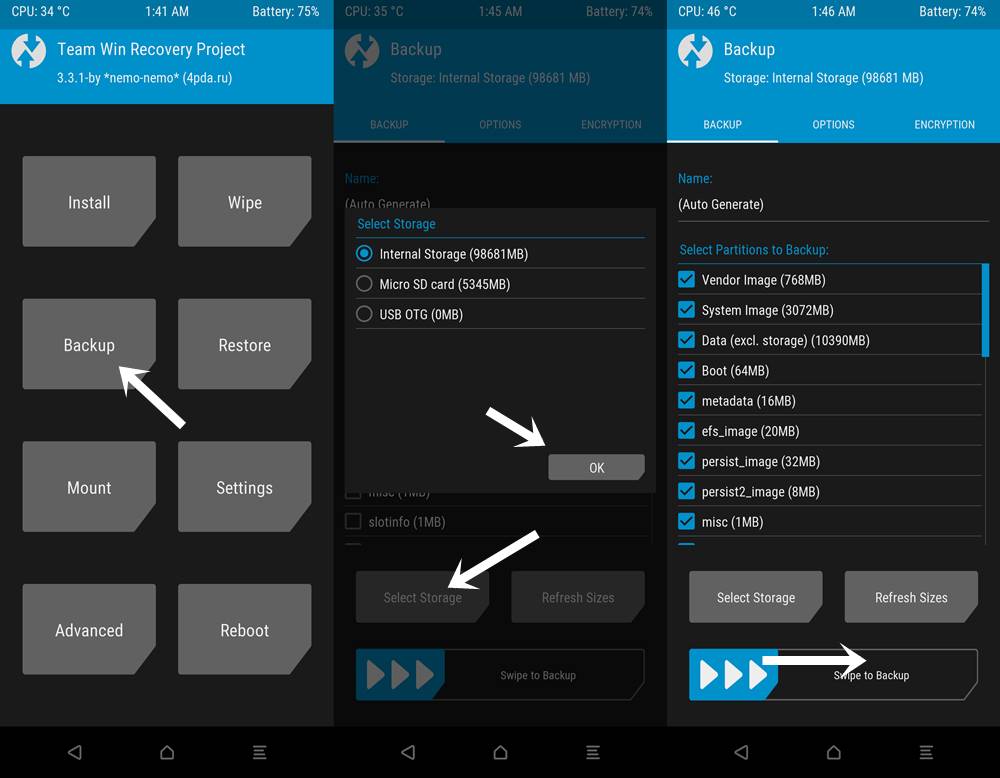
However, there are a few risks/caveats of these tweaks as well. To begin with, the process will wipe off all the data from your device and might nullify its warranty as well. Likewise, apps like Google Pay, Netlfix, and Pokemon Go might not function along the expected lines. Furthermore, you may no longer receive OTA updates on a rooted device. So if this is all well and good, then here are the required instructions to unlock the bootloader, install TWRP Recovery, and root the Galaxy Z Fold 2.
Unlock Bootloader, Install TWRP Recovery, and Root Galaxy Z Fold 2
Before we list out the instruction set, there are a few prerequisites that you to keep in mind. Make sure that you checkmark all these requirements before proceeding ahead.
Prerequisites
- First and foremost, create a complete device backup. This is because the process will wipe off all the data from your device, so a backup beforehand is an absolute must.
- Next up, enable Developer Options and USB Debugging on your device. To do so, head over to Settings > About Phone > Tap on Build Number 7 times > Go back to Settings > System > Advanced > Developer Options > Enable USB Debugging.
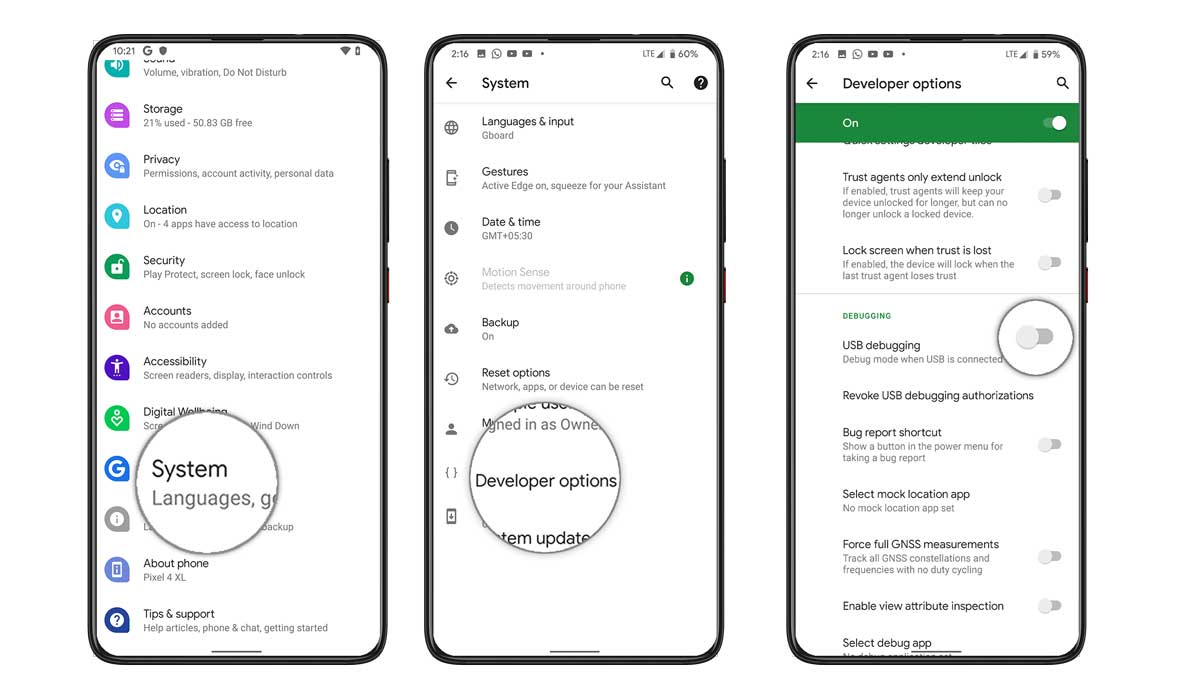
- Download and install the Android SDK Platform Tools on your PC.
- Likewise, also install the ODIN Flash Tool. This tool will be used to flash the TWRP Recovery onto your device.
- Download the latest Magisk Installer ZIP file. It will be used to root your device.
- Next up, download the TWRP for Galaxy Fold 2: twrp-f2q-3.4.0-1a20_ianmacd.img. We would like to thank XDA Senior Member ianmacd for this recovery. This recovery works for the F916B, F916N, and F9160 variants.
- Likewise download the Multi Disabler ZIP: multidisabler-samsung-2.6.zip. This will be used to remove encryption from your device. Thanks to XDA Senior Member ianmacd for this file.
That’s all the required files. You may now proceed with the steps to unlock the bootloader, install TWRP Recovery, and root the Galaxy Z Fold 2.
STEP 1: Unlocking the Bootloader
- Go to the Settings menu on your device.
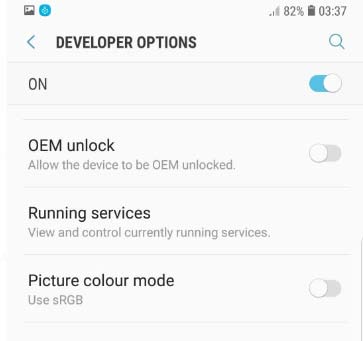
- Then head over to Developer Options and enable the OEM Unlock toggle.
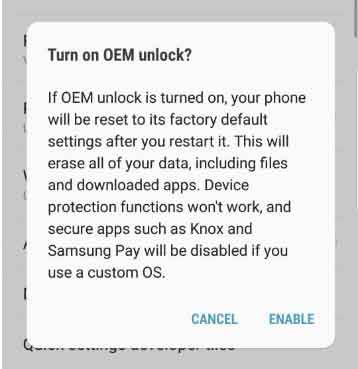
- At this point, you will get a confirmation pop up, tap on Enable.
- Now power off your device. Press and hold the Volume up and Volume down buttons together and connect your device to the PC via USB cable.
- Your device will now boot into the Download Mode, and you may now release both the keys.
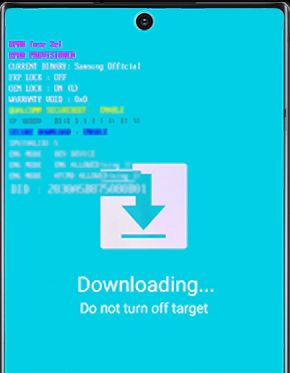
- Use the Volume Up key to bring up the Bootloader Unlock option and again press the Volume Up key to confirm the decision.
- Your device will now boot to the OS. Just skip through the setup process as your device will be wiped later on as well. As of now, head over to the Developer Options and double-check that the OEM Unlock toggle has been grayed out.
That’s it. You have successfully unlocked the device’s bootloader. It’s now time to install TWRP and then root your Galaxy Fold 2. Follow along.
STEP 2: Installing TWRP Recovery on Galaxy Fold 2
To begin with, rename the downloaded TWRP to recovery.img. Now use an extraction software such as 7 ZIP to convert IMG to TAR. To do so, right-click on the recovery.img file and select 7 ZIP > Add to archive. Then go to Archive format and select “tar”.
- Now that the recovery is converted to .tar, launch the Odin Tool on your PC.
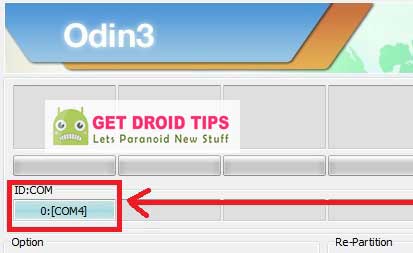
- Boot your device to Download Mode and connect it to PC via USB cable.
- As soon as you connect it, the COM port should verify the same via a Port number.
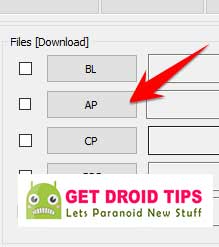
- Now click on the AP button, browse to the TWRP.tar file and select it.
- Click the Start button and wait for the flashing to complete.
- Once done, the tool should display the Pass message. You may now reboot your device to OS.
STEP 3: Decrypt Data Partition
Since the Galaxy Fold 2 uses file-based encryption (FBE) for the user data partition, you will have to decrypt it. If you don’t do so, then TWRP wouldn’t be able to access the said partition. Furthermore, if you haven’t yet disarmed verified boot, then you might have to flash a neutralized vbmeta.img image as well.
- So download the multidisabler-samsung-2.6.zip file from the Prerequisites section and transfer it to your device.
- Then connect your device to the PC via USB cable. Make sure USB Debugging is enabled.
- Head over to the platform-tools folder, type in CMD in the address bar, and hit Enter. This will launch the Command Prompt.
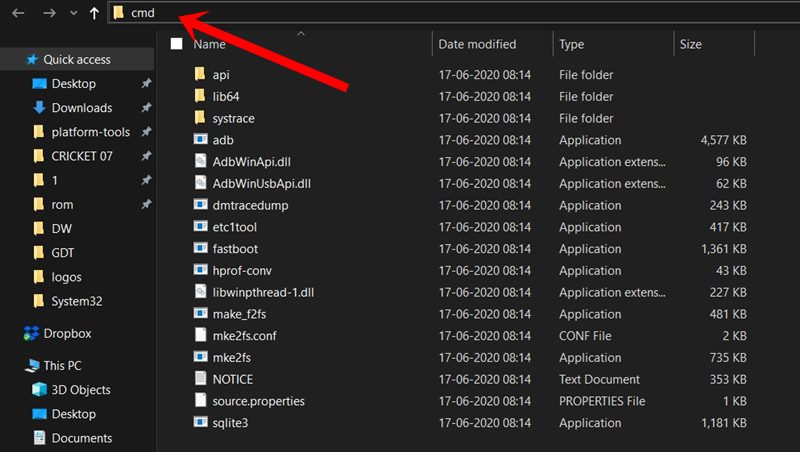
- Type in the following command in the CMD window to boot your device to TWRP
adb reboot recovery
- Once booted to TWRP, go to Install, select the file and perform a right swipe to flash it.
- After this, go to Wipe and tap on Format Data.
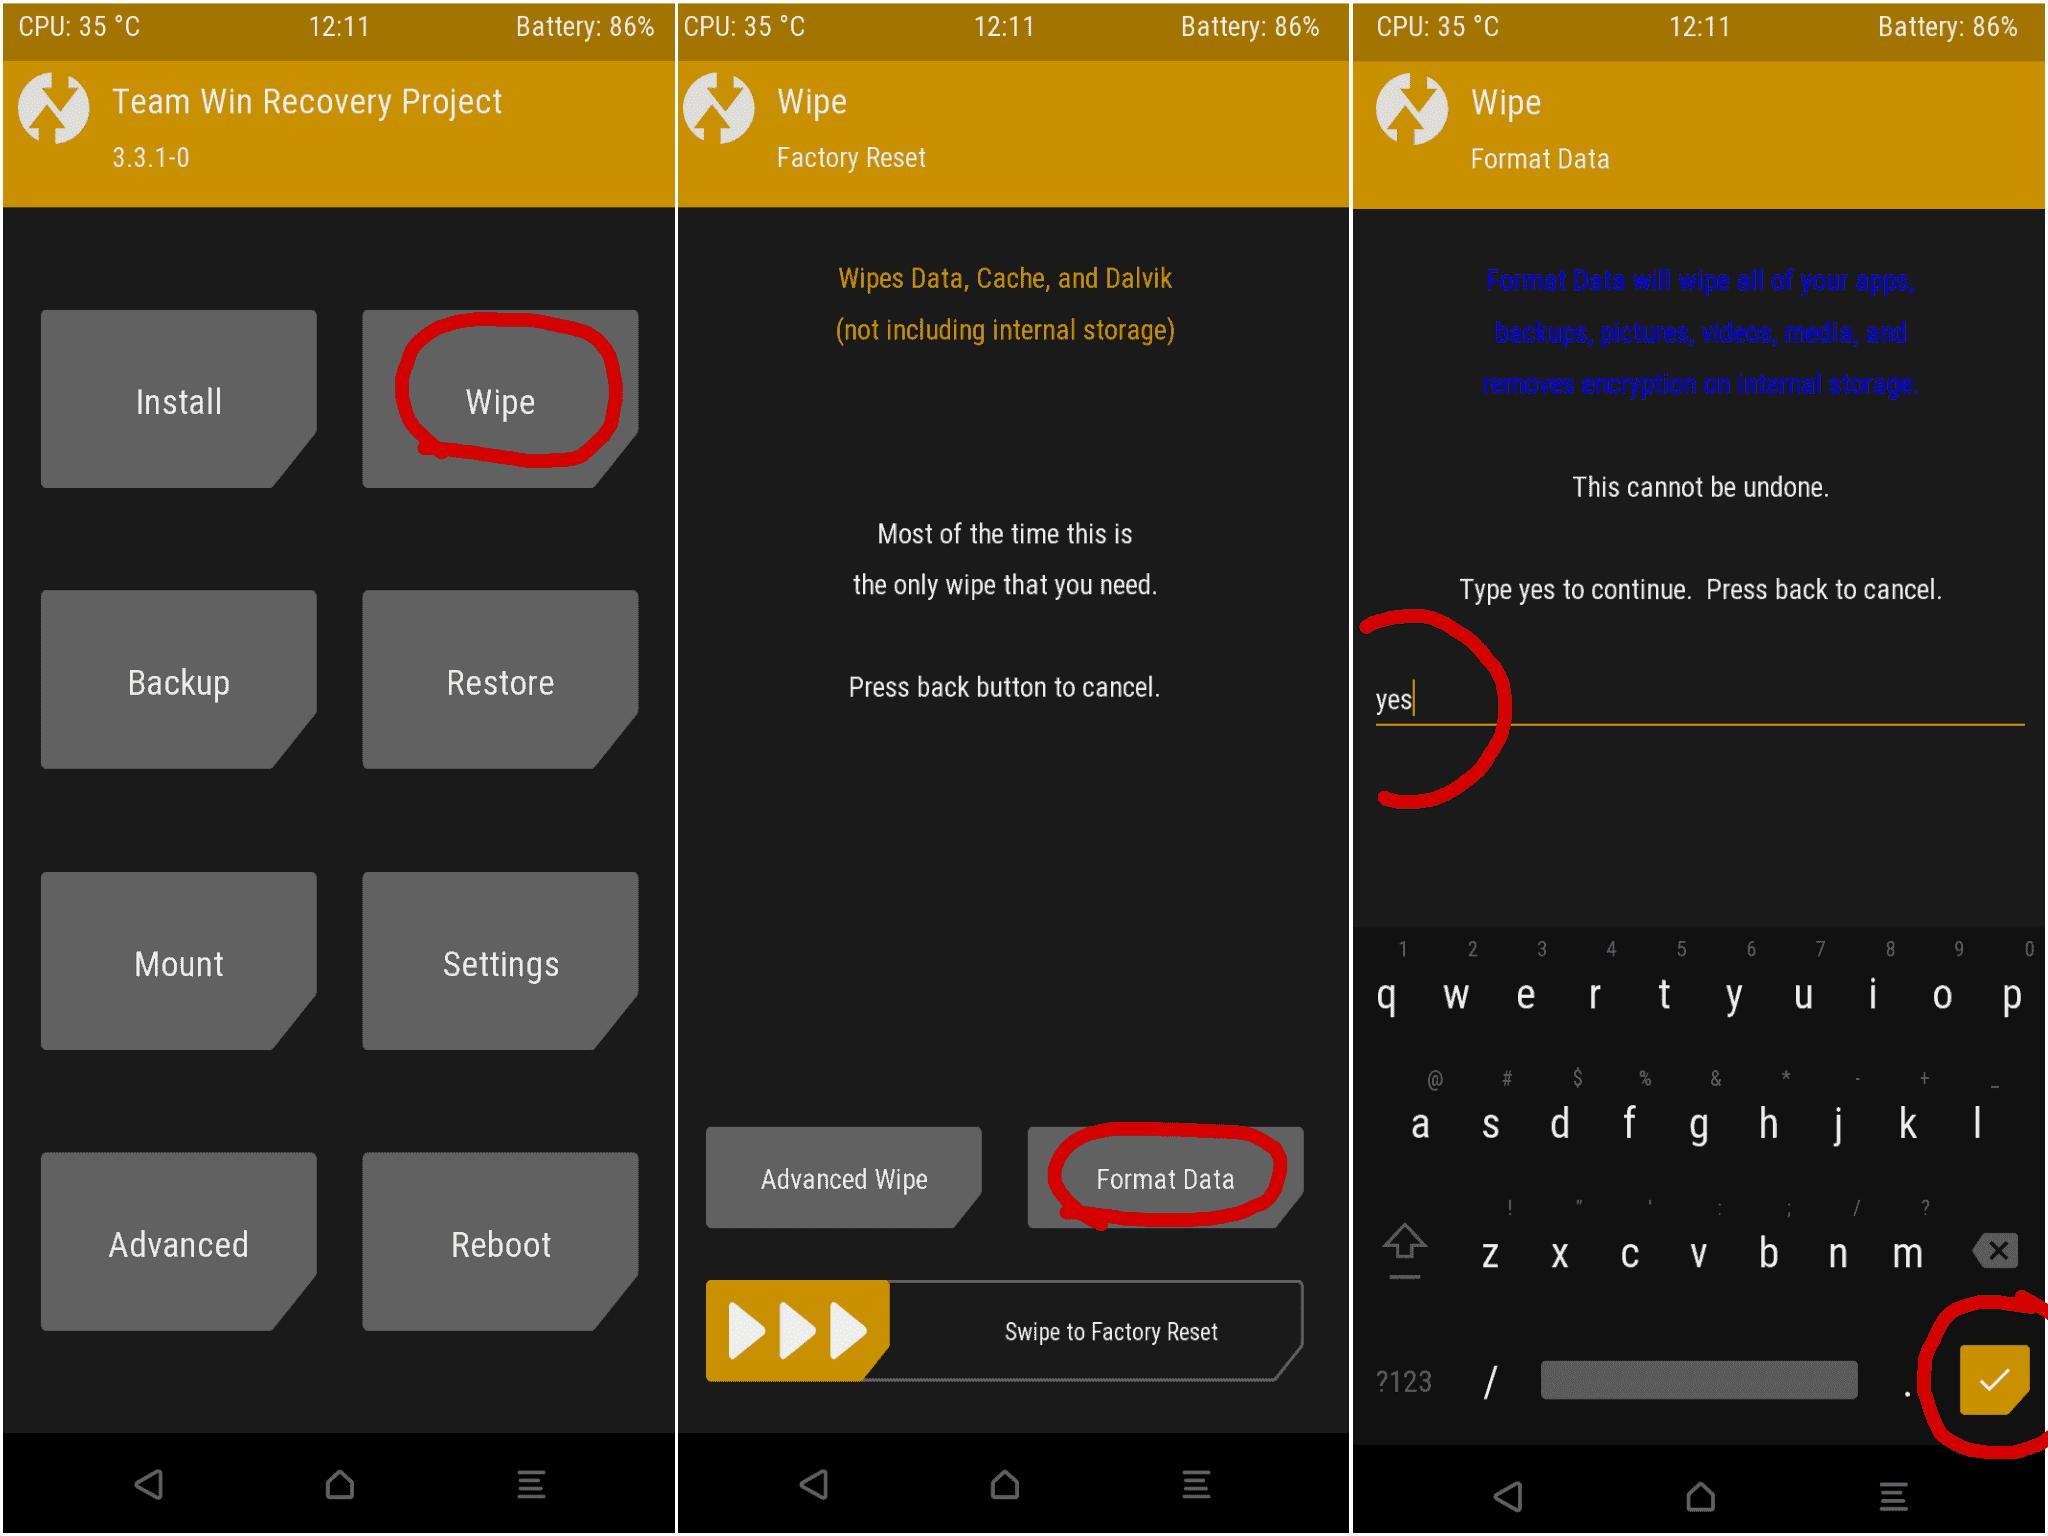
- Type in YES in the space provided and tap on the checkmark situated at the bottom right.
With this, the data partition has been decrypted via TWRP, you may now proceed ahead to root your Galaxy Fold 2 device.
STEP 4: Root Samsung Galaxy Fold 2
- You will now have to transfer the Magisk ZIP file to your device. As of now, you might be booted to TWRP. So go to Reboot and select System.
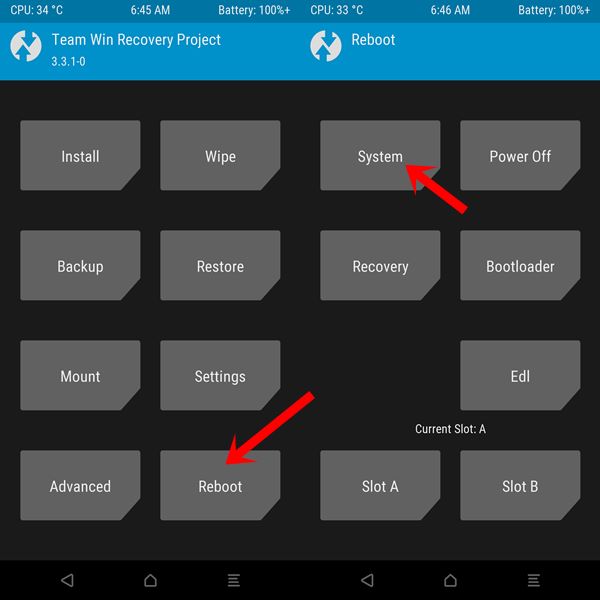
- Once your device boots to OS, skip the setup process and just transfer the Magisk Installer ZIP to your device
- Now boot your device to TWRP using the ‘adb reboot recovery’ command as mentioned in the above step. You may also use the hardware key combinations for the same.
- Once booted, go to the Install section, select the Magisk ZIP, and perform a right swipe to flash it.
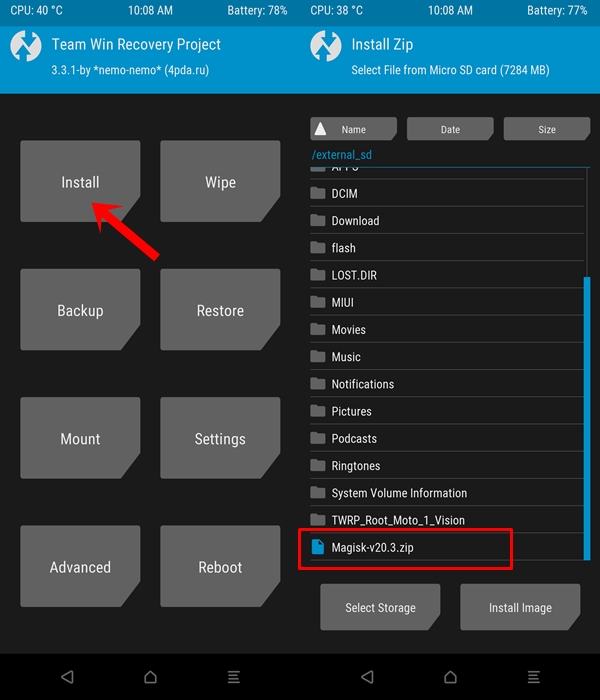
- Now go to Reboot and select System. That’s it. Your rooted device will now boot to the OS.
With this, we conclude the guide on how to unlock the bootloader, install TWRP Recovery, and root Samsung Galaxy Z Fold 2. Do keep in mind that the first boot after every major review modification might take up some time. Furthermore, it is recommended that you set up the device only after you have successfully rooted the device. Apart from that, if you have any other queries, do let us know in the comments section below. Rounding off, here are some iPhone Tips and Tricks, PC tips and tricks, and Android Tips and Tricks that you should check out as well.
