When we choose to copy or move a particular data from one place to another in our computer system, that data is temporarily stored in our memory’s specific location. When the copy or moving process is executed in the destination location, the data stored in the clipboard memory is accessed and used to copy or move the information or data. The data can be anything from the usual text, hyperlinks, folders to media files, or any files.
Now when we use the Ctrl+V shortcut to paste the clipboard stored data, only the data that is last stored on the clipboard is copied or moved over. What if we need something that was stored earlier in the clipboard? Many people don’t realize this, but like Windows XP, even Windows 10 users can access the clipboard history and choose anything to copy or move from here. So that is what we will see in this article. We have compiled a step by step guide on how a windows 10 user can access any bit of clipboard information to copy or move data. So without further ado, let’s get into it.
Also Read
How to view Clipboard History in Windows 10?
The clipboard data is reset or restored only when the system is completely restarted. Until you shut down, your clipboard will contain all of the information copied during that session. To access this history, you will have to first enable it in your Windows 10. It only takes a few steps, and it is relatively straightforward too.
- Click on the search and enter the text “clipboard settings.”
- In the results, you will see clipboard settings show up. Click on it to open it up.

- In the window that opens up, click and turn on the toggle for Clipboard History.
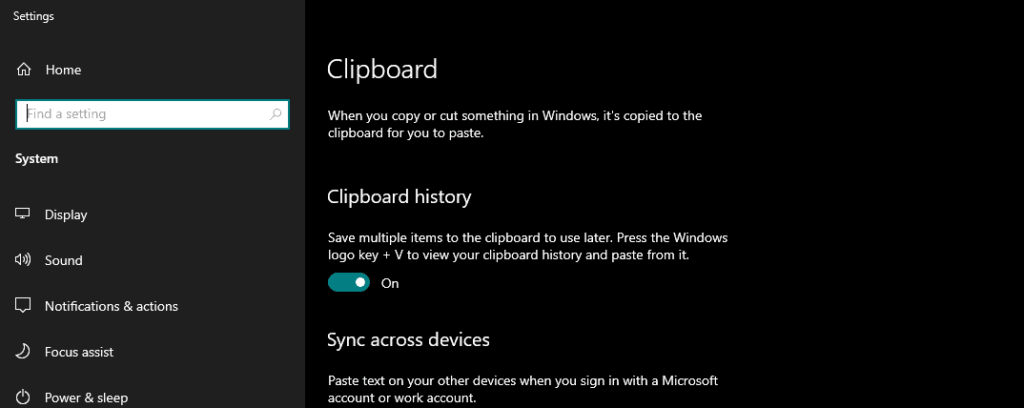
- If you want to sync your other devices like your smartphone to the clipboard history, then turn on the toggle for “Sync across devices,” too.
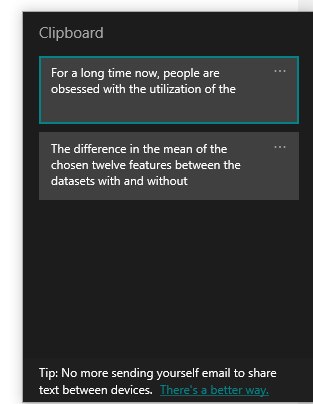
Now when you want to copy or move something, press Windows key + V, and you will have your clipboard history window show up on your screen. Then from the list of clipboard data, choose the one you want to copy or move.
With this built-in Windows Clipboard viewer, there are limitations, though. It can only store data if it is text, HTML, or images less than 4 MB in size. For anything else, you can only copy or move by selecting that data most recently, just like you usually do while copying or moving anything on your computer.
When you press and hold the Windows Key + V keys, the clipboard window will show up on the right side of your screen. The most recent copied data will be on the top and the oldest ones at the bottom. And depending on the build of your windows, the layout will be different.
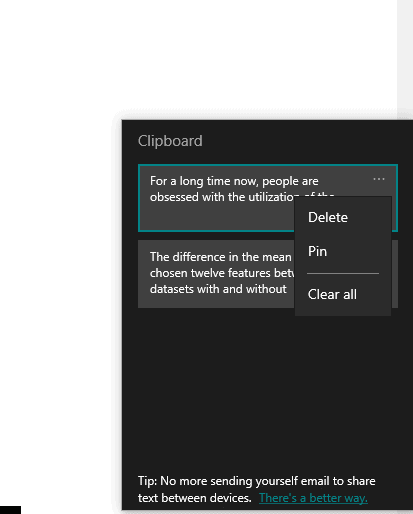
In older builds of Windows 10, you will get a three-dotted icon next to each data. Clicking on that icon will open up three options, delete, pin, and clear all. The clear all option will clear everything present on your clipboard. The pin option will pin that particular data at the top, and it won’t be cleared off even if you click on Clear All or reboot the entire system. The delete option will delete that one particular data(text or image) from the clipboard.
Clipboard App:
Now there is an alternative to this built-on clipboard feature of Windows, and for that, you will have to download the Clipboard app from the Windows Store. This app offers a lot more options than the default feature of Windows 10. To get this application,
- Open the Windows Store and search for “clipboard.”
- In results, you will see the Clipboard app with the publisher Justin Chase. Don’t select an application by some other publisher.
- Then you will see the “Get the app” for the Clipboard app. Click on it and wait till the downloading and installation of your application is done in your Windows 10 system.
- After you have successfully installed the Clipboard application, you are ready to use it as you please. The interface on this is straightforward and simple, so you should not have any difficulties with the application.
So use the clipboard feature on your Windows and start copying anything that you want all together. This feature will especially come in handy if you have something to copy or move from one location to another in patches. Rather than switching between the source and the destination location every time, just copy or cut everything at once and then paste it into the desired location.
So that is how you enable and use the clipboard history functionality in Windows 10. If you have any questions or queries about this guide, then comment down below, and we will get back to you. Also, be sure to check out our other articles on iPhone tips and tricks, Android tips and tricks, PC tips and tricks, and much more for more useful information.